Chimneys

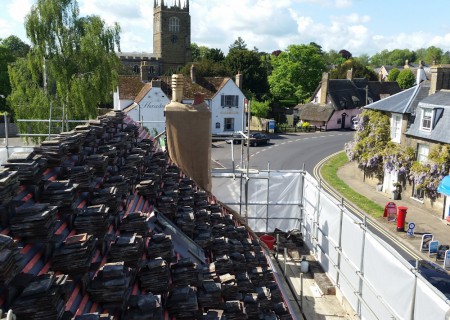
Another lovely sunny day.  The roof has been felted and battened and tiles stacked ready to go back on.  But the roofers are not here.

village-from-roof

We noticed some problems with the chimneys which will be much easier to sort out while we can still climb on the roof.

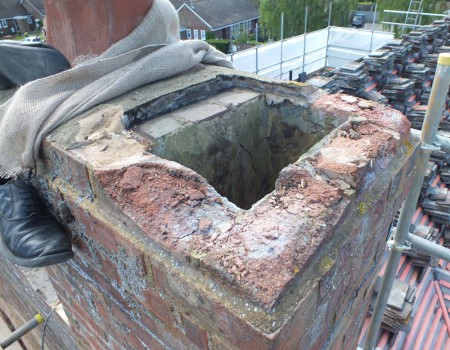
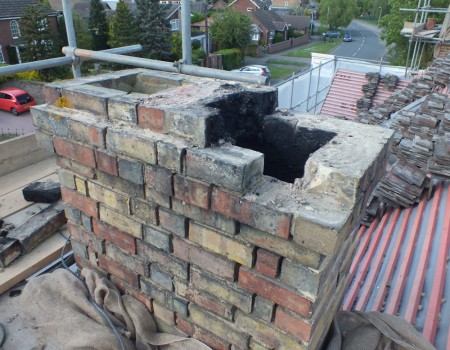
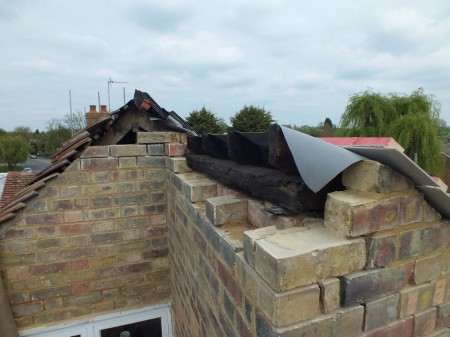
The top of the north chimney had been rebuilt in cement at some point and I guess the bricks became too wet and spalled when the flaunching failed. I’m replacing them with modern bricks and cement.

spalled-bricks-north-chimney

I didn’t have any bricks that matched so the barbecue is now a course of bricks lower. The Jackdaw who lives in the chimney was very tolerant and her chicks are still getting on well.  I had to be very careful to prevent debris from falling into the nest.

flaunching-north-chimney

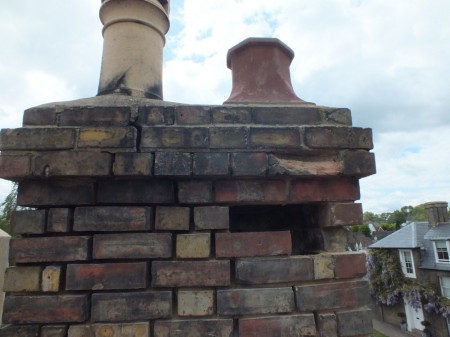
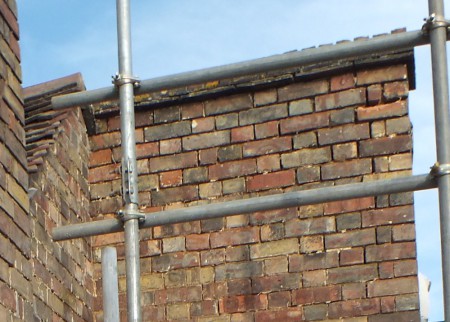
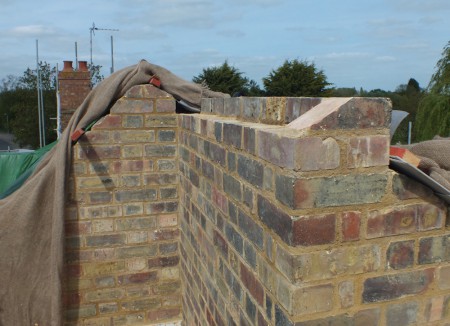
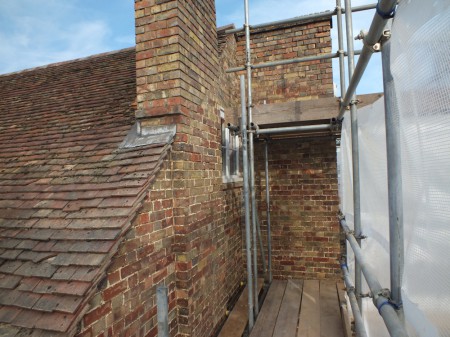
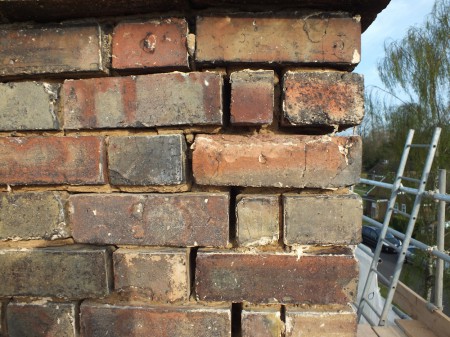
I am not entirely sure what was holding up the south chimney, but amazingly none of the bricks were loose.  One had spalled hence the hole.  I probably ought to have completely rebuilt this chimney in hindsight as it also leans by around an inch.  Instead I replaced most of the mortar with the bricks in place.

south-chinmey

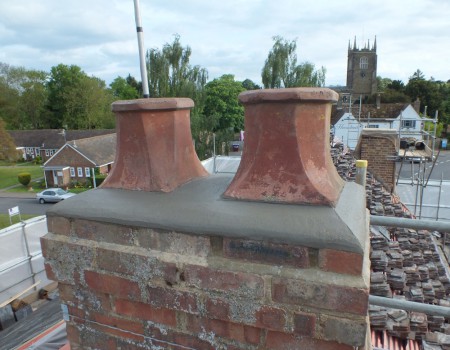
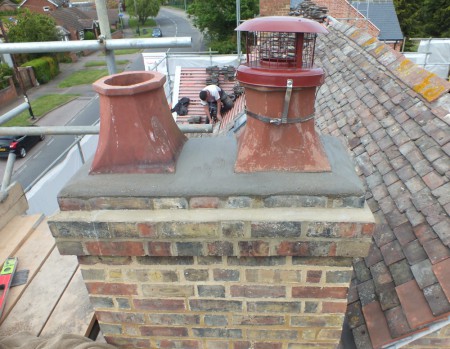
The top of the south chimney had been repaired in cement but the bricks were loose rather than spalled and I can put them back in. We had a hold up due to a reclamation yard sending a chimney pot far different from their photos, and this caused a great deal of annoyance and last minute searching for chimney pots.

south-chimney-pots-removed

I had a bright idea and cut the top off the poorly matching chimney pot.  It’s a good match now.  Just some fiddling to get the cowl to fit properly and the chimneys will be finished.

south-chimney-top

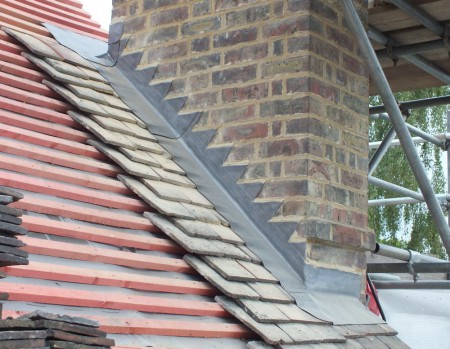
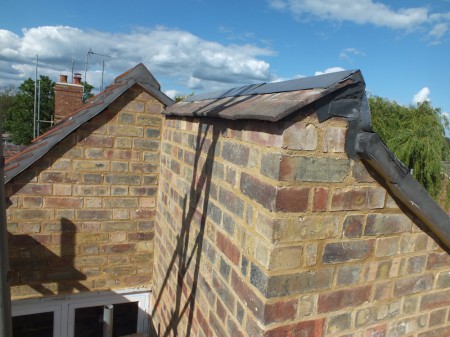
The roofers had lead specialists came in for a morning to weld the fiddly bits of leading above the chimneys with appropriate falls, then the roofers neatly cut and fitted the leading and pointed it in lime.  Though if you are doing the same thing look up soakers on the internet – they might have been a better way to do this leading.

chimney-leading

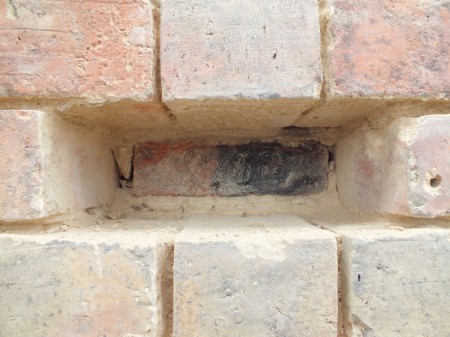
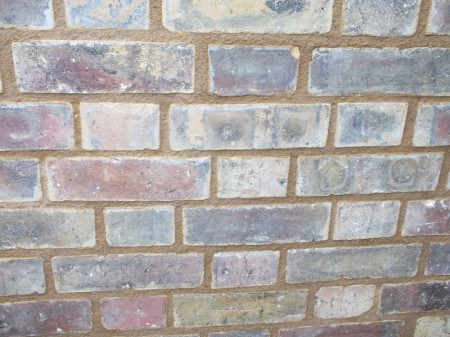
We’ve not had enough historical chimney interest in this post.   In photos taken from the church you can see the chimney in the previous couple of photos had been removed and rebuilt on the other side of the attic window in 1910.   I turns out the bricks from the original building were re-used.  I found a very sooty brick behind a facing brick that had spalled in the gable.  The size and colour of the brick match the opposite chimney.
sooty-brick

Archaeology in the Attic

The roofers have stripped the front of the roof so there is plenty of light in the roof space for photos.   I’ve being trying to date different parts of the building.

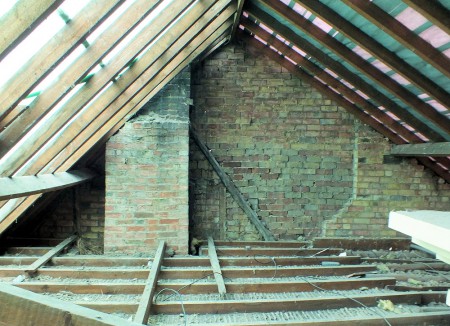
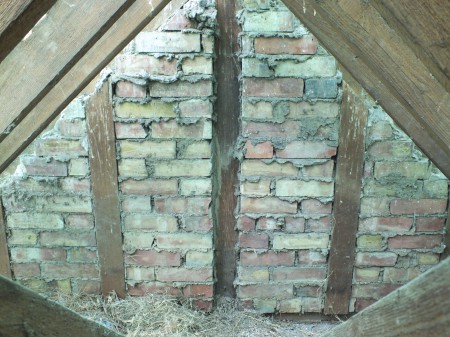
You can see the evolution of the building from inside the attic.  To the left on both sides of the chimney is the top of the gable end timber frame of what we assume is the original building first noted in 1646.  I think 1640s would be the Jacobean period, the one just before Cromwell.  The wood is tree shape rather than cut like modern wood and has since been in filled with brick.

arric-end-wall

To the right of the timber frame the lower, darker bricks are from the original low roof extension, and the upper bricks and purlin support were built in 1910 when the roof was raised to it’s current height.

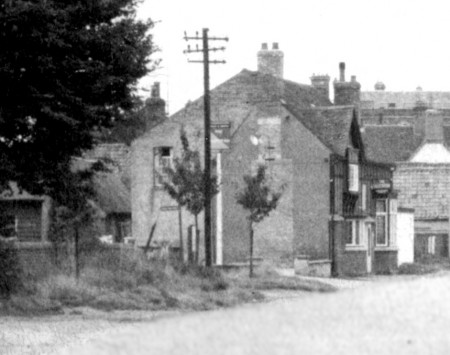
Here is a blurry photo from the 1950s.  You can see the form of the original building to the right of the gable, and the change in brick shade between the two extensions.   You can also see a chimney to the rear of the house which isn’t there any more.  There is still evidence of the chimney removal in the roof timbers.

The chimney closest to the photo looks slightly ghosted above the roof line.  That’s not a photographic effect – the top of the chimney had been rebuilt with slightly lighter bricks.

1950s-north-gable

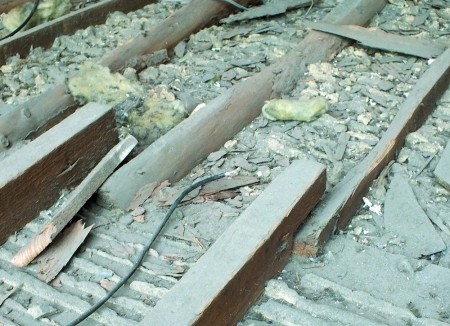
The ceiling joists are interesting.   With their ends sitting on the spine wall, the joists to the bottom of the photo are nice Edwardian ones that you can stand on.  The ones to the top of the photo are made from bits of tree again and are part of the early low roof extension.

I had assumed the extension was built somewhere between 1800 and 1850.  The timbers suggest the cost saving was not only in the lack of foundations, but combined with the thin glazing bars on the last original sash window I’m now guessing the extension is closer to 1800 which makes it Georgian!  Makes sense as the later Victorians were better at building.

ceiling-joists

The front of the house (Edwardian) has a structural timber frame with brick infill.  The bricks are hand made and what I had assumed was grey cement mortar turns out to be lime covered in loft dust. I think the render outside might be lime, but it is coated in waterproof paint which can’t be removed without damaging the render.

brick-infill-front-wall

I’m learning that I’m not very good at dating buildings, but it is fun to see the different phases.  Dating is made easier by the almost complete rebuild in 1910.  Anything done to a decent standard is Edwardian.  The shonky stuff in lime is earlier, and the shonky stuff in cement is later.

Rebuilding the Parapet Wall

I asked the roofers if there was anything I needed to be doing over the May bank holiday weekend and they asked me to rebuild the parapet wall.  Roofers only like to tuck their lead into walls with a clear connection to the ground, so my magic levitating bricks were no good.

roof-wall-front

The pointing had eroded so badly that the bricks had become loose.  The top few courses could be lifted off with no resistance.   So could the next few courses.  By the time I got down to bricks that stuck a bit to the course below  I was down about 6 or 7 courses.

The timber that became exposed had started to rot where it had been embedded in mortar between the loose leaky bricks, but it was still sound enough to work as a roof.  I have treated the timber and I’m rebuilding the wall as a cavity wall around the timber with ventilation from the roof space.

roof-wall-taken-down

I’ll update this post later.  I’m a very slow bricklayer and haven’t finished yet.

Here we go.  The top courses had been rebuilt previously in cement and the bricks couldn’t be saved.   Rather than use new bricks I’ve gone for a slight design change.  The  parapet wall will be slightly lower and capped with tiles making it secondary to the main ridge line.  Hopefully that will also help keep water off the brickwork.

parapet-wall-bricks

Much later the roofers put a little hat on the top of the wall.   We didn’t really think it through and there is a lot of lead on there from various evolutions of the design.  The timbers underneath should at least be well protected.

tiles-on-parapet

Pointing

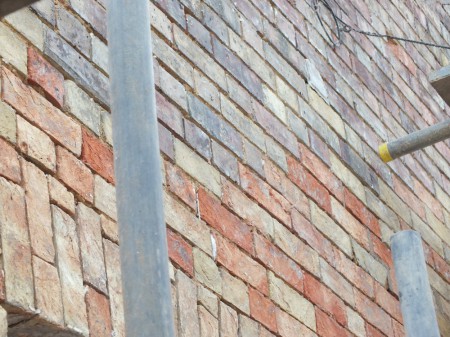
I’m starting to get the hang of re-pointing with lime mortar.   The pointing on the south gable was eroded to a depth of around 10-15mm and needs to be raked out and replaced.

I’ve found a local sharp sand which appears to match the original sand very well.  It is a plastering sharp sand from nearby Leighton Buzzard and contains aggregate up to 2mm.    The sharp sand I was using last year was concreting sand with a max aggregate size of 5mm which is much too big for bricks.

So far I haven’t found anyone to re-point the house but the job is taking me too long to be sensible.

pointing

Roofing

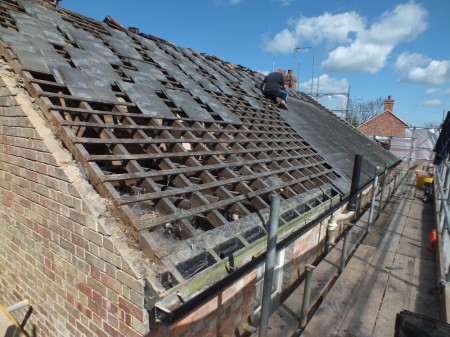
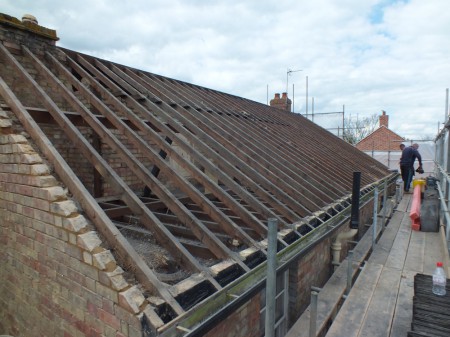
The roofers arrived on Monday and have already stripped the rear of the roof.  The tiles are generally in good condition and have been stacked ready to go back on.

stripping-roof

There was nothing much wrong with the rear of the roof other than a few rusty tile fixings.  The structure is good.  The top couple of courses of brick on the gable were loose so I’ve rebuilt them in lime to match the pointing.

roof-stripped

For a couple of days the roof will be covered by a tarpaulin while insulation is fitted.

temporary-sheeting

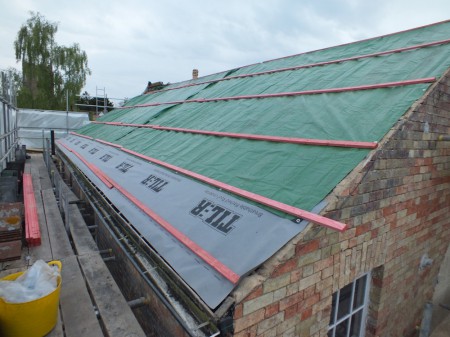
Then the roof was felted and battened, and the tiles stacked ready to be reattached. We’ve retained the old gutter which is still out of shape but should now be functional.

felt-battoned

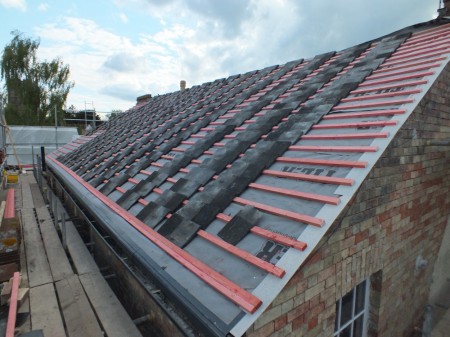
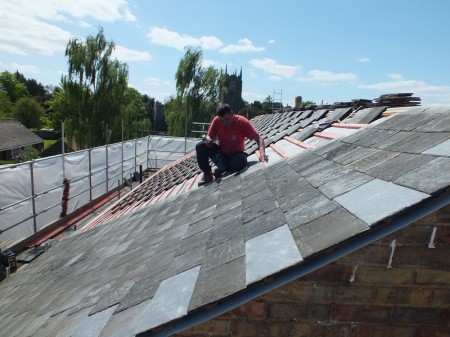
By the middle of May the rear roof is going back on.  That’s Milton in the photo hammering in copper nails.  Most slates are original but we are adding tile and a half slates at the gables which are new and won’t match exactly.  The conservation officer commented on them, but they did allow a more sensible overhang than half tiles.

rear-roof-going-back

The ducks are back

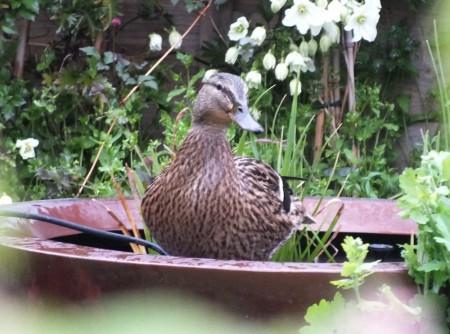
It was about this time last year that the ducks arrived and they are back again. Last year they seemed to live in the garden for a couple of days, then flew in to eat the duck food every now and again for a further few weeks.

This year they stayed for a day then met next door’s cat.  Ducks don’t seem to like cats and we haven’t seen them since.

duck

Edit – there was a noise that sounded like a cat being attacked by a duck one evening.  Ducks are back again and we haven’t seen the cat since.

Paint Stripping – The South Wall

The paint stripping has been completed apart from the tidying up.   The South gable is very prominent when turning the corner into the High Street at the bottom of The Hill.  There is a very odd stepped gable which doesn’t work in Magnolia paint.

Driving home from work one day I saw the magnolia had disappeared from the top of the south gable.  For me it transformed the building into something nice instead of the eyesore I am used to.  Though the flat roof toilet block still needs a bit of work.

south-gable

The south elevation was painted quite recently –  at some point after 1987.  The bricks haven’t suffered any damage and the whole wall has a consistent colour.   Apart from the north gable I think most of the building was rebuilt in 1910.

south-wall-top

The pointing is in a poor state.   Being a tenanted building the place has been neglected since it was built.  That’s a wonderful thing.  Nobody has filled the gaps with difficult to remove cement to trap water and damage the bricks.   My mission over the next few months is to re-point in lime mortar and sharp sand (and rebuild the top of the wall in the photo which is made from levitating bricks).

south-wall-pointing

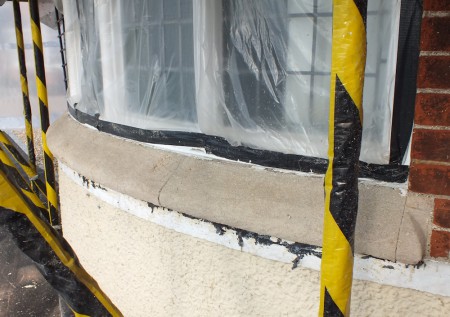
Finally another picture of some bath stone, this time below the curved bay window in the snug.  The building work from 1910 was carried out to a very high standard.

bay-window-stone

More Paint Stripping

The paint stripping is progressing quickly.   The east and north walls have been completed.

east-and-north-stripped

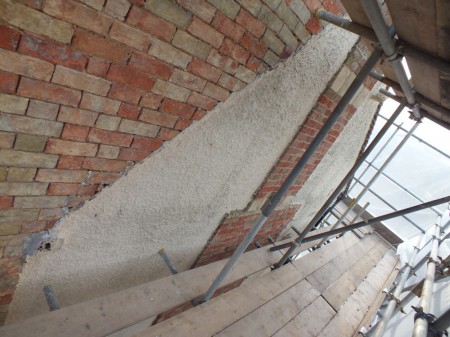
The north wall didn’t strip as well as the east wall.   There is a diagonal line up the building where the wall was raised in 1910.  The lower bricks should be sooty but are soft like the barn, and like the barn they have been damaged by the effects of waterproof paint and it’s removal.

brick-difference

It is fashionable these days to be able to ‘read’ old buildings and the north wall does not disappoint as it also shows the outline of the earlier 1646 building.  At least we thought it was the outline but it’s looking like there might be some of the original building hiding under lime render on lath applied in the late 19th century.  We can’t remove the paint without damaging the render, but don’t want to leave waterproof paint on there.   We’ve left it for now pending research and advice.

north-wall-render

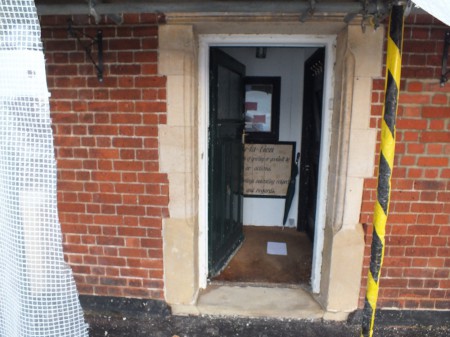
The front door surround looks like bath stone.  It stripped well.  I don’t know why someone thought magnolia would look nicer.   We originally thought the stone had been salvaged from another building, but there is also bath stone above and below the bay windows so it looks like it was cut for the property.

door-stripped

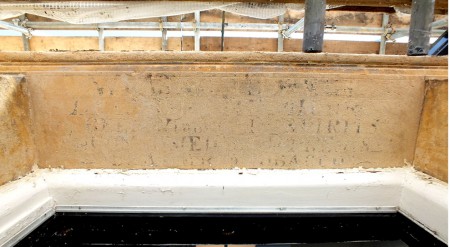
There is evidence of writing over the front door.  It is possible to make out the words licensed, spirits, and tobacco.   The top line is the name of the landlord at the time, William T Davey.   He was  the landlord from 1910 to 1933.   We think the facade was constructed in 1910.    Edit – more likely 1921.
writing-above-door

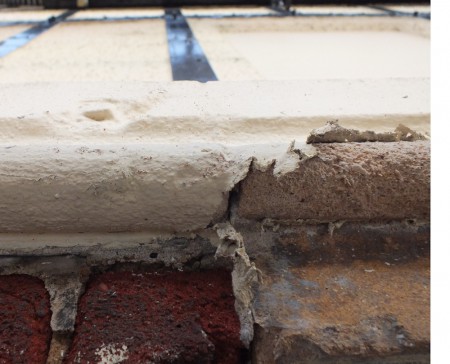
The stonework above the door and the stonework on the window sills has some surface damage.  It looks like it was rough before but the paint stripping has caused more damage.

stonework-damage-painted

Paint Stripping

The paint stripping started before the scaffolding was finished which was useful as the paint stripper needed to increase the coverage of the sheeting.

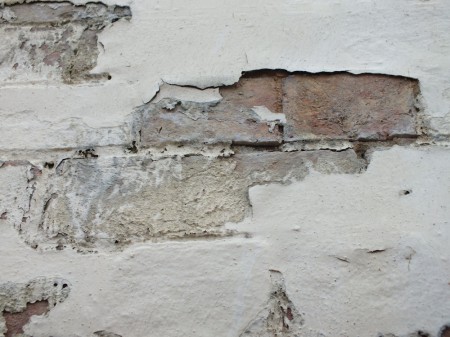
The problem with the magnolia (apart from how horrible it looked) was that it was waterproof.  The wall was sodden wet behind the paint causing damp and freezing damage,

1-failing-paint

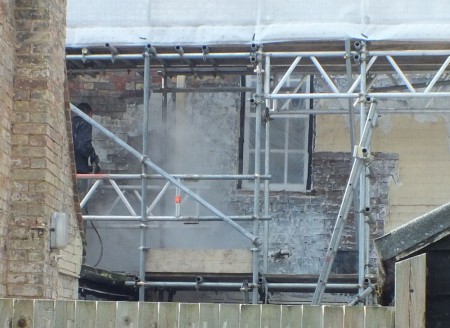
I’ve had a go at paint stripping before.  This time I got some professionals in – Craig Ginn from Dartford who uses stripper and a DOFF steam system to remove paint.

Most of the paint came off in sheets with a steam jet wash and paint stripper.  It needed a couple of applications of stripper to get rid of all the paint.

paint-stripping-large

Behind the paint we’ve mostly found good bricks.  There is a bit of mix and match from different building phases and alterations, but it already looks a lot nicer than the magnolia.

stripping-north-wall

Scaffolding

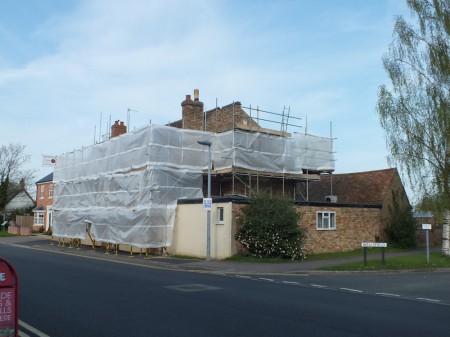
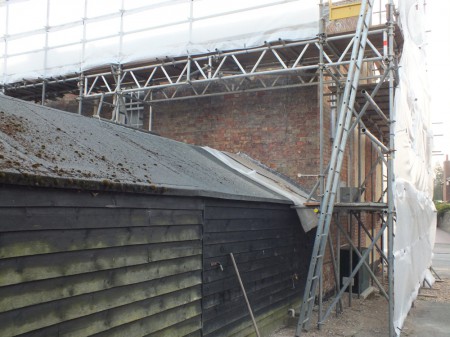
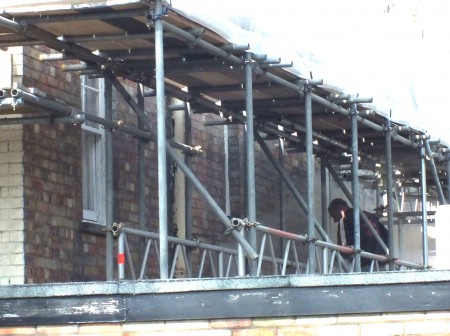
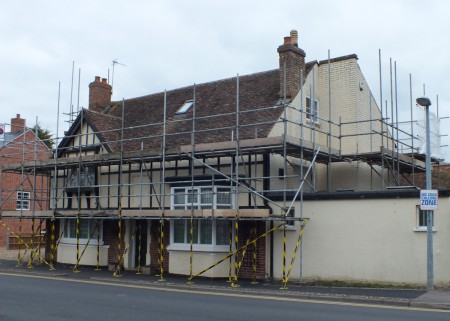
It’s Easter and the winter break is over.  The scaffolding started going up yesterday.  The intention is to complete any exterior work that needs doing before it comes down again at the end of June.
The paint strippers arrive next week to remove the magnolia paint from the brickwork.   Then the roofer will remove and re-fit the tiles and replace the lead work.  Some of the wood looks to be in a poor state so that will need dealing with.  Finally I’ll re-point in lime and paint anything that needs painting.

scaffolding-large

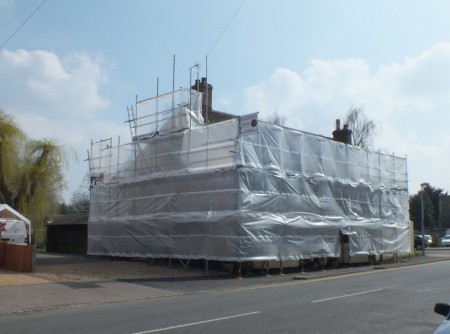
The scaffold has been covered with sheeting, partly because paint stripping is a messy business, but mostly for the effect.

scaffolding-sheeted

The scaffolding was put up by Trueform Scaffolding of Willington, Bedfordshire.

Aerial Photographs

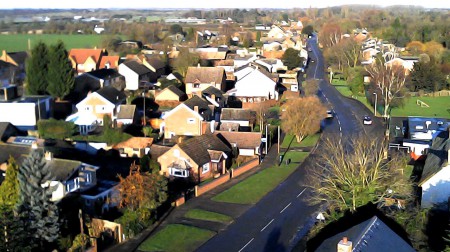
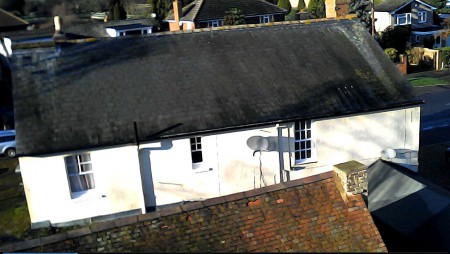
Kae bought me a quadcopter drone for Christmas and it has a camera fitted.   It’s good fun.  After some aerial shots of the cat running away I’ve taken possibly the first ever photo of the rear of the house which has always been hidden by the earlier barn in the foreground.

rear-house

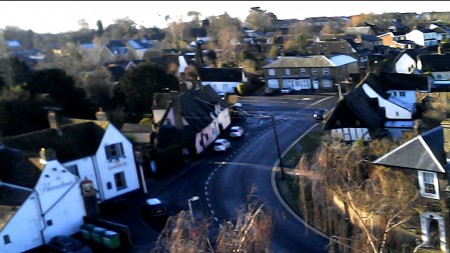
I’ve found that if I fly too high the drone goes out of range and then promptly plummets to earth (safety feature).    Here’s a blurry shot of the south of the High Street with the pretty thatched cottages.

top-high-street

Here is the High Street north as seen from slightly too high above my back garden.

high-street-north

No actual work to report.  It’s cold and wet outside.   We have scaffolding lined up for April and a hectic schedule to sort out everything that needs doing to the outside before July.

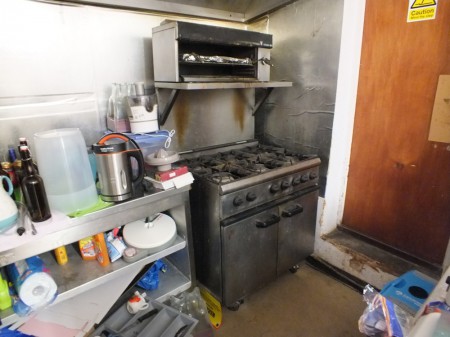
New Oven

The old oven was disconnected by the gas fitters when we moved in, and has sat in the corner untouched since.  Kae has been using a portable hot plate for cooking.

old-oven

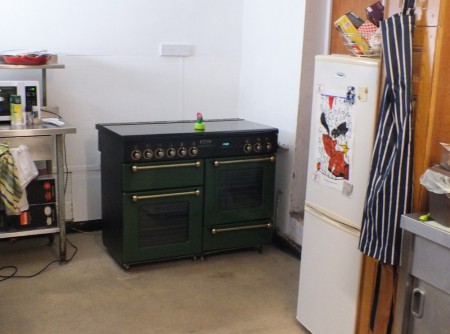
With the new kitchen delayed into next year by roof issues we’ve bought a  Rangemaster second hand from eBay.

Kae has cleaned and painted that end of the kitchen and we’ve moved things around in there.  Much better.  Next year we’ll hopefully have a kitchen with cupboards.

rangemaster

Dropped Kerb

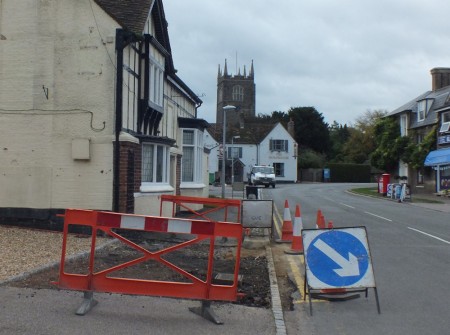
The road and pavement are being resurfaced and all of the alterations in the village are being done first which seems very organised.   Our kerb has been removed and the service covers raised ready for the new tarmac.

kerb-dropped

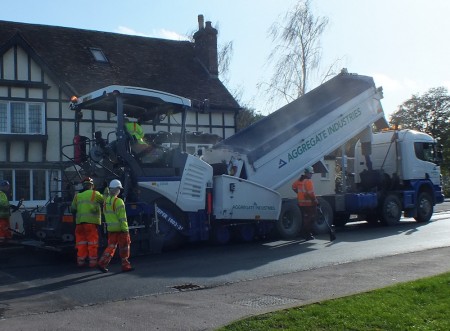
The road re-surfacing machine was fed with tarmac by a lorry running in front.

road-machine

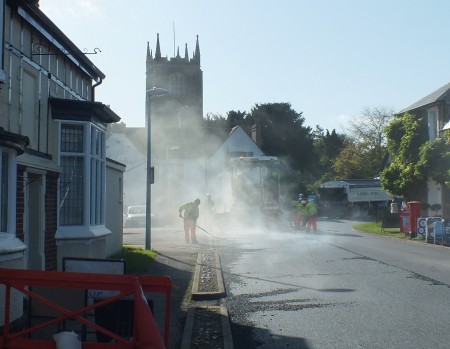
The process was very quick.  The whole road was surfaced in a day.

surfaced

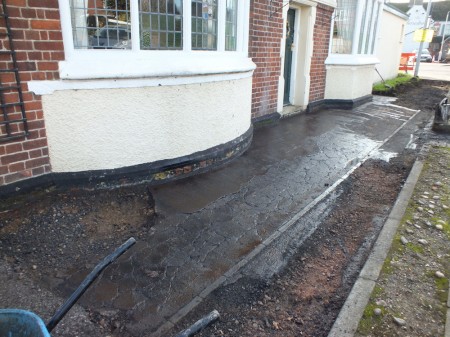
A couple of weeks later we’re getting a new pavement too!   Scraping off the old pavement revealed an old concrete pavement with an edging set maybe 18 inches back from the current kerb.  The concrete is a reasonable distance below the slate damp proof course at the front of the house and I guess it was put in when the facade was constructed in 1910.

Of course later resurfacing was plonked right on top bringing the pavement level up to the damp proof course.  It isn’t causing any problems but another layer on top would probably have done.

old-pavement

The contractors doing the new pavement were excellent.  They understood the problem of bridging the damp course and have laid the new replacement pavement slightly below the damp proofing roughly where it was before.

No More Magnolia!

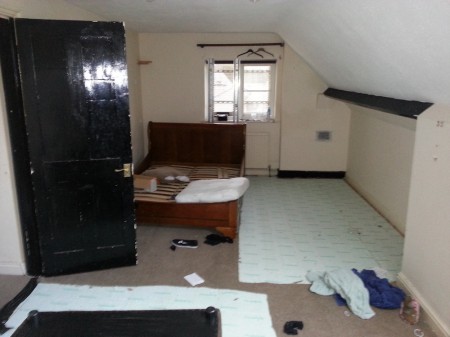
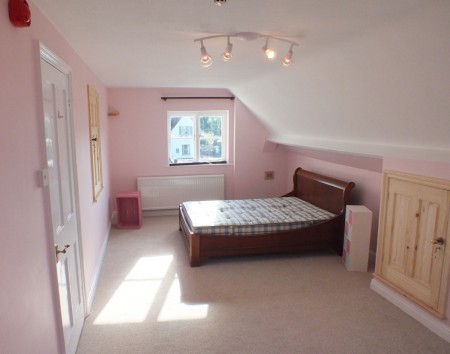
The attic is becoming a bit more cheery with some new pink paint.   We’ve decided to rid the house of the drab magnolia that dominates inside and out.   Here are before and after shots.

attic-before

attic-finished

Lime Plaster and New Doors

I made some holes in the attic walls to access the roof space, but it would be handy if the attic is habitable in about 3 weeks when some guests come to stay.

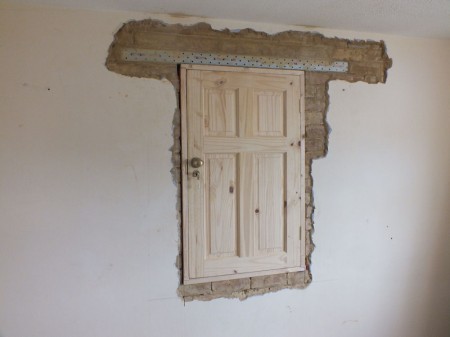
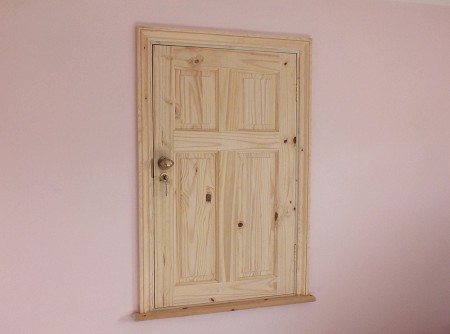
I ended up fitting normal doors and frames cut down to suit the openings.  The cost was slightly higher than the average eaves access door, but a normal looking door halfway up a wall is an interesting feature and it was a good opportunity to learn how to install door frames and doors.

door-high-in-wall

The trick with door frames is to cut them exactly square and size them about 2mm smaller than the hole in the wall.  Plastic spacers are available in bags of various sizes which are used to pack the frame at the corners and near the frame fixings.

The trick with doors is to buy an electric planer. I’m not planning to fit many doors so bought a really cheap planer at £34. Fitting the lock and hinges needs a very sharp chisel and wood drill bits.

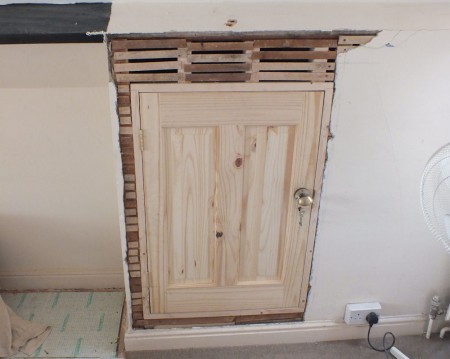
The second door is in a stud wall.  I went for lath and plaster rather than plasterboard to match the existing construction.   It’s quite therapeutic and much less dusty than cutting plasterboard.

lathe

The spacing between the laths is important.  I spaced them a bit too widely in places and it was difficult to smooth the plaster.  I’ve used lime plaster to match the original.  This is the base coat and I’ve allowed 2mm or 3mm for the skim coat.

first-coat-plaster

The finish coat started fairly badly, then I found out what a plastic float is for.  Once the plaster starts to dry the plastic float can be used to sand off the high spots and spread the plaster into the low spots.  Then a spray of water allows the plaster to be towelled flat.  Once the plaster has dried further a sponge float hides the imperfections and leaves a smooth finish.

You can take liberties with lime, to the point of working it the next day.  For DIY this is helpful as it reduces the need for any actual skill.

finished-plaster

I’m quite pleased with my first attempt at plastering, but don’t fancy tackling a whole room yet.

I fitted architrave around the doors and nosing at the bottom like a window.  The space behind will be useful for storage so I might fit some cupboards.   I wish I’d thought of that earlier as I’ve allowed 300mm for insulation below the door opening.  Still, I’ve figured out how to install doors now so the next one will be easier.

door-finished

Marquee

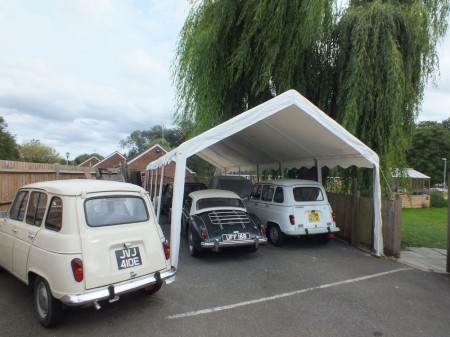
I had originally hoped to build a garage this year, but that’s looking like it will be a couple of years away while roof troubles in the house are fixed.  The MG and Rodeo leak and their floors are sodden.

A marquee from Gala Tent will hopefully serve as a temporary garage for this winter.   It is held down by 12 ratchet straps attached to rebar fixed with resin into the tarmac.  Hopefully it won’t blow away and will withstand the willow for a few months.

Edit 6 years later – it did brilliantly!    Would recommend Gala Tent who supplied a replacement roof covering in 2020.

marquee

No Roof Insulation?

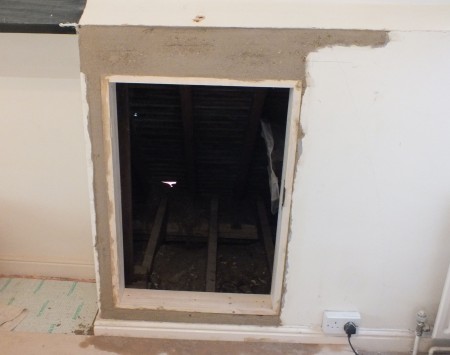
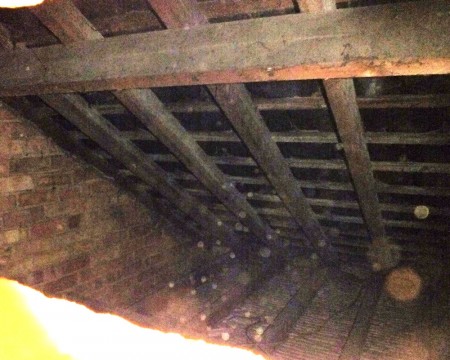
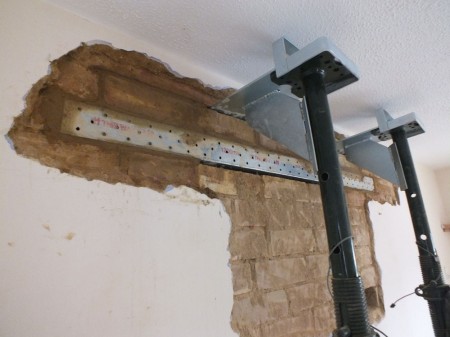
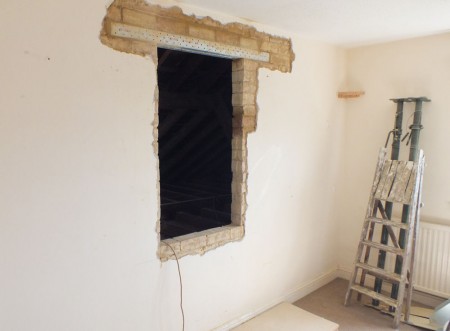
Back in the main house, the roof space above my bedroom is completely enclosed by brick walls and there is no access hatch.   I removed a brick from the attic room wall to have a look inside.

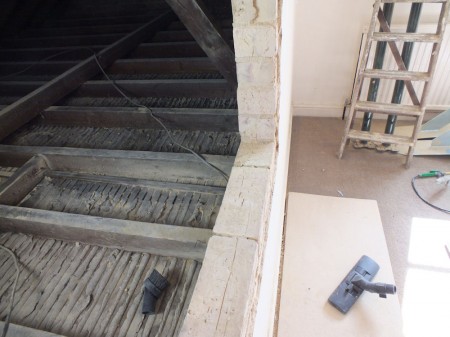
The space hasn’t been touched for over 100 years.  There is no insulation in there at all – no wonder I was chilly last winter!   I’ll install an access door from the attic to fit insulation.  The structural engineer wanted to see in there so I’ll put the door in before asking him around to look at the barn roof.

brick-removed

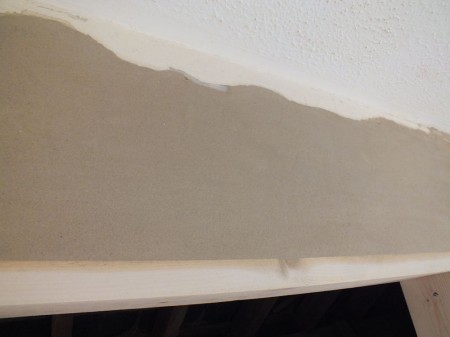
I have spoiled the attic decoration a little.  The lintel is in and I need to wait for the mortar to dry before knocking a doorway through.  The wall on the other side of the attic is a stud wall which was easier to knock through.

The roof covering through there is not in a good state.  I’m inclined to get some scaffolding up next year and get the roof and other external work done.   The structure isn’t rotten but the nails holding the tiles have rusted away and many of the tiles have slipped which makes it difficult to do local repairs.

lintel

I saved around 45 bricks from the hole and they appear to be the same as the bricks used in the external walls.  Saves going to the reclaimed brick place.

hole-in-wall

The access door doesn’t go all the way down to the floor because the ceiling on the other side of the hole is a lot higher (and there will be 270mm of insulation on top).   That’s the thing I want to chat to the structural engineer about.

If the attic room floor were higher we could still just about have an attic (only with badly placed windows) and it would be just about possible to have a room below on the first floor instead of the void (also with badly placed windows).   The plan is not fully thought through yet.

floor-levels

In the meantime the attic is a useful bedroom so I’ll put some door frames in and redecorate.  Later a substantial amount of insulation.

Barn Roof

Oh dear,  the barn roof turns out to be a bit iffy.

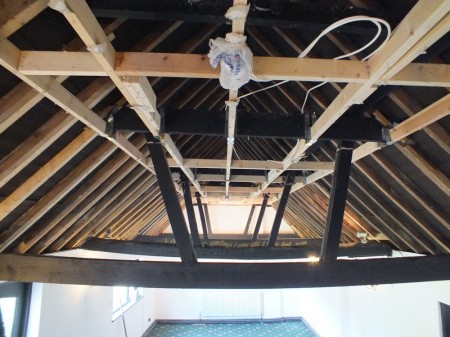
The roof has some nice oak beams but they turn out to be mostly decorative.   Normally pretty oak beams would form part of a roof truss, but the principal rafters you might expect to see in a roof truss are missing here.   There are a couple of purlins which are supported by posts back to the middle of the the tie beams which have become bendy as a result.

The roof spread (leaning walls) looks like it may have been caused by a lack of attachment between the tie beams and the wall plate (bit of wood on top of the walls).  Some attachments were added in 1983 (I found a newspaper stuffed in) but they aren’t perfect and the movement is still ongoing at around 1mm/year.

I’ve stripped the plasterboard from the inside of the roof to see what the structure is.   Fixing it will take some thought.   Probably putting back the structure you would expect to see and adding a bit of steel to join the crusty bits together.   It’s all very annoying.  Putting a kitchen in would have been enough hassle.

barn-roof

Kitchen Layout

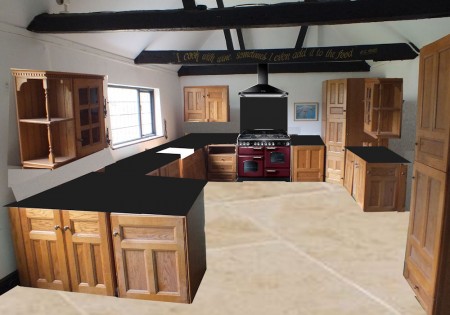
We bought a kitchen on eBay a year ago and yesterday arranged it in the barn to work out how it would fit.   Here’s an artist impression of what it might look like when it’s finished.  We can use it to help chose colours.

We plan to clear the barn next week to look at the roof spread and start fitting insulation and services prior to installing the kitchen.

sketch

Later on there was a change of plan – the kitchen is going to stay in the kitchen and the barn will become an outbuilding.

Driveway

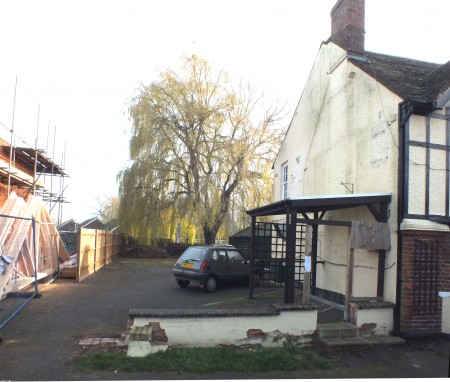
The driveway has been a bit of a mess since the dwarf wall was removed and the driveway sloped down to meet the pavement.   This is how it was originally:

DSCF7608-perspective-foixed-2

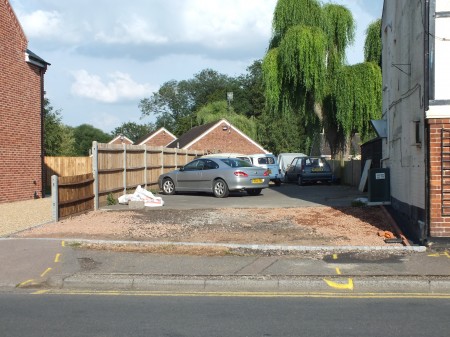
With the setts and edgings done I can put some gravel on top to make it look pretty.  A couple of tonnes of MOT stone were spread out during the freakishly hot weather in July.  It will be topped in gravel once the MOT has been flattened and whacked down.

The driveway will be temporary as I would like to build the garage at a lower ground level, but that will be a good couple of years away.

DSCF8046

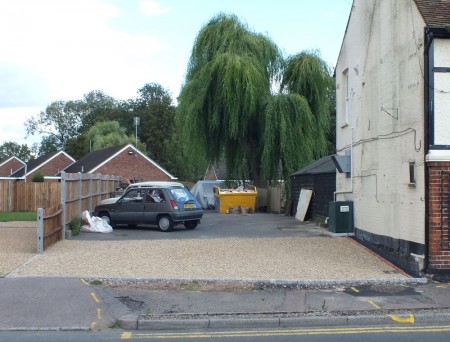
3 tonnes of gravel later and the front of the house looks much nicer.  I ought to find somewhere to hide the concrete mixing board to give the illusion of tidy.

gravel