Category Archives: snug

Finishing the snug

The floor in the ballroom will take ages to lay so I’ve moved onto the snug. I’m keen to get the snug finished before winter as it’s a small room that will have a wood burner and it’s going to be toasty in there.

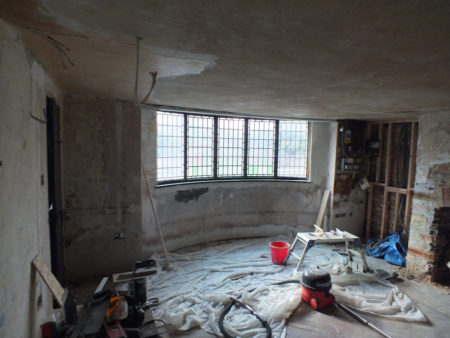
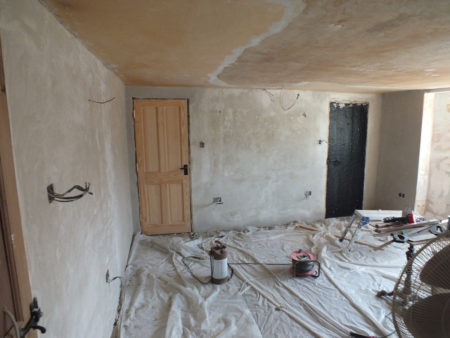
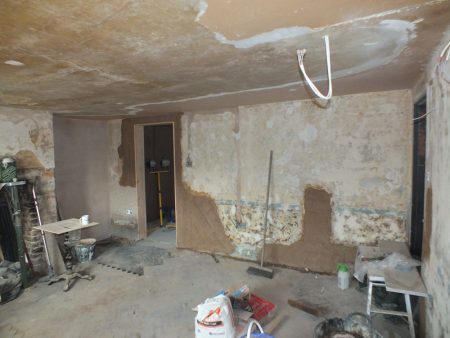
There’s not much to do. The old consumer unit has been removed, the wallpaper behind stripped, and the big hole in the ceiling where the wires went repaired with lime and lath. The snug has had a fair bit of work already. The ancient ceiling is cracked and I’m adding a little filler before lining paper.

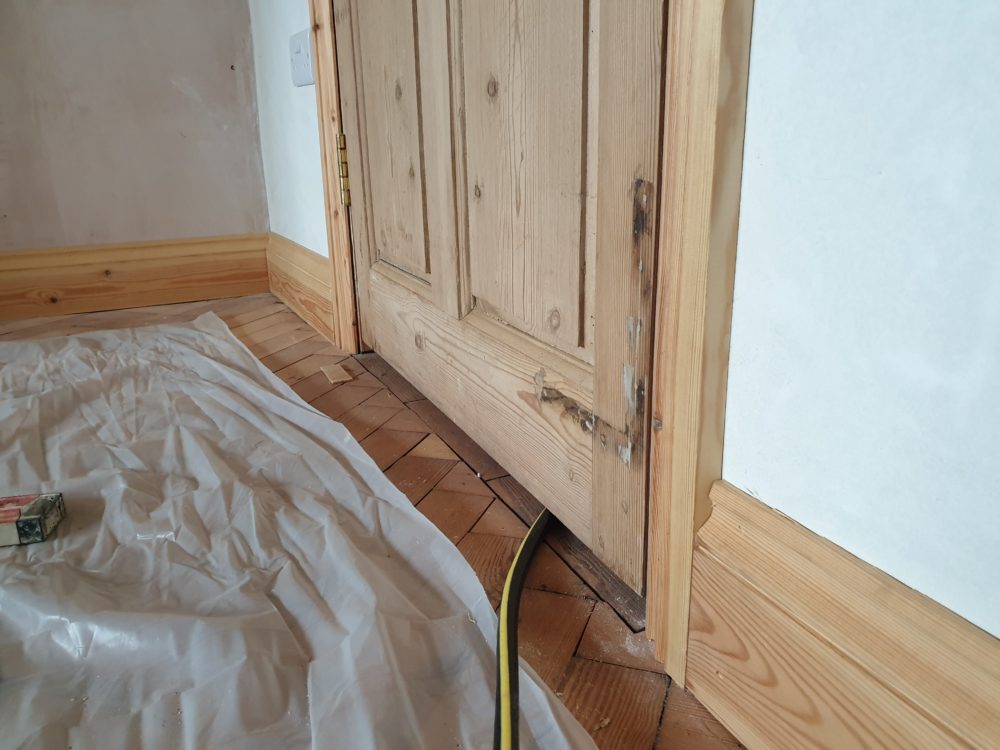
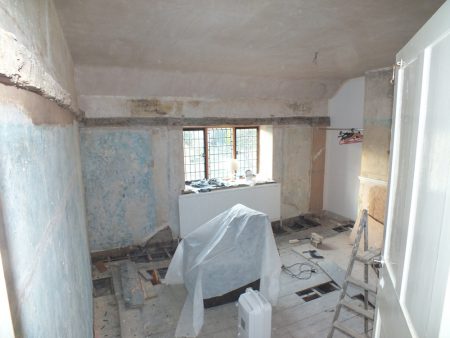
I’ve started fitting the architrave and skirting and it’s making the snug look much more like a room. The walls are nice and flat because they were skimmed.

The walls are wattle and daub and are no good for mechanical fixings so I’m fitting the skirting the modern way with grab adhesive. It seems to dry soft and chalky so the boards can be removed again without damaging the plaster too much.

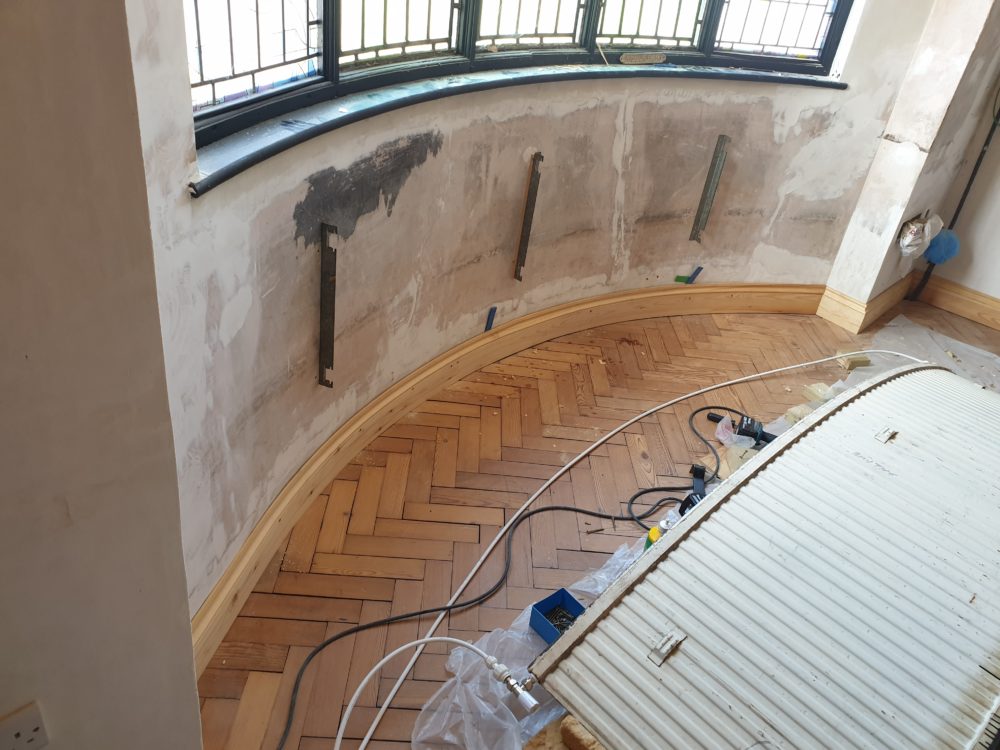
The skirting board in the curved bay was a pain. I cut deep slots on the rear spaced 1/2 inch apart to make the skirting easier to bend. It was very much a two person job to fit (I broke the skirting on my first attempt and had to prepare a second board). My neighbour came over to help press the board into position while I screwed it to the wall.

It almost worked but the moulding at the top split in three places. I’ve glued it back together and it should be OK with a little filler.

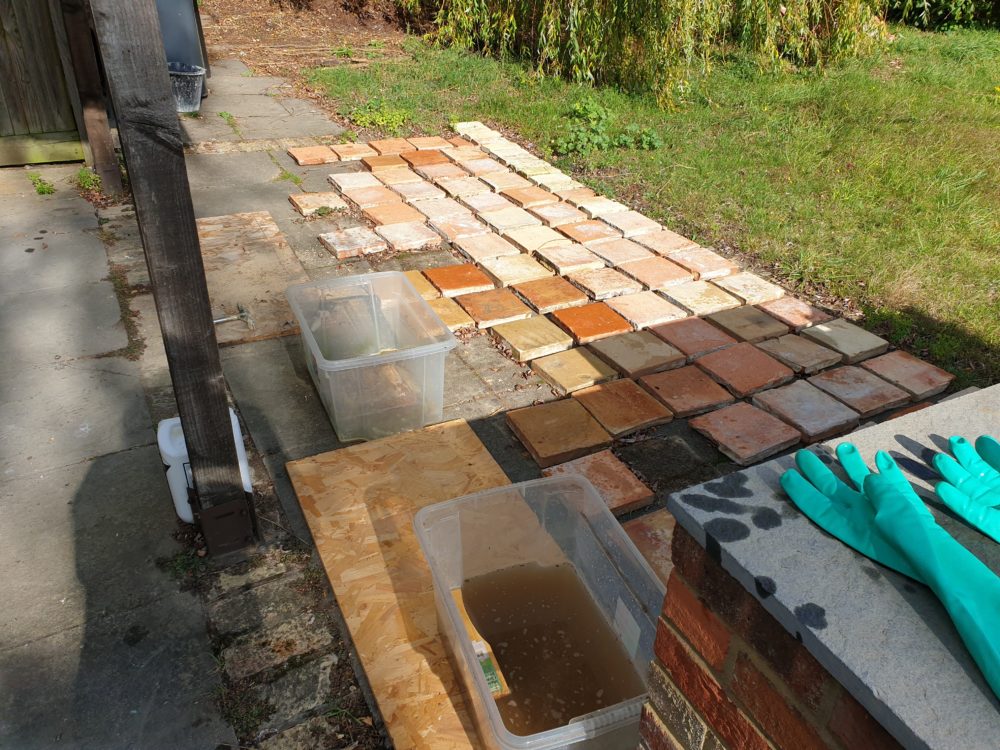
Outside I have a lot of reclaimed pamment tiles which have cement staining. The cement is coming off well with brick acid. I want to use the tiles in the snug hearth and in the ballroom cubby. Maybe also for some steps if there are enough good ones.

It’s a job I ought to have started some time ago as it’s easy to go and move a tile from the acid tub into the water tub every now and again while I’m doing something else. It’s less time efficient when the hearth is the next job on the list.

Moving things around

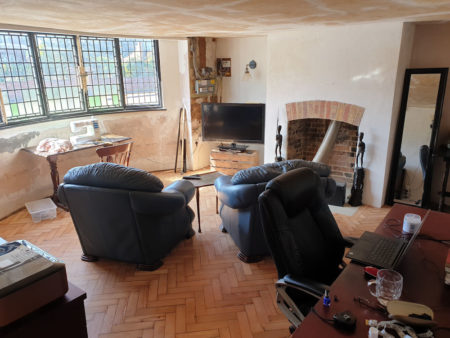
Not a lot seems to have happened this month – that’s because I’ve been busy!   The office is now mostly cleared out and the snug is now an everything room.   I really like it and I’m surprised how much furniture I could get in there.   It never seemed that big.

The door and windows are completely stripped and just a little more prep needed before linseed paint.

snug-with-furniture

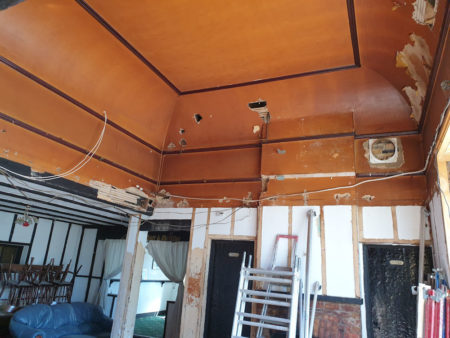
Most of the plumbing in the house has been removed, mostly so I could remove the rest of the false ceiling.    The 10 inch beam spanning the room would have been quite heavy so I propped it up on scaffold and cut it into manageable chunks.

The ceiling supports around the edges were cross nailed into the lath and plaster supports.   They didn’t come out easily and there is more plastering to be done than it looks.

The walls are being a pain too.  They seem to have been re-plastered in the 1970s with cement and gypsum.  They have textured paint, then wallpaper, gloss paint, and finally lots of emulsion.   It is very time consuming to get back to the plaster so I’m thinking either a scabbler or just knock the whole lot off and try again.   It’ll probably be a bit of both.

ballroom-ceiling

First fix electrics on that side of the house is loosely planned in a month or so.  I’m having a rest and taking a week to tidy and organise the living spaces and then should probably get busy getting ready.

Arts and Crafts Secondary Glazing

I’m retraining to do building conservation work, so if you fancy some Arts and Crafts secondary glazing my email is at the bottom of the page.    Or if you prefer making your own here is a somewhat dimensioned pdf of the profiles together with a cutting plan that didn’t account for the saw blade width.

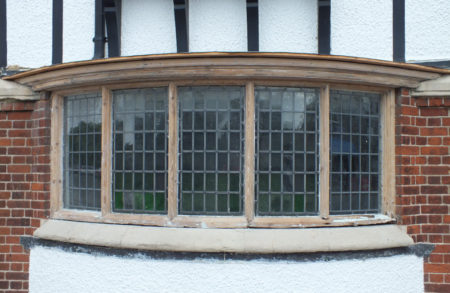
I’ve been messing around with ideas for secondary glazing for the last couple of years.  The mainstream secondary glazing seems really ugly and very expensive.    My bay windows don’t have any openers so I’m planning to make a fixed wooden frame with a similar profile to the existing frame.    Here is my prototype.    It doesn’t quite fit together because of the curve in the bay, but it’s close enough for me.
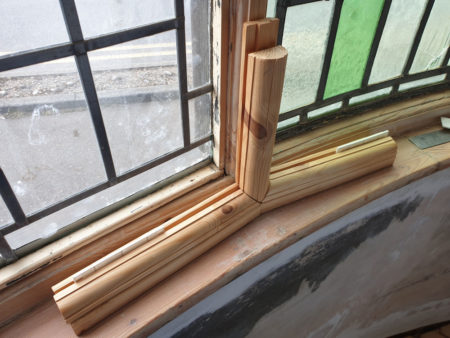
secondary-glazing-proof-of-concept

Last year I bought a table saw and router table for the work, and enough wood for both bays.  Today I have made a start and have been creating sawdust.       As usual I’ll update this post as I go along.

If you ever buy a table saw make sure it has a cast base with some chance of staying flat.  I’ll be buying another one before doing the big bay window.
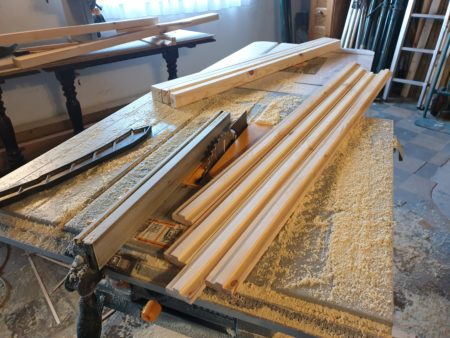
20200330_155535

The profiles worked out well.   My dimensions are a little inconsistant, but there should be some adjustment possible during fitting.  The edge mouldings went through a redesign as I realised it would be better to attach them to the window frame rather than the cill and ceiling.

Annoyingly I can’t figure out how I did some of the radiuses on the protype.  I remember putting a lot of thought into it at the time but have forgotten all that now.
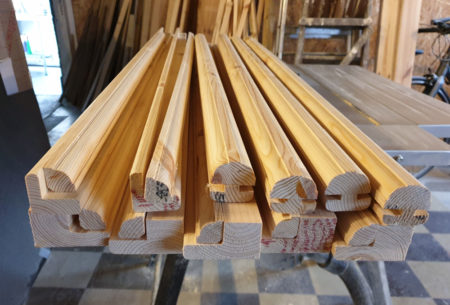
glazing-profiles

Fitting the glazing frame was time consuming.    The window isn’t a very consistant shape so it took a little imagination to fit the glazing frame in a way that would accept rectangular glass.    The bay is curved and a 7 degree angle kept cropping up, and not always where I was expecting it.
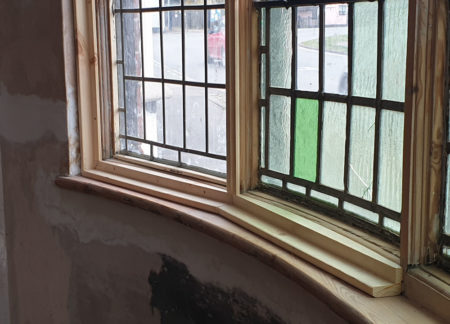
glazing-fixed-part

Adjusting things to fit and then fixing the glazing frame took 2.5 days in total, more than it took to make the profiles in the first place.  After getting everything perfect I added 1mm gaps between the bits of wood to allow for some expansion.   I’ll fill those with linseed putty.

Then after all that obvious progress in just half a day.   I finished off the prep and painted the inside of the window.   In the photos it looks nice in natural finish, but in the flesh it looks a whole lot nicer in black.   It’ll go more matt once the linseed oil paint soaks into the wood and dries.

The glazing at each end is not original.  I think someone skipped some rare curved Crittall openers and replaced them with flat glass with some lead stuck on.  The middle three panels are curved.
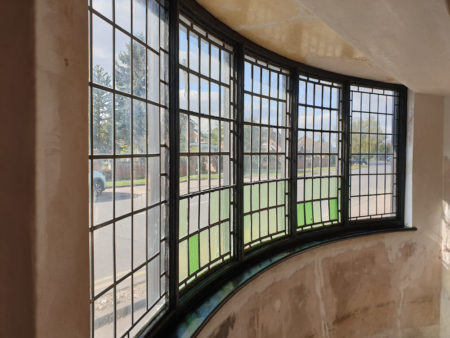
painted-window

I maged to paint over the numbers on the secondary glazing frame pieces that told me where they fitted and was left with a jigsaw puzzle.

With the frame in place I started cutting the mouldings to size and now my brain hurts.  The parts are cut at either 45 degrees, 41 degrees or 49 degrees depending on the moulding width.  The 41 degree cuts also have a 7 degree compound angle to account for the curve of the window.   Gave up and had beer instead.
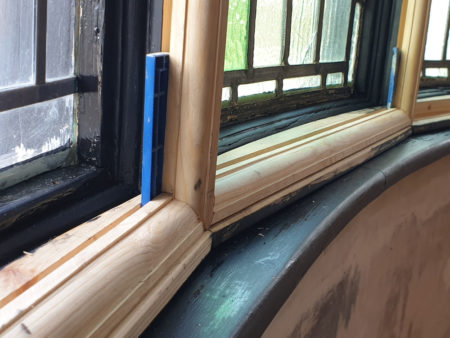
secondary-glazing-mouldings

I found cutting the profiles to shape was much easier when I used an off-cut and cut the ends to fit the angle of the uprights then marked the saw settings on the cut end.   Once I had the angles it was easy to cut mouldings to the right length and angle.   The angles were different for every piece, largely because I set the glazing to fit the window and the window isn’t quite straight.

I’m very pleased with the finished secondary glazing.  It blends in and looks like it could be a part of the original window, and will likely disappear completely once it’s black.   I think the glass will stand out much more than the frame being faceted rather than curved, but I’ll wait until I’ve finished the big window in the next room before ordering the glass.  This job has taken 7 days so far, and it’ll be interesting to see how much quicker I get on the big bay.
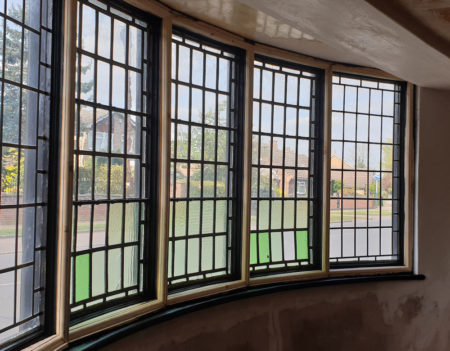
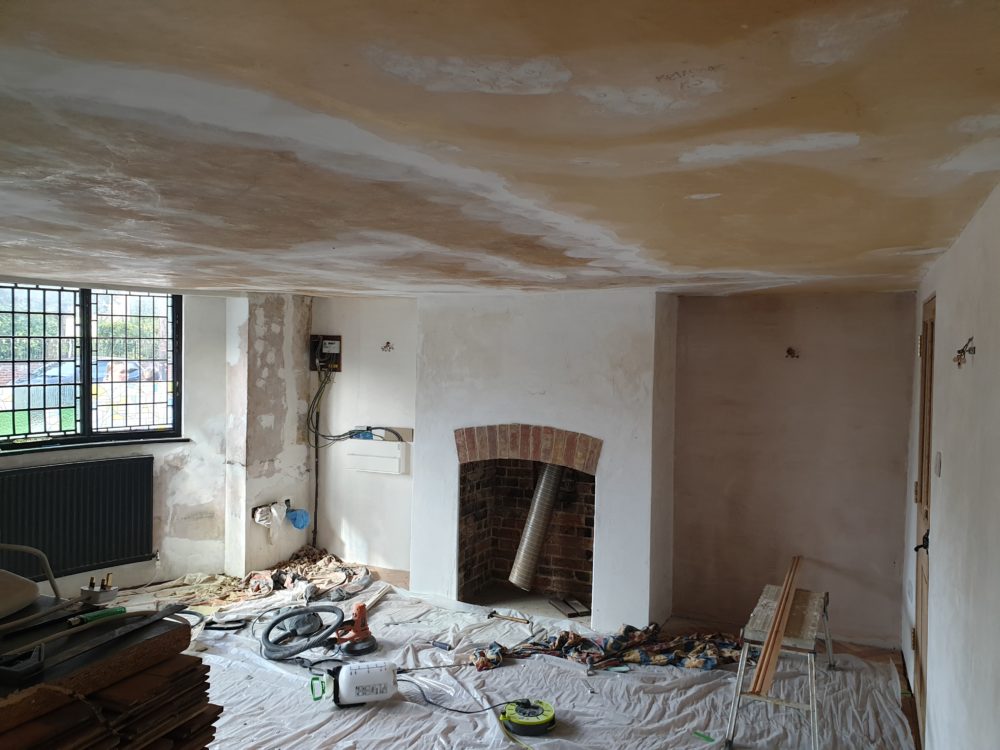
finished-secondary-glazing

Parquet Floor Level Sanding

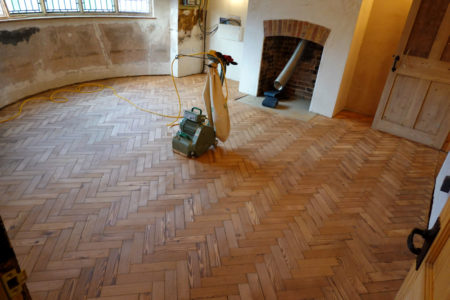
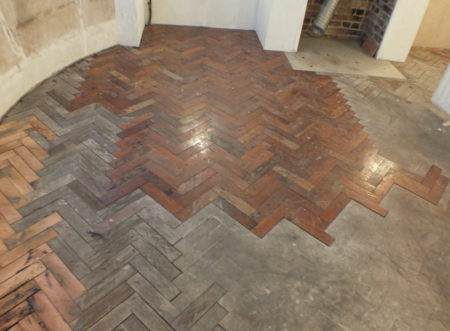
Who would have thought the parquet in the last post would ever look like this? – and it’s not even finished yet!   Callum Finlay spent a day using an edge sander to get all the new blocks to the same height as the rest of the floor.  The photo shows the subsequent rough sanding using a belt sander.

floor-sanding

I’m amazed at how little material was removed and that the new bits match.  The levelling will allow me to fit the skirting, then once I’ve finished decorating Callum will come back to do the fine sanding and finishing and make it look all posh.

For the rest of the year I’ll be… er… oops.  Next year things should be more settled and I want to get back on the case with the restoration and make more things more beautiful.

Parquet Floor Restoration

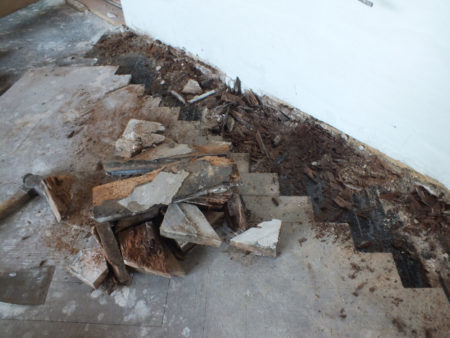
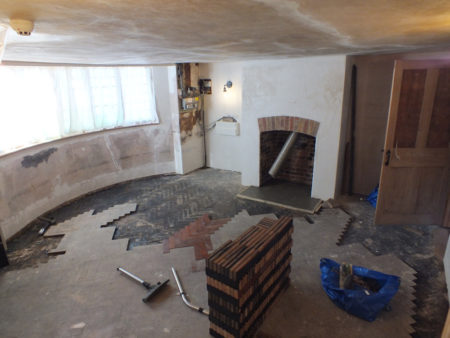
The snug has a parquet floor in pitch pine about 30mm thick which is very rare these days.    I guess it was laid when the new facade was built around 1920 and since covered with carpet.   It is lovely but wasn’t laid all that well. The bitumen adhesive makes a good damp course under the blocks but they mortared it into the walls instead of leaving a gap and some damp came through, notably where they built a car park 12 inches above the inside ground level.

It will end up being be a good 2 or 3 weeks of work and a bunch of money to fix the floor, but it is charming and one of the few original features remaining inside from the 1920s so I want to have a crack at it!

rotten-parquet

The car park was fixed with a trench, and I have cut a gap below the plaster to allow an air gap between the parquet and the walls which will be covered by skirting.

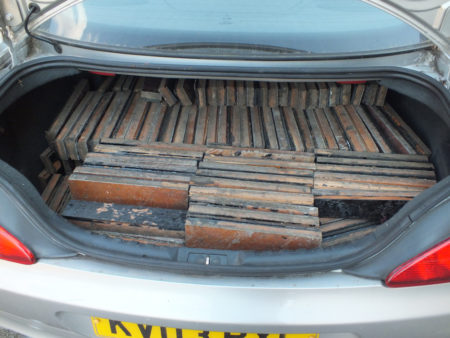
Much of my parquet was rotten but I managed to find some close to the right size on eBay that I could cut down on a chop saw.   My rate for cleaning bitumen off was about 2 square meters per day, sometimes with a Bacho 665 paint scraper and other times with a heat gun depending on the type of bitumen.

peugeot-parquet

This project has been going since June in bits and pieces.   Now all of the parquet has all been cleaned but remains of bitumen on the floor still need to be flattened with the paint scraper.   There are modern glues that can stick to bitumen but modern glues will be difficult to remove in the future so I’m still taking advice.

Apart from all that I’m almost ready to lay a floor!

snug-floor-lifted

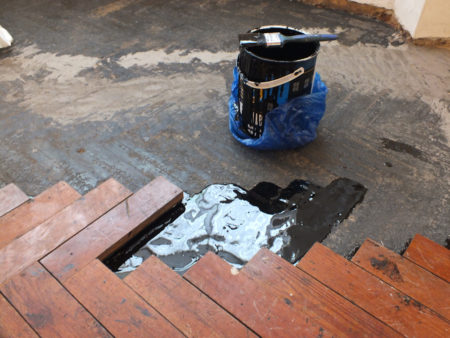
The low points in the floor were filled with Ardex 45 rapid, and I’m using Black Jack roofing adhesive to fix the parquet, buttering the blocks for good adhesion.   Both were recommended by the floor sander.  The roofing adhesive is nice to work with but takes weeks to set (heating the room helps).

The trick to laying parquet is to work to a string line.  If the blocks all line up then the gaps will be OK on the next row.  The wall edges take a long time as the blocks need to be cut to fit.

bitumin

It takes a surprising amount of time to lay parquet – two weeks to be exact.  I got fed up with it.   It didn’t help that I ran out of blocks and had to cut the face off some thin worn blocks then glue ply to the rear to bring them back to the right thickness.   I’ll try to get the room more finished before sanding and finishing.

parquet-laid

Snug Window Repairs

Slow updates – I’ve been in Sweden again.   I painted the front windows when I moved in 5 years ago, but it turns out modern oil based gloss paint is not UV resistant and the paint cracked after only a couple of years.  Problem is when you have cracked paint you need to remove it (and everything underneath) before repainting.

The front windows have very fiddly profiles and it took about 3 days to remove the modern paint with a heat gun.   Linseed paint is UV resistant and tends to dust rather than crack and just needs another splash of paint rather than stripping off, so I’ll be repainting in linseed so I can avoid doing any stripping ever again!

snug-window-stripped

When I first moved in I thought the windows were beyond repair, but looking at them now I see window frames in really good condition.

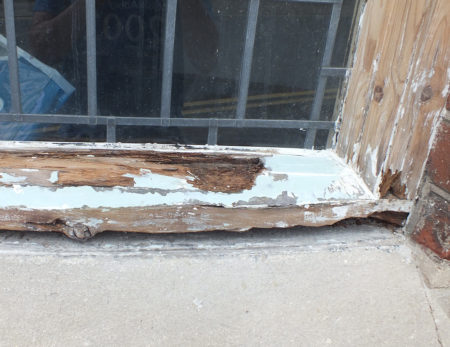
I guess the difference after 5 years is just confidence and knowing what can be done to repair them.  There is just one sill that needs to be replaced and a couple of mullions that will need some new wood letting in.   I’ve got a bunch of photos of the rotten sill and they are all in focus but appear out of focus.  The camera has seen much worse and I’m not sure why it is objecting now.

rotten-sill

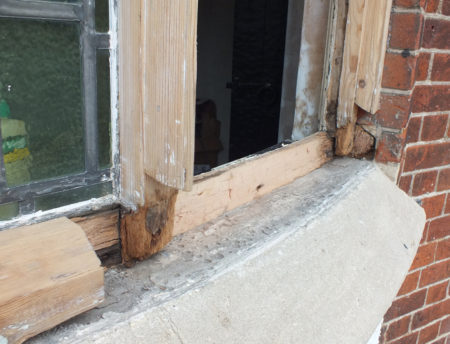
Maybe the camera was right.  The sill was quite rotten and I ended up removing it right back to the inner face of the window.  The rot in the mullions has been cut out at an angle to allow water to drain when the finish cracks.

That committed me to the scary bit – it would be my first time replacing a window sill, and this one is in a curved bay which complicates things.   I practiced on modern wood before attempting the repair.

sill-removed

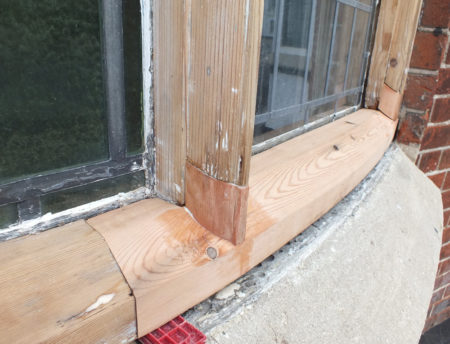
The new sill was made from the sill of the original sash removed from the back bedroom – 100 year old wood is much more durable than the stuff available today and also much harder to cut.

The curve was cut with a bandsaw and the taper added with a planer.   Repairs to the profiled mullions were cut with the bandsaw.  A new box of chisels was involved too.   I’m quite pleased with myself – some tidying still needed but it looks the part.

new-sill

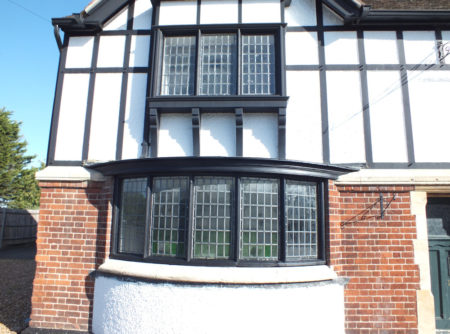
The gaps and cracks were filled with linseed putty and the first coat of linseed oil paint is looking fabulous.   I went for black to match the rest of the woodwork on the facade and to balance the top-heavy look of the half timber upper floor.  I prefer it to the before photo of the facade here, but it doesn’t seem quite right yet.

window-painted

I still need to fill around the window with lime mortar, then paint another coat or two.   Also the lead roof still needs to be fitted.  I’ve been stripping the inside of the window on and off as the profiles look prettier without 1mm of paint, but that will be a fill in job as I’m determined to work outside while the weather allows.

Plastering the Snug

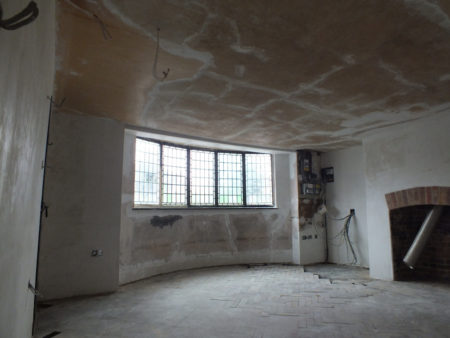
I’m sweating away in the heatwave doing plaster repair in the snug.   There is not much to see in the photo – a lot of the snug was back to brickwork behind the late 20th century wood paneling and the leak from the bay window and the electricians took a bit more off.   I’ve patched that all back to level, but the Georgian plaster on the other walls is in poor condition having been messed with and will likely need a skim.

The ceiling is remarkable.   It has an inch of plaster with straw reinforcement.   It is probably the oldest and most bendy bit of plaster left exposed in the building so I’ll not mess with it apart from filling in some of the larger gaps and then lots of lining paper.

snug-plaster-started

I ran out of lime plaster and took a break to paint the upstairs bedroom.  After the new plaster arrived I skimmed 2 walls and have a nice flat and smooth finish.  I used Ecomortar R50 ultra fine plaster – it is lime based with some additives to help it stick to different backgrounds and something to make it set in a couple of hours to avoid shrinkage cracking, but it still seems reasonably breathable.  Turns out to be a lot quicker to skim than to patch.

snug-walls

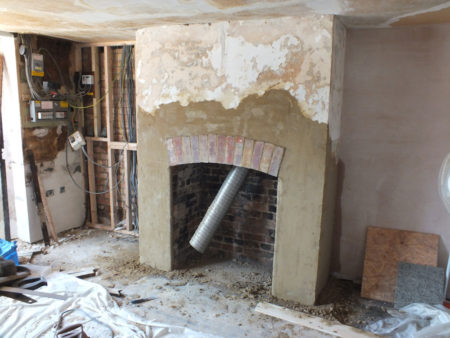
Working around the room the fireplace is next.   The original plaster was quite thick so the scratch coat will take a few days to dry before I can skim over the whole fireplace.  Next is figuring out how to plasterboard the stud wall with the electrics in the way.
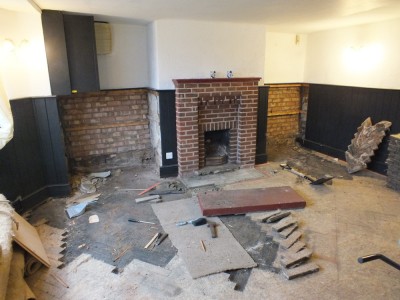
fireplace-scratch-coat

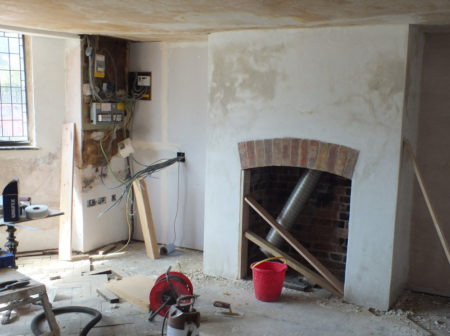
This is a bit more like it.   I didn’t quite get the curved edge for the front of the fireplace while plastering (I have a cunning plan for a bit of apparent craftsmanship in the snug).  The latest idea is using a guide propped up by bits of wood together with a concrete edging trowel with some spacers glued to the edge.

To the left of the fireplace the wires in the cable entry for the new consumer unit are propped up while glue for the slate insert dries.  I’ll wrap some intumescent pipe wrap around the wires.   I don’t want any electrical fires getting into the void behind the plasterboard as it is ventilated to the roof space to keep the external timber frame dry, but the inside stud walls are all filled with the horribly combustible insulation they insist on these days.  The stud wall is there for the same reason as the upstairs stud wall – I want to be able to replace the common bricks used outside to replace the bottom of the timber frame with some nicer ones.

fireplace-plastered

Finally looking in the same direction as the first photo and almost ready for decorating (apart from to the right of the window where the old electrics will have to remain until the other side of the house has been rewired).  I’ll paint directly on the plaster behind the new electrics – it is mean to wallpaper behind consumer units!

snug-plastering-finished

Snug Fireplace

The bedroom is finished apart from paint and I’ve started on the snug.   I’m planning to fit a wood burner and have removed the late 20th century fireplace to get back to the builders opening.

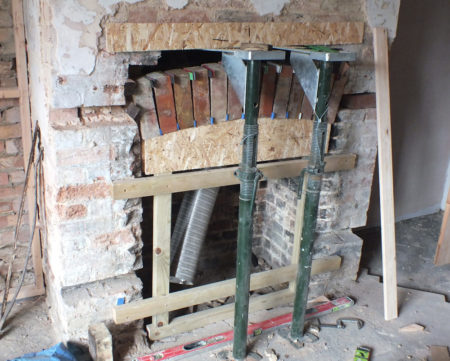
The brickwork is not presentable and will need to be plastered.  My idea is to leave a brick arch exposed to add some interest.   In the photo the arch former is in position for a trial fit of the arch.  The OSB board above the baby acros is there to provide a surface to line up the face of the arch which will be 10mm proud of the brickwork.

arch-template

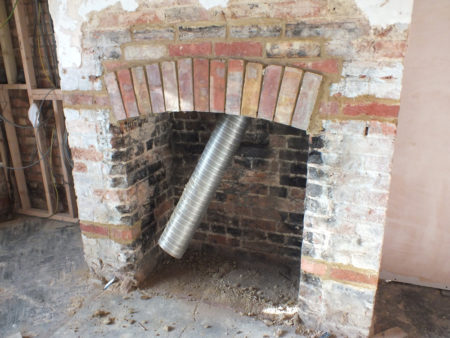
The arch uses the same bricks as in the main room.  The colour differences between the bricks should be reduced when they are sealed. Failing that I will have a multi-coloured arch.

It’s a bit mean to future historians to build the arch in 100 year old bricks so I’ve made good use of red bricks left over from the new build next door to fill gaps where fireplace mounting wood was removed, and also a couple of loose bricks above the arch that I have saved to match replacement bricks for the exterior wall.

arch-complete

I think the sides of the fireplace opening will need to be plastered as the corners of the bricks have been knocked off.  Possibly I will be able to only plaster the corners and make a nice curve.   I’ll likely leave the back of the opening in sooty brick.

Kitchen, Snug and Bedroom – Even More Progress

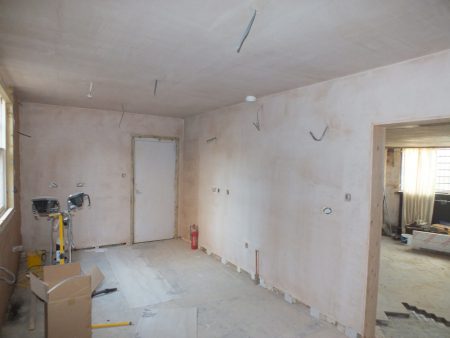
It’s only been a month since the last post and look at the difference!    The side of the house we are working on has first fix electrics, the door frames are in and the internal stud walls have been plastered.  The external walls have a base coat of lime plaster which is taking a very long time to dry in the cold weather, but hopefully will dry more quickly now the dehumidifier and heater are running.

kitchen-plastered

The snug next to the kitchen is a very old room that has survived largely intact with it’s wattle & daub and it’s inch thick straw plaster.   Some damage was exposed when the wood panelling was removed, and some great chunks of cement fell out of the walls.   The base coat of lime is drying and the walls have been prepared for a skim coat in lime.    I want to paper the ceiling and walls with lining paper so they can be rescued again more easily in the future.

snug-prep-for-plaster

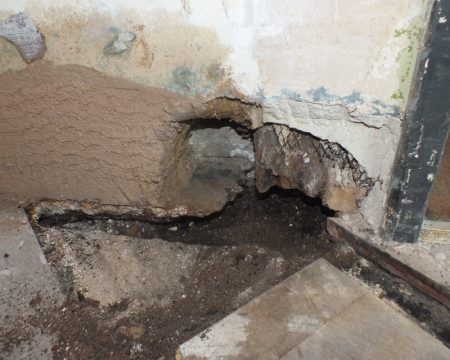
The sole plate in the internal wall of the snug turned out to be underground and therefore rotten.   Normally sole plates are a good 15 inches above ground on brick plinths and therefore dry.  I put this wall down to lazy Jacobean builders!  The wall doesn’t support much any more so we’ll prop the posts up on bricks and remove the sole plate.
buried-sole-plate

Meanwhile upstairs, the bedroom ceiling has been skimmed which neatly hides the artex, the bit that I put my foot through while insulating the loft, and the rotten bit that Rocco replaced with lath and lime.

The floor boards are up near the window because I wasn’t convinced by the Edwardian approach to joist hanging.  Modern joist hangers make the floor much less springy.   It was also a good opportunity to finish off the plastering around the window – the scratch coat went on 2 years ago.

bedfoom-mess

Rot in the Snug

Kae is in France this week, and in the absence of anyone sensible around I decided to do some decorating. Though one thing leads to another…..

snug-stripped

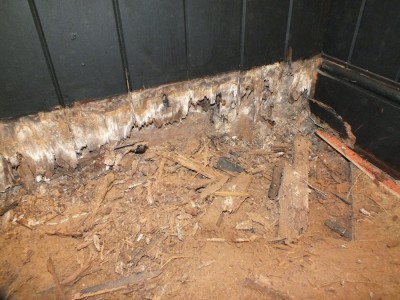
The problem was rot.  Initially the term dry rot was bandied around but it seems it was good old-fashioned wet rot. Under the carpet in the Snug there was some lovely 1920s parquet flooring. Unfortunately the ground level outside is about 12 inches above the floor level inside and the far end of the room has been damp for years. The parquet floor and the later wood panelling had crumbled away and needed to be brushed up.

dry-rot

The rot appeared to be confined to the area around the end wall and fireplace. I had intended to remove all of the parquet but moving further into the room the parquet floor appears to be in reasonable condition (apart from maybe the bay window area). I’m in two minds whether to restore the floor or recycle it on eBay.

Before I keep it I’ll need to find a solution for the damp problem. For now the rotten bits are on my skip pile and I’ll rest the carpet back on the good bits. The missing bits will leave the structure exposed to try to dry it out.

I ended up restoring the parquet.