Category Archives: Repair

Pub Piano Tuning

It is traditional for pub pianos to be way out of tune. Mine came with the pub and the keys played the note that the key to the left was supposed to play. A piano tuning app (Pano Tuner) showed what note was playing and with the hammers removed I tuned the strings plucking them like a guitar. YouTube was very helpful for piano fixing advice.

The curved keyboard lid was broken and for years I couldn’t think how to hold it while gluing it back together. The feather boards mounted on the router table turned out to be perfect for clamping the joint. The sticky keys were fixed by wobbling them from side to side.

It’s a Duck, Son and Pinker piano from Bath. It sounds nice now it’s in tune. I looked into the brand and their name plates always say “Duck Son and Pinker Bath and Bristol”. Mine doesn’t mention “Bath and Bristol”.

It’s a plain piano without panels or decoration. Can the internet tell me if that makes it an early piano or a late one? EDIT – from the serial number it looks like a 1911 model. Thanks Jonathan.

Plastering the ballroom walls

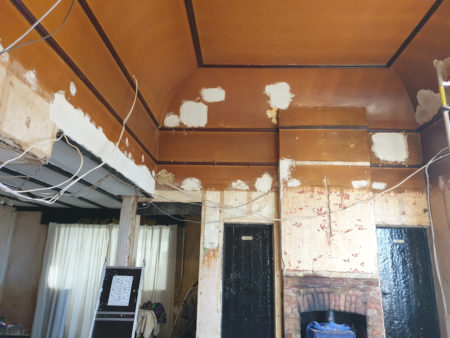
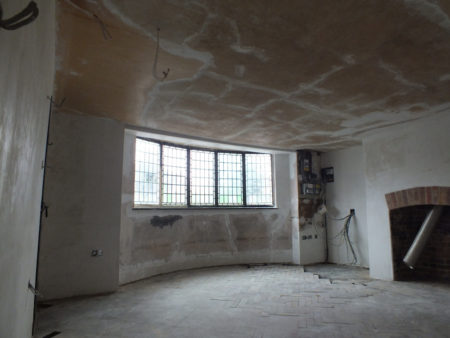
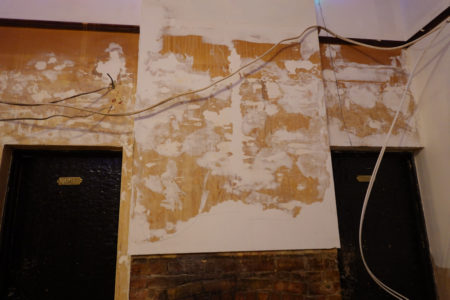
The walls are not in perfect condition.   They were thoroughly mock tudored in the 1970s and removing the mock tudor resulted in a lot of damage.    The lower 5 feet were wood panelled in the 1920s then plastered in the 1970s.   The next few feet have textured paint, then the parts that were above the false ceiling have been knocked around by electricians and plumbers.

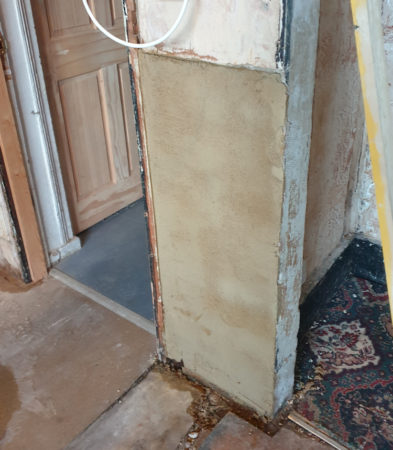
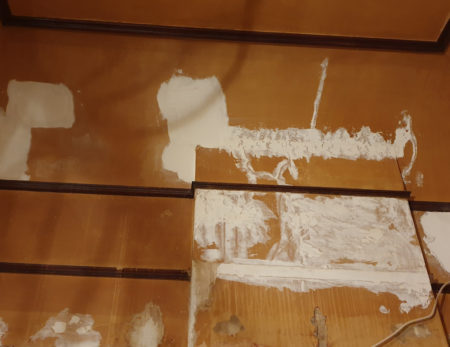
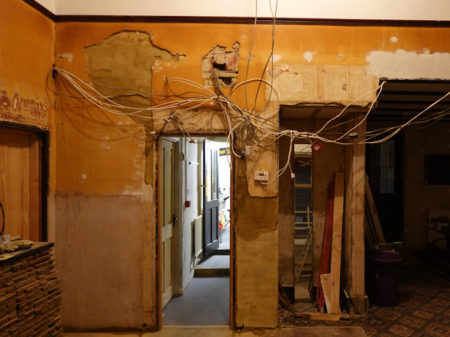
In the photo above the left of the doorway and to the right of the doorway is some basecoat plaster I’ve applied directly on brick.  It will need a second coat to get a couple of millimetres shy of surface level when I’ll switch to the lime repair plaster.

The brick was really thirsty having been inside for 100 years.  I could hold the sprayer in the same spot for some time and the water would be sucked in rather than run off.  It’s best to pre-dampen bricks so the water isn’t sucked out from the new plaster before it makes it’s bond.
base-coat

The other side of the room is a little further along.   The larger holes have been repaired using the repair plaster.  I shape the plaster using a steel rule which gets the level just below the surface.   The final coat is a filler which has the advantage of being sandable.

The original plaster on those walls is still reasonable smooth and straight so there is a chance I’ll get away with filling the many holes people have made and then then just paint over.   At worst I’ll need to use lining paper.   I don’t think I’ll need to skim
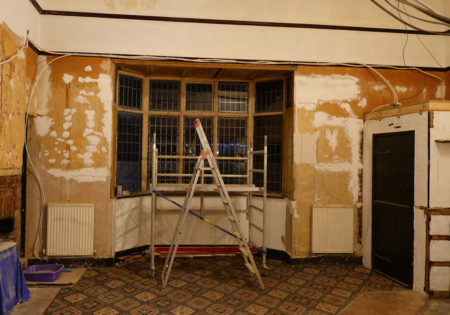
filling-walls

The dining area was re-plastered in the 1970s and has accumulated fewer holes – mostly just where the mock tudor was nailed on.   I’ve found filling to just above the plaster level then a quick once over with a drywall sander is a really quick way to make the walls perfect.
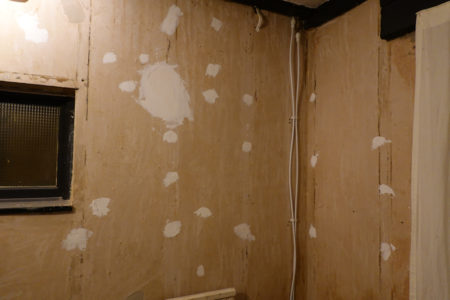
filler-spots

I finished filling a couple of walls and put the first coat of paint on to see how it would look.   The repairs aren’t noticeable and the walls look flat.

I felt it took a long time to prepare the walls,  but it was only 5 days ago that I painted the ceiling.  I think it’s just boring, and a couple of weeks plugging on with it should have all the walls finished.
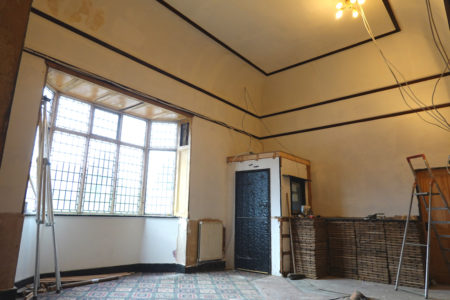
walls-painted

Not everything is finished.   The textured paint came off with some effort with a paint scraper after softening using Zinsser BIN wallpaper stripper.  The resulting surface looks worse than it it.

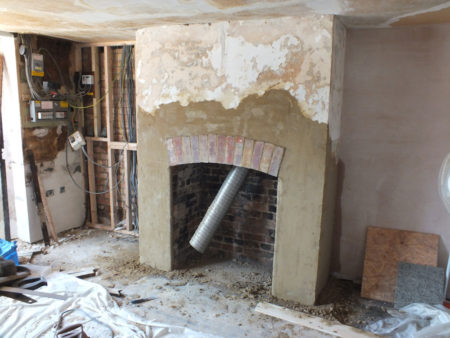
The last bits of loose plaster in the room have been knocked off the fireplace and the wooden former is in position to make an edge for the new plaster before I figure out what sort of trim or shelf I might eventually put in it’s place.
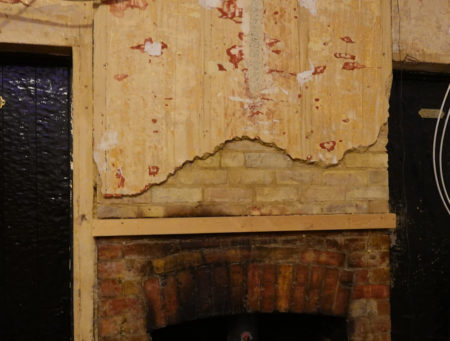
fireplace

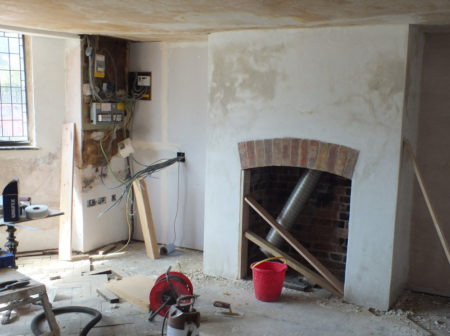
It’s a big area with more than one room and takes ages.   I’ve been scatting around the place doing bits on everything because drying times.    Here’s the chimney again after 2 coats base plaster, 2 coats repair plaster, then a bit of filler to tidy everything up.

At the time of edit I’m wondering if I can get it all finished and painted in time for my Christmas photo.  Get the fire burning and lean nonchalantly on the mantle that isn’t there yet.  One day left.  Sure to happen but the paint might still be wet.
plastered-fireplace

Bits of wood are excellent to use as corner formers.  Removing mock tudor had pulled the corners off the weird box in the ceiling that hides the top of the stairs.   A bit of thin ply marked with the line of the ceiling,  cut to shape and screwed to the wall was fab for quickly forming the corner.  The plaster pushed into the gaps also made the edges for the remaining plastering.
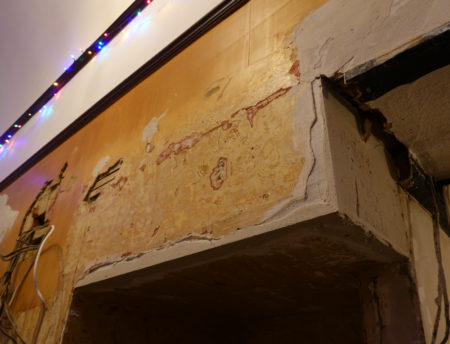
sharp-corner

I doubt I’ll get all the walls painted for Christmas, but the lights are up!

Plaster repairs in the ballroom ceiling

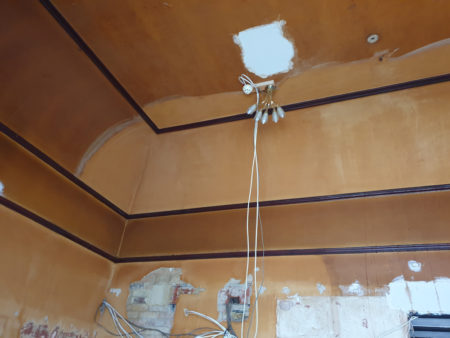
The were a lot of holes in the ballroom ceiling and they are slowly being filled with plaster.   The walls have been damaged quite extensively and will probably need a skim, but most of the brown coloured ceiling above is in good condition apart from a few holes.   The ceiling wasn’t brown originally – the colour is from a century of tobacco smoke.

Once the plaster on the ceiling is finished I’m planning the first coat of ceiling paint to brighten up the ballroom.  I’ll do the second coat when I start decorating.

plastering-progress

The walls below can’t be completely finished until the electrician has been, but I can save time later on by making them straight and getting some plaster on them.

For base coat directly on bricks I’m using a lime render similar to the one I used outside.  It goes on much more thickly and smoothly than the white lime repair plaster which is more of a skimming plaster.    I realised while applying this bit that small bit of (modern) plaster above doesn’t line up with the door jam.  Oops – will knock that off and extend the new plaster to the original a little higher.up.

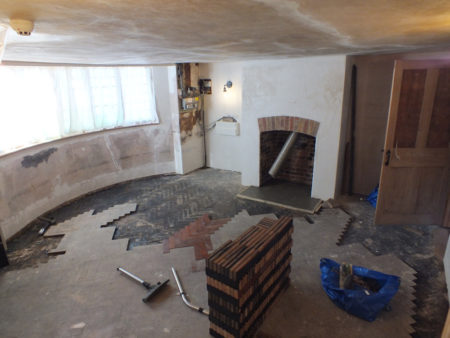
I found some rotten parquet at the bottom of this bit of this wall.   I’m hoping the rest of the concrete floor in the ballroom wasn’t laid over parquet because that would be really annoying.  But it is good to find out the main room was once finished in parquet like the snug.

base-coat

For the lath I’m using St Astier R50 Ultrafine lime plaster because I panic bought a few bags before lockdown.   It’s a skimming plaster intended to go over plaster or paint or whatever is there.   It is strong, sticky, and has a chemical set so it doesn’t crack.  It’s not exactly the right stuff for base coats as it can’t be applied thickly with any neatness.

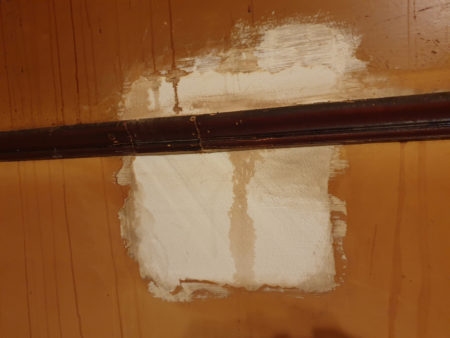
Most of the repair plaster repair is now close to the surface and just needs finishing.   This one was a fiddle as the picture rail had been cut away.    I spliced in a a bit of picture rail recovered from the chimney and the join isn’t noticeable from the ground.

base-plaster

I’ve decided to clean the ceiling using sugar soap before the final coat of plaster on the repairs.   I had thought the paint was gloss, but it seems the gloss was just the muck on top.

Applying the soap with a sponge on the ceiling overhead and scrubbing was physically exhausting and the next day was a recovery day.  I’ve been adjusting the process  – spraying and soaking the surface, letting the sugar soap soak, then just wiping off to reduce the effort and that has sped things up.

cleaning-ceiling

The entrance vestibule now has a roof.   the ceiling of the vestibule was once part of the false ceiling.   I cut the joists back but the ceiling is weak and the vestibule made the corner of the vaulted ceiling above inaccessible by scaffold tower.

I had imagined throwing a few loft boards on top would have been a minor job but it took a whole day.  The odd shape was one thing but a lot of time was spent routing joints to make the most of what I had after I found my stock of loft board wasn’t all the same thickness.

The new roof provides a good platform for painting this corner of the ceiling.

entrance-roof

There is not much plaster repair in this post because I find it really boring.  It’s day after day.   I’ve been building up repair plaster to just below surface level then doing the final skim with filler and using a great big drywall sander to get things level for paint.

It’s almost finished.   I’ve tried a bit of paint over the repairs and the repairs are not noticeable.    One day more and surely I’ll be able to at least paint the ceiling.

almost-finished-filling

Some methods to repair big holes in lime plaster

The beautiful vaulted ballroom ceiling has quite a lot of big holes caused by the false ceiling, and then by plumbers and electricians fitting things above the false ceiling.    I’ve been filling the holes to get ready for plastering.

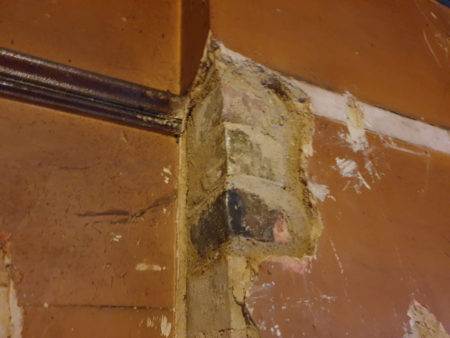
My favourite method is to use bricks.   This is a corner of the chimney which had been cut away to install a beam that supported the false ceiling.  There is no need to be neat as the bricks will be covered.

bricks-replaced

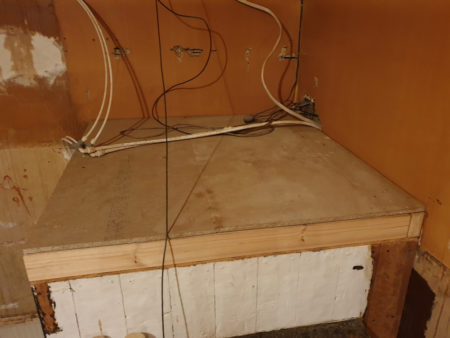
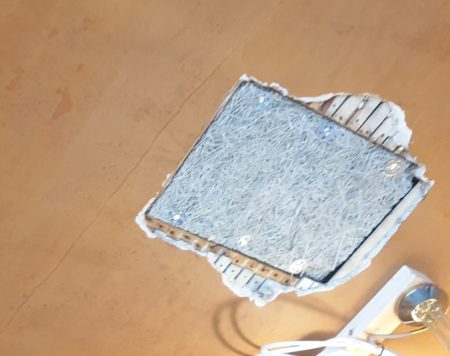
In the middle of the ceiling there was a big square hole which seems to have been made by an electrician for some reason. It lent itself perfectly to a square of woodwool board screwed to some 2 by 2 attached to the joists.

woodwool

I later tried screwing some woodwool board behind some lath on a smaller hole but the screws didn’t hold in the woodwool so that’s a poor approach.

It doesn’t matter much as it’s only a very small hole and the plaster itself will provide enough strength to hold itself up.  For a bigger hole there would be a need to attach some actual wood behind the woodwool to provide something to screw in to.

woodwool-above-lath

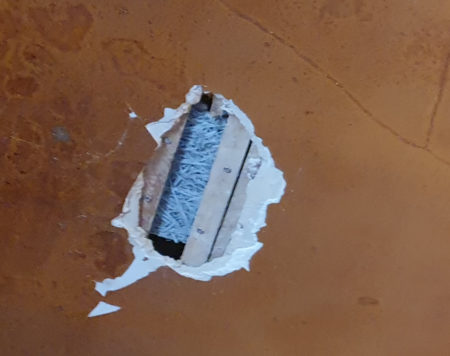
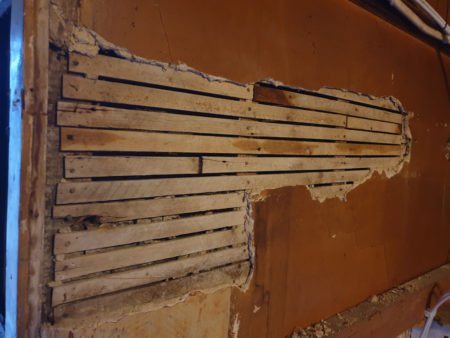
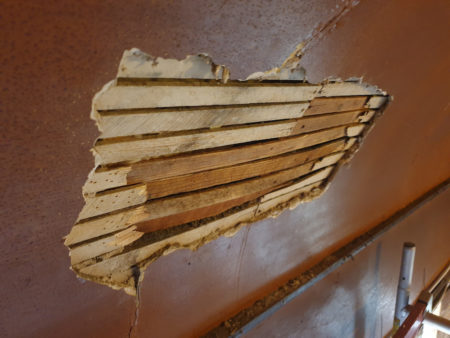
The edge of the false ceiling had been cross nailed to the lath supports using very big nails.    Removing the ceiling caused a lot of damage to the lath and plaster.  On this occasion after removing the loose plaster the supports were mostly exposed so I could just replace the broken laths with new ones the same way they were installed originally.

The lath is original to the house (it mostly came off the big I beam) and I soaked it in a bath for a few hours to make it expand before fitting it.   That way it hopefully shouldn’t expand again when it is wet by the new plaster which might otherwise cause the wall to bow.

lath-replaced

I have of course been botching too.    There are some awkward holes which would need to be extended significantly to get back to the joists.

I’ve tried exposing a couple of inches of the ends of broken lath and then attaching new lath to the old lath by cross nailing using lots of stainless brad nails.   The result seems secure.  But I’ve only tried it in one place.

laths-connected-to-laths

I’m doing quite well with the ceiling and have been doing the first plaster coat as I go along.   It’s been years and I’m starting to remember how not to apply plaster.  First rule I forgot for lime plaster or anything lime is to put as little water in the mix as possible.   Of course I started on a ceiling and I made a mess.

Exposing the 1920s Ballroom Ceiling

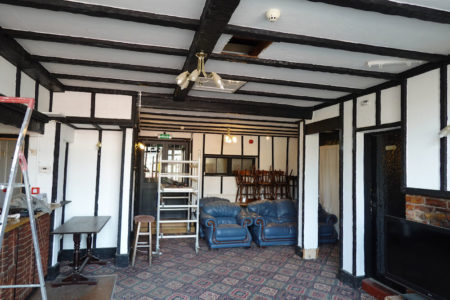
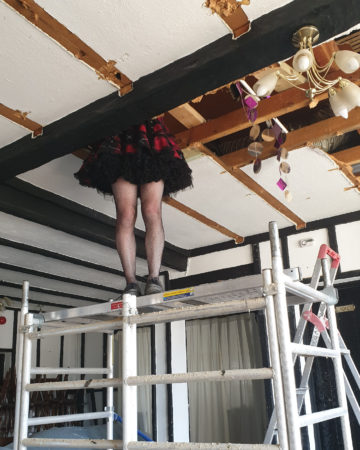
I love mock tudor as much as the next person, but I think sometimes it can be taken a little too far.

mock-tudor

Above the ceiling in the foreground is a well preserved 1920s vaulted ceiling and I’ve been careful to avoid running any services in there just in case I wanted to expose it again.    Exposing the original 1920s ceiling (as well as finding a slightly different balance for the mock tudor) is my plan for the next couple of weeks.

I’ve realised it will be a super project to keep me sane during the lockdown.

laicey-legs

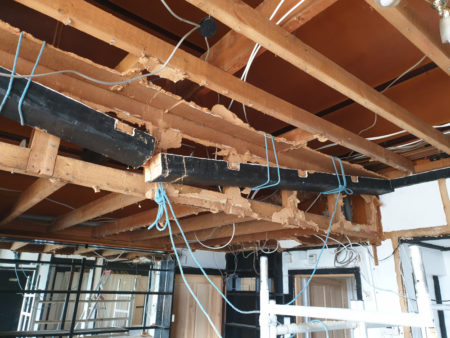
I’ve been unpicking the ceiling bit by bit.  It has been easy as the ceiling is nailed together and I have a crowbar and a big hammer.  With the boarding gone it is easy to see what is structural and in what order everything comes apart.

I had been a bit worried about the big beams which are made from 2 lengths of 6×2 pine nailed together so are quite heavy.    Chopping them in half then lowering them on rope worked really well and was safer than it looks in the photo!    Better to have no help as I wasn’t worrying about where anyone else was standing so could concentrate on me.
removing-beam

The main ceiling construction was nailed outwards at each end.    I found the most convenient method of removing the joists was cutting through one end with a reciprocating saw, then crowbar the joists from the central support.   Once those nails got to the end of their travel the joists started a slow and gentle fall to the gound with very little assistance and by the time they got to the ground they had extracted the nails at the other end by themselves.

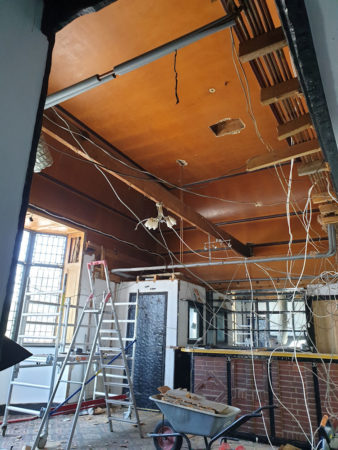
Some bits will have to stay in place for now to support pipes and lighting.    Normally I have a tidy at the end of the day but removing the ceiling was exhausting so I’ll tidy tomorrow.

celing-removed

It is very dark in there now.    I think the ceiling was once white but hasn’t been painted since 1920.   Pub tobacco smoke has caused it to darken.   A huge chandelier or two will hopefully brighten it up a bit.

I’ve had a sweep up and will get on with something else until I can get plumbers and electricians around to let me finish the ceiling.   I’m turning my attention to considering what sort of floor would be nice in a ballroom.   Of course the first photos that popped up were the Palace of Versailles and that was good inspiration.   I’m thinking more parquet.

Parquet Floor Level Sanding

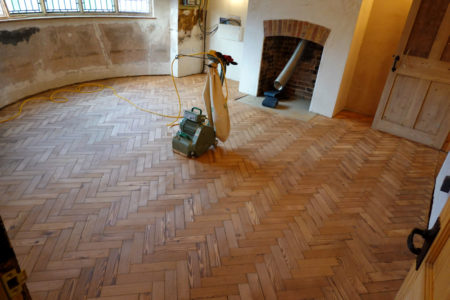
Who would have thought the parquet in the last post would ever look like this? – and it’s not even finished yet!   Callum Finlay spent a day using an edge sander to get all the new blocks to the same height as the rest of the floor.  The photo shows the subsequent rough sanding using a belt sander.

floor-sanding

I’m amazed at how little material was removed and that the new bits match.  The levelling will allow me to fit the skirting, then once I’ve finished decorating Callum will come back to do the fine sanding and finishing and make it look all posh.

For the rest of the year I’ll be… er… oops.  Next year things should be more settled and I want to get back on the case with the restoration and make more things more beautiful.

Parquet Floor Restoration

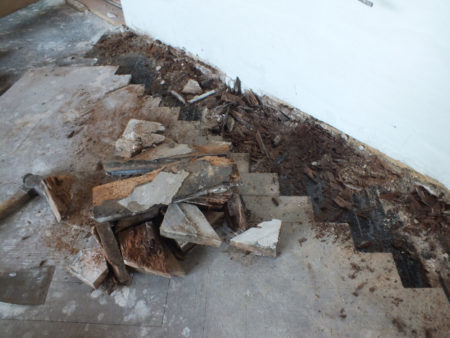
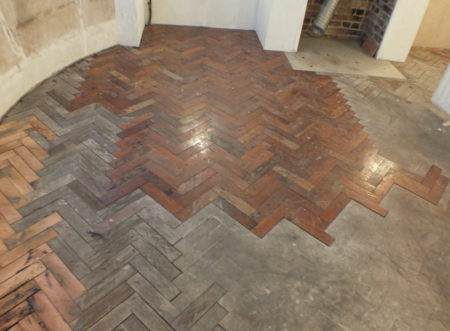
The snug has a parquet floor in pitch pine about 30mm thick which is very rare these days.    I guess it was laid when the new facade was built around 1920 and since covered with carpet.   It is lovely but wasn’t laid all that well. The bitumen adhesive makes a good damp course under the blocks but they mortared it into the walls instead of leaving a gap and some damp came through, notably where they built a car park 12 inches above the inside ground level.

It will end up being be a good 2 or 3 weeks of work and a bunch of money to fix the floor, but it is charming and one of the few original features remaining inside from the 1920s so I want to have a crack at it!

rotten-parquet

The car park was fixed with a trench, and I have cut a gap below the plaster to allow an air gap between the parquet and the walls which will be covered by skirting.

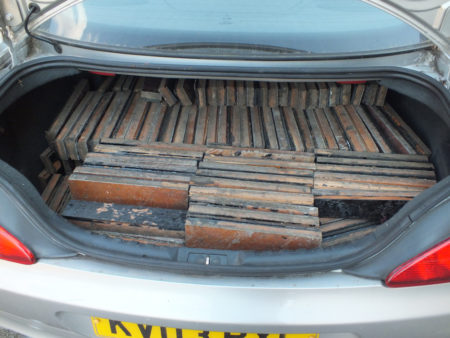
Much of my parquet was rotten but I managed to find some close to the right size on eBay that I could cut down on a chop saw.   My rate for cleaning bitumen off was about 2 square meters per day, sometimes with a Bacho 665 paint scraper and other times with a heat gun depending on the type of bitumen.

peugeot-parquet

This project has been going since June in bits and pieces.   Now all of the parquet has all been cleaned but remains of bitumen on the floor still need to be flattened with the paint scraper.   There are modern glues that can stick to bitumen but modern glues will be difficult to remove in the future so I’m still taking advice.

Apart from all that I’m almost ready to lay a floor!

snug-floor-lifted

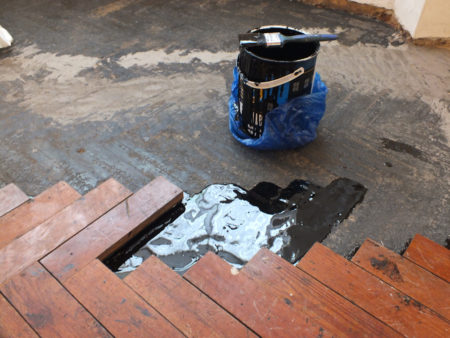
The low points in the floor were filled with Ardex 45 rapid, and I’m using Black Jack roofing adhesive to fix the parquet, buttering the blocks for good adhesion.   Both were recommended by the floor sander.  The roofing adhesive is nice to work with but takes weeks to set (heating the room helps).

The trick to laying parquet is to work to a string line.  If the blocks all line up then the gaps will be OK on the next row.  The wall edges take a long time as the blocks need to be cut to fit.

bitumin

It takes a surprising amount of time to lay parquet – two weeks to be exact.  I got fed up with it.   It didn’t help that I ran out of blocks and had to cut the face off some thin worn blocks then glue ply to the rear to bring them back to the right thickness.   I’ll try to get the room more finished before sanding and finishing.

parquet-laid

Snug Window Repairs

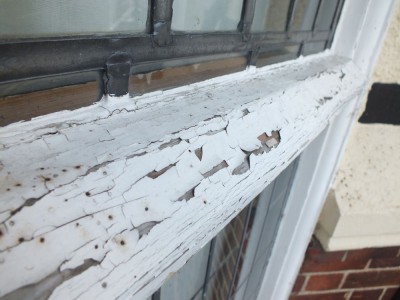
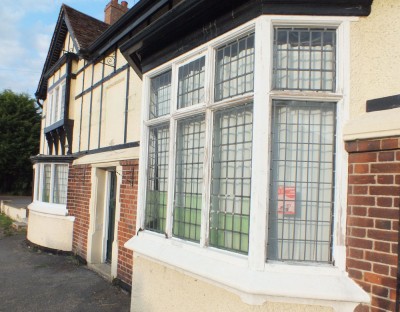
Slow updates – I’ve been in Sweden again.   I painted the front windows when I moved in 5 years ago, but it turns out modern oil based gloss paint is not UV resistant and the paint cracked after only a couple of years.  Problem is when you have cracked paint you need to remove it (and everything underneath) before repainting.

The front windows have very fiddly profiles and it took about 3 days to remove the modern paint with a heat gun.   Linseed paint is UV resistant and tends to dust rather than crack and just needs another splash of paint rather than stripping off, so I’ll be repainting in linseed so I can avoid doing any stripping ever again!

snug-window-stripped

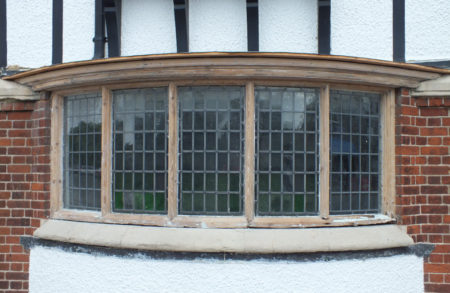
When I first moved in I thought the windows were beyond repair, but looking at them now I see window frames in really good condition.

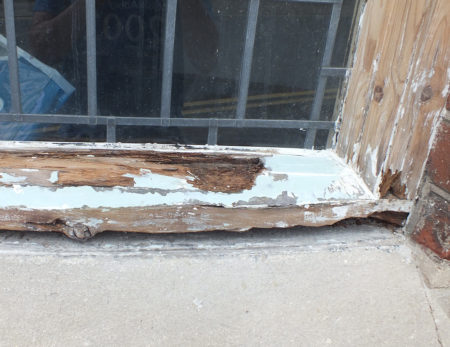
I guess the difference after 5 years is just confidence and knowing what can be done to repair them.  There is just one sill that needs to be replaced and a couple of mullions that will need some new wood letting in.   I’ve got a bunch of photos of the rotten sill and they are all in focus but appear out of focus.  The camera has seen much worse and I’m not sure why it is objecting now.

rotten-sill

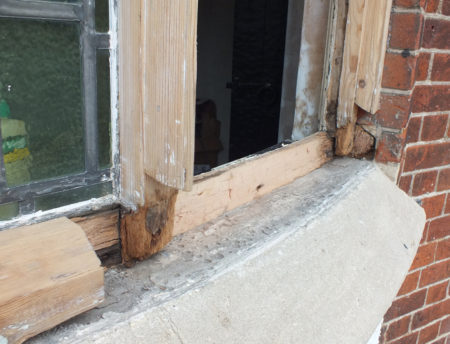
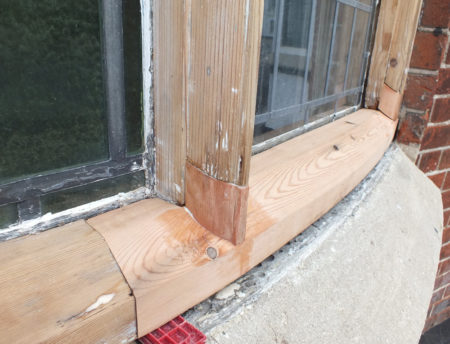
Maybe the camera was right.  The sill was quite rotten and I ended up removing it right back to the inner face of the window.  The rot in the mullions has been cut out at an angle to allow water to drain when the finish cracks.

That committed me to the scary bit – it would be my first time replacing a window sill, and this one is in a curved bay which complicates things.   I practiced on modern wood before attempting the repair.

sill-removed

The new sill was made from the sill of the original sash removed from the back bedroom – 100 year old wood is much more durable than the stuff available today and also much harder to cut.

The curve was cut with a bandsaw and the taper added with a planer.   Repairs to the profiled mullions were cut with the bandsaw.  A new box of chisels was involved too.   I’m quite pleased with myself – some tidying still needed but it looks the part.

new-sill

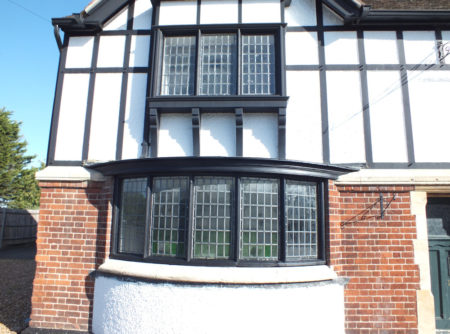
The gaps and cracks were filled with linseed putty and the first coat of linseed oil paint is looking fabulous.   I went for black to match the rest of the woodwork on the facade and to balance the top-heavy look of the half timber upper floor.  I prefer it to the before photo of the facade here, but it doesn’t seem quite right yet.

window-painted

I still need to fill around the window with lime mortar, then paint another coat or two.   Also the lead roof still needs to be fitted.  I’ve been stripping the inside of the window on and off as the profiles look prettier without 1mm of paint, but that will be a fill in job as I’m determined to work outside while the weather allows.

Plastering the Snug

I’m sweating away in the heatwave doing plaster repair in the snug.   There is not much to see in the photo – a lot of the snug was back to brickwork behind the late 20th century wood paneling and the leak from the bay window and the electricians took a bit more off.   I’ve patched that all back to level, but the Georgian plaster on the other walls is in poor condition having been messed with and will likely need a skim.

The ceiling is remarkable.   It has an inch of plaster with straw reinforcement.   It is probably the oldest and most bendy bit of plaster left exposed in the building so I’ll not mess with it apart from filling in some of the larger gaps and then lots of lining paper.

snug-plaster-started

I ran out of lime plaster and took a break to paint the upstairs bedroom.  After the new plaster arrived I skimmed 2 walls and have a nice flat and smooth finish.  I used Ecomortar R50 ultra fine plaster – it is lime based with some additives to help it stick to different backgrounds and something to make it set in a couple of hours to avoid shrinkage cracking, but it still seems reasonably breathable.  Turns out to be a lot quicker to skim than to patch.

snug-walls

Working around the room the fireplace is next.   The original plaster was quite thick so the scratch coat will take a few days to dry before I can skim over the whole fireplace.  Next is figuring out how to plasterboard the stud wall with the electrics in the way.

fireplace-scratch-coat

This is a bit more like it.   I didn’t quite get the curved edge for the front of the fireplace while plastering (I have a cunning plan for a bit of apparent craftsmanship in the snug).  The latest idea is using a guide propped up by bits of wood together with a concrete edging trowel with some spacers glued to the edge.

To the left of the fireplace the wires in the cable entry for the new consumer unit are propped up while glue for the slate insert dries.  I’ll wrap some intumescent pipe wrap around the wires.   I don’t want any electrical fires getting into the void behind the plasterboard as it is ventilated to the roof space to keep the external timber frame dry, but the inside stud walls are all filled with the horribly combustible insulation they insist on these days.  The stud wall is there for the same reason as the upstairs stud wall – I want to be able to replace the common bricks used outside to replace the bottom of the timber frame with some nicer ones.

fireplace-plastered

Finally looking in the same direction as the first photo and almost ready for decorating (apart from to the right of the window where the old electrics will have to remain until the other side of the house has been rewired).  I’ll paint directly on the plaster behind the new electrics – it is mean to wallpaper behind consumer units!

snug-plastering-finished

I’m back – with a beam

After getting home it took a while to build up the enthusiasm to start again.  I burned out a bit in Finland and lost a couple of months getting myself back together.

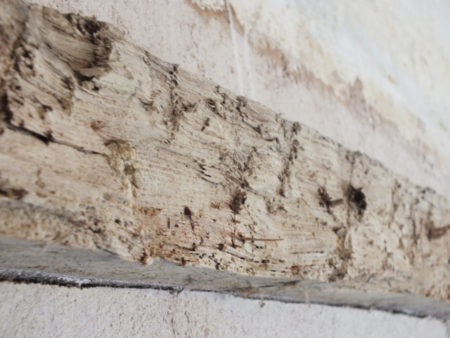
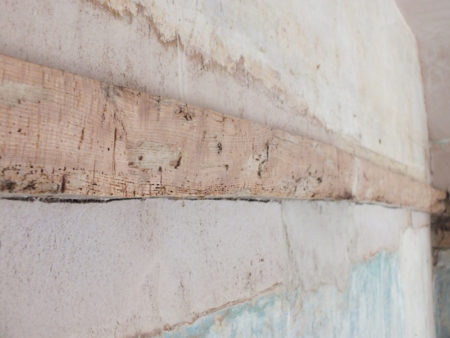
I’m starting on a bedroom.  There were some beams sticking out of the wall left over from the 17th century structure which had been plastered over and then painted gloss black.  I thought they would look nicer exposed, but one of them had been really roughed up to take the plaster.

beam1

The wood was really tough!  I ended up spending a day with a very sharp hand axe to take the surface off.  With some sanding (after the photo was taken) to reduce the axe marks it isn’t looking too bad.   It isn’t the prettiest beam in the world but doesn’t look quite so objectionable.

beam2

More soon.   I’ve been plastering!

Crittall Frame Restoration

Following on from the last bay window post.  It seems a bit mad to be restoring Crittal windows in a building that isn’t listed and I don’t have to.   The reason is I like the faceted effect of the leaded glass and don’t want to replace it with double glazing.   I am under building regs instruction to improve thermal performance so will have to fit secondary glazing however I mount the leaded glass.

I’ve had the Crittall frames sandblasted.   BBS of Bedford did a super job.  Anyone planning to do this should first remove the handle first as it turns out to have brass fittings under the caked on paint.  The hinges are also brass.

shotblasted

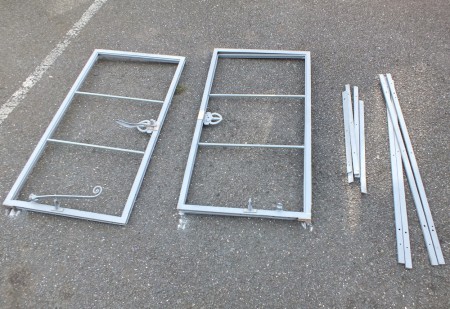
The windows have a fascinating construction.  The frames themselves are brazed together, then the brass hinges are screwed on, then the bars to the right of the photo which create a flat external mounting face screwed from the inside of the frame.

The frames weren’t that bad – only the bottom rails were starting to get a bit thin in places.

rust

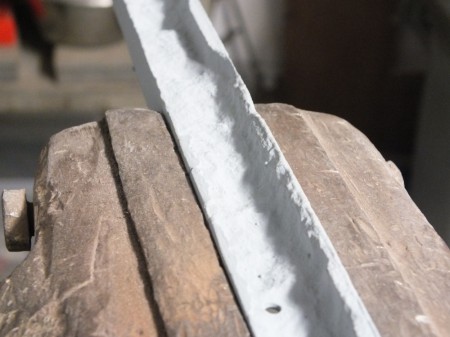
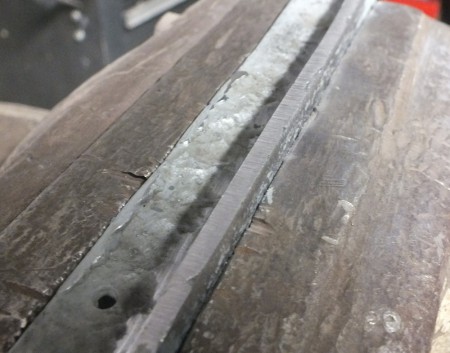
The frames from 1910 are mild steel so can be welded.  I built up the edges with MIG then ground down to create the original profile. I think the edges need to be welded as they will be sensitive to knocks, but everything else can be done in car bodyfiller.

I’m using Bilt Hamber Electrox primer which is 90% zinc by weight.  I keep nearly dropping the pot as it is unreasonably heavy.  It offers some cold galvanising protection which I have found to be very effective on previous car projects, but it does need the shot blasted surface to stick well.

welded

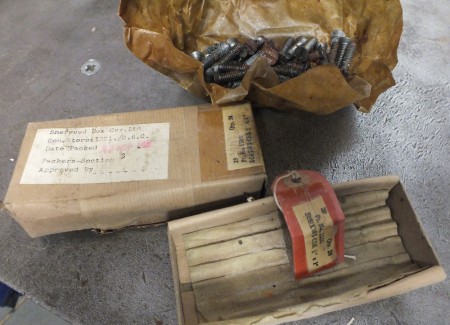
The screws holding the windows together are 1/4 inch Whitworth.I bought some old stock screws from eBay still sealed in 1945 packaging.   Some had become a little rusty but there were enough good ones for what I needed.

screws

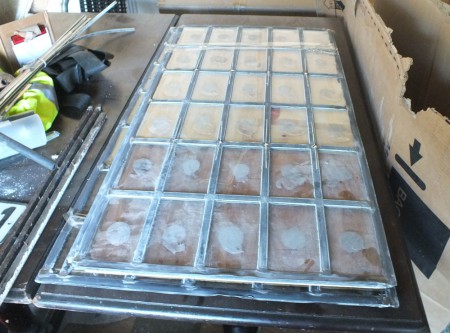
The leaded glass was rebuilt by Fraser of Tempsford Stained Glass who did a fantastic job.  Most of the edging needed to be replaced, a couple of glass panes were changed, and he soldered in some new wire ties to attach to the glazing bars.

glass

The frames and glass are going up to Sheffield and a replica wooden frame and bay window timbers will be built around them. (Because I liked the original frame profile too.)

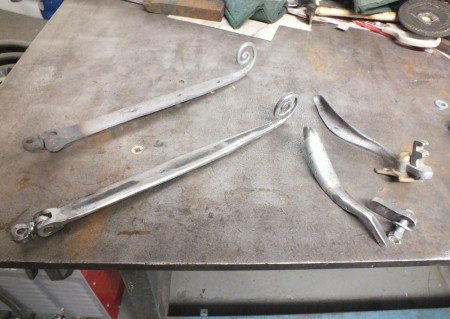
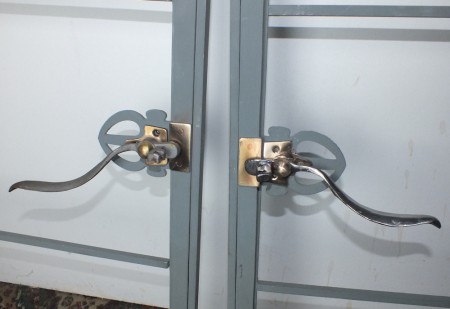
The handles and catches are nice too, but I was missing one of each.  Rather than do any lime on the hottest July day on record I’ve started to make up some new ones. The handle isn’t finished yet but I’ve done the tricky bit.

window-hardware

Later here is the (nearly) finished handle.   I’m quite pleased with it.

new-handle

Drain Flaunching

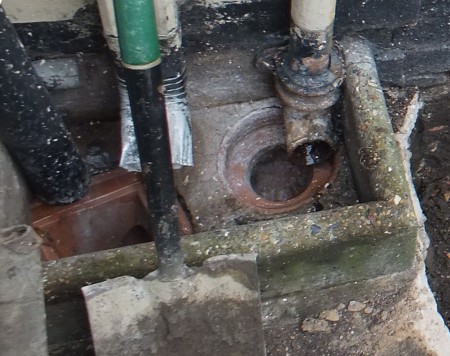
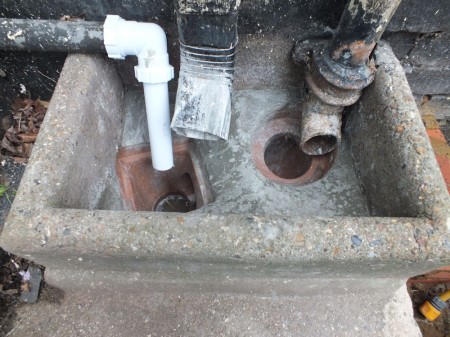
The damp in the kitchen walls is off the scale of the damp meter I am using. One of the many causes was that the flaunching in the drain outside the kitchen had failed due to water falling through misaligned pipes wearing the mortar away.

The sink drains via a tortuous route into the grey outlet at the top left of the photo, then the water falls in the gap (just to the right of the spade) and back through the kitchen wall just underneath the sink.

flaunching-before

The builder next door suggested a strong mix of 1:1 cement and sharp sand, and tapping the cement to bring the ‘fats’ to the surface to make the cement smoother and stronger.  He gave me half a bag of cement and some sharp sand.   It occurred to me later that flaunching around drain pipes without much access wasn’t necessarily the easiest job for my first time working with cement (I’ve never owned a house before).  But it turned out OK.  It was splashed with water shortly after it was done which is why it is a bit blotchy.

flaunching

I still need to re-align the drain pipes.  The modification to the kitchen sink drain will be temporary.  Kae has decided to move the kitchen into the barn.

Paint Stripping From Brick

Quite a few of the walls have been painted in the past.  There are at least 5 layers of paint, and the top 3 are modern plasticy waterproof paints.

Waterproofing a brick wall is probably a fabulous idea so long as the paint finish is perfectly applied and then never damaged.  In the real world you miss a bit, then want to screw a light on the wall and nail a few wiring clips in.  Also it starts failing after a couple of years with weather and sunshine.  Water gets in and can’t get out so the bricks and mortar are damaged by frost. It isn’t sensible to re-point lime mortar on top of waterproof paint.

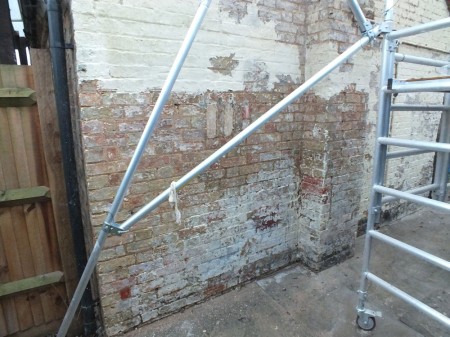
Worse, in the modern world people dry line the inside of the wall and fit insulation.  Imperfectly waterproofing both sides of the wall would cause all sorts of trouble, yet that’s exactly what building regs want me to do in order to insulate to the latest regs.  I’m going to be bad and make both sides of the wall breathable.  So I need to remove the waterproof paint.  Here is work in progress:

paint-stripping

What a pain!  I did some tests last year and decided on Solvistrip from Stippers of Sudbury.   It works well on my masonry paint but is slow work.  The trick is to trowel it on as thickly as possible with a paint brush, then brush the drips flat after about half an hour,  Never let the outside face of stripper dry out – it always needs visible stripper on the outside else you will be trying to get rid of sticky gum.

After an hour or two gently remove it with a jet washer, taking care not to point the jet washer towards anything you don’t want to be splattered with paint.  Point the pressure washer at a slight angle downwards and work down and the paint is pushed off towards the ground.   I don’t think a hot water pressure washer is necessary, though it would probably be much faster and reduce the number of stripper applications.

It comes off without too much effort (too much effort with a jet washer will take the surface off the bricks), but only removes a few coats at a time. I’m getting better at it and removing it in 2 applications.

I’ve been on the job for 4 days now, but only recently found a way of doing it that works for me.  More stripper on order and another 4 days should see the gable done.  Once that is done I can start rebuilding the chimney which has a triffid growing out of it.

Never again for paint stripping – I got someone in to do the rest of the house.

Retail Therapy

I went through a bit of a low point recently.

Building regs treat a change of use much the same way as a new build.  I’m looking at over £40k of insulation, secondary glazing and fire doors and that was half my budget for the whole project.

Secondary glazing and nice fire doors cost money, but it’s at more than the same again for knock ons like removal of failed waterproof paint on the outside and lowering ground levels to make insulation feasible that make it expensive.

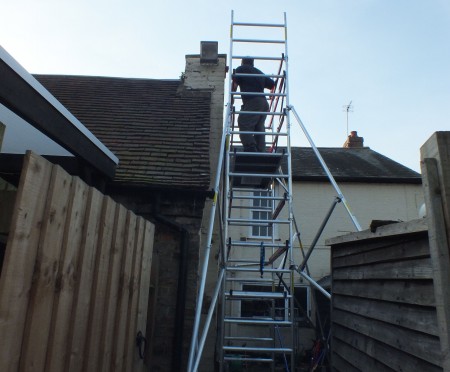
But I’m fine now.   I spent £3500 yesterday on shiny things.  The first arrived this morning.  A 9.4m scaffold tower!

scaffolding

I only have it up to 6m at the moment.  If I get braver with heights I’ll go to 8m to sort the blocked off chimney that is splitting due to damp from not being vented.

Just at the moment I’m removing waterproof paint with a paint stripper to allow the walls to dry out before adding insulation.

Ivy on Barn Roof

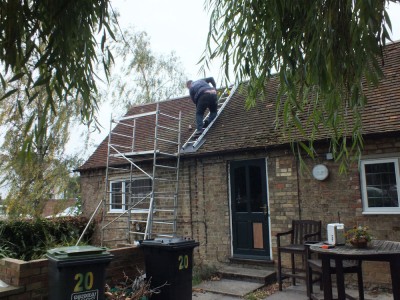
Clive was around this week and removed the ivy from the barn roof.  The tiles were generally in good condition, though the 50 reclaimed ones we bought were all used up.  The gable of the barn has been built on top of the garden wall.  I think the ivy was originally planted to disguise this.

We nearly had to withdraw the planning application last week when it looked like we would have to pay a second Section 106 tax plus associated legal fees (maybe £10K total), Fortunately that seems to have been resolved now.  Being officially a commercial building causes a lot of problems so we’re aiming to push to start making the place residential under the existing plans.

scaffold-on-barn

barn-wellsfield

This is how it looked before:

ivy-original

Windows

We didn’t get to speak to the Conservation Officer in the end, but the Planning Department seemed generally happy about our application so we’ve updated the plans with their recommendations, had the dates changed on the various surveys, and have put in a proper planning application.

It was helpful to have the extra time to think about the design – the pitched roof replacing the flat roof looks much prettier, the barn/function room will now be a medieval banqueting hall instead of a garage, and Kae has grabbed some extra space for the kitchen.  I’ll post plans on here when they are scanned.

Meanwhile I’ve been busy on the exterior woodwork.  The windows were painted with modern paint – you can tell because the finish has cracked.    I want to paint the windows that we aren’t going to replace before the winter.  They are in a state and are taking a lot of time to prepare, but the wood is still reasonably sound.

window-frame

I’ve been putting this window off – it’s the big one at the front where the double height room used to be.  It’s 10 feet wide by 7 feet high and is fiddly.  (For metric conversion see how small the front door is by comparison.)  The bank holiday weekend should hopefully have it finished.

window

Rot in the Snug

Kae is in France this week, and in the absence of anyone sensible around I decided to do some decorating. Though one thing leads to another…..

snug-stripped

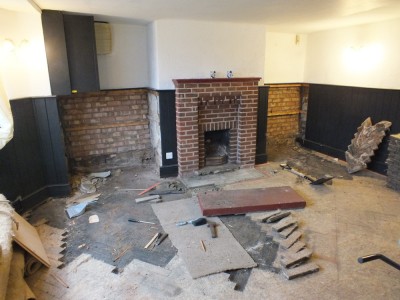
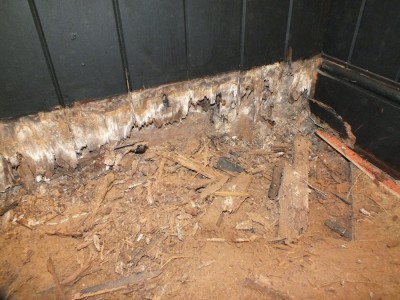
The problem was rot.  Initially the term dry rot was bandied around but it seems it was good old-fashioned wet rot. Under the carpet in the Snug there was some lovely 1920s parquet flooring. Unfortunately the ground level outside is about 12 inches above the floor level inside and the far end of the room has been damp for years. The parquet floor and the later wood panelling had crumbled away and needed to be brushed up.

dry-rot

The rot appeared to be confined to the area around the end wall and fireplace. I had intended to remove all of the parquet but moving further into the room the parquet floor appears to be in reasonable condition (apart from maybe the bay window area). I’m in two minds whether to restore the floor or recycle it on eBay.

Before I keep it I’ll need to find a solution for the damp problem. For now the rotten bits are on my skip pile and I’ll rest the carpet back on the good bits. The missing bits will leave the structure exposed to try to dry it out.

I ended up restoring the parquet.

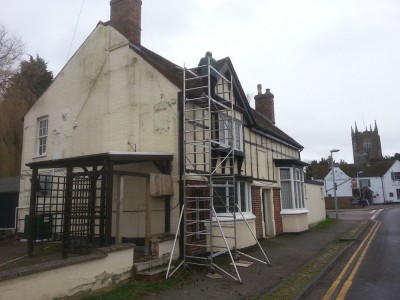
Scaffolding

The roof isn’t lined, so water backing up behind the moss in the gulleys had been finding it’s way inside. The upstairs room fronting the street had some water damage. Clive removed the moss with a broom taped to some waste pipe.

scaffolding