Author Archives: malcolm

Cast Iron(ish) Grating

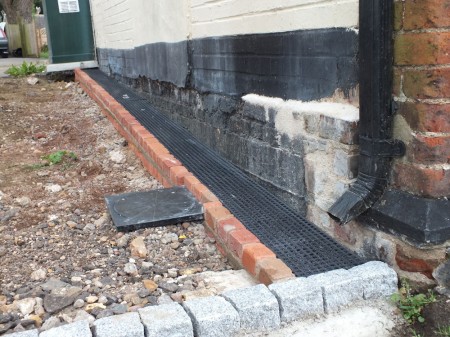
A while ago the builders next door dug a trench around our house to make the exterior ground level lower than interior floor level.  Previously there was a French drain but that didn’t work, so the plan is to leave the trench open and cover with a grating.

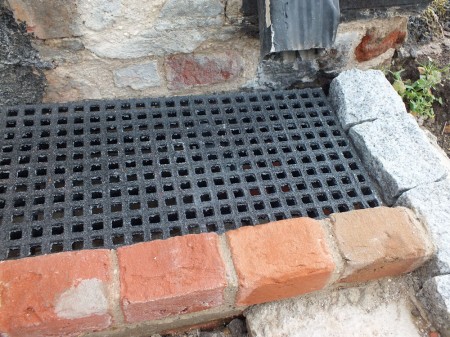
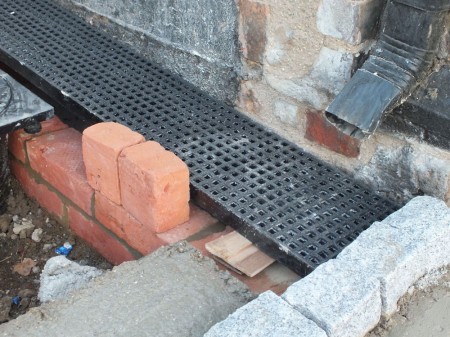
A cast iron grating would be lovely but the quote was £5,000.  I went for a fibreglass grating that looks much the same from a company called Fibregrid.   It looks excellent.

grating

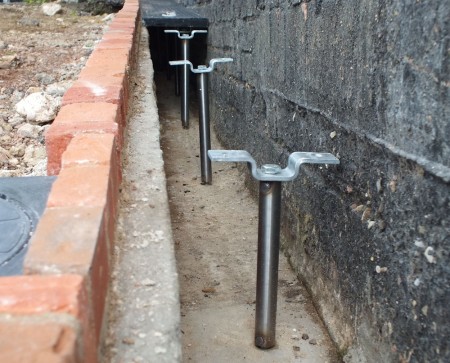
The grating is supported on one side by the retaining wall.  I didn’t want to bolt it to the house wall on the other side for fear of trapping water.  Instead it is supported on stainless steel tubes screwed to stainless threaded rod which might eventually be resin fixed into the concrete base.

grating-supports

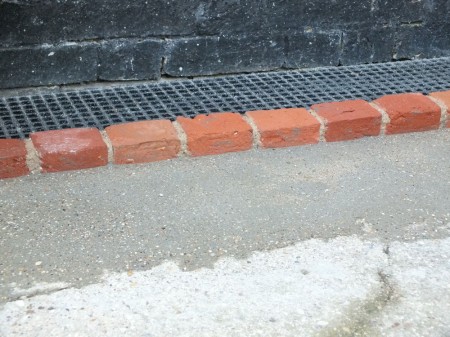
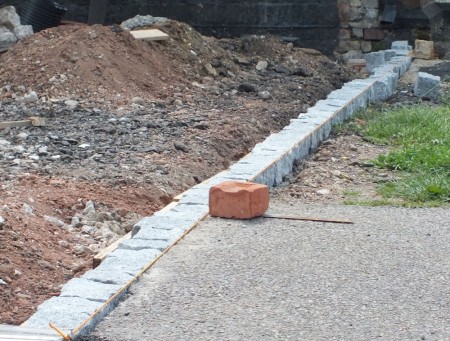
My bricklaying is getting better.  The edging is quarter brick on end.

grating-close-up

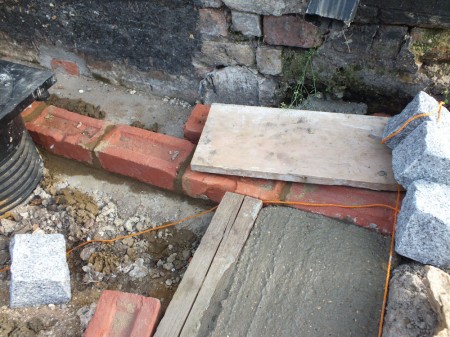
With the edging in I can fill up the hole behind the retaining wall.  This will make it much less risky to exit via the kitchen door.   Only the driveway to gravel now.

concrete

A lot of this work will be adjusted in a couple of years time when the garage is built at a much lower ground level. It’s nice to be able to practice. (Edit from future me – ground levels are just fine when you have a trench and I like the brickwork.)

Proper Real Granite Setts

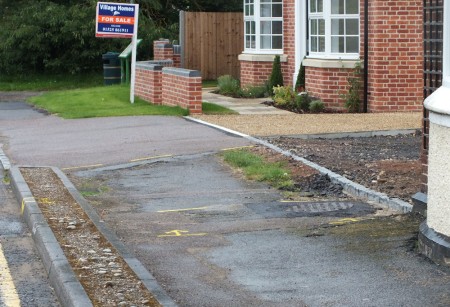
All of the planning conditions have been discharged so we can make a start!    First on the list is the driveway which needs an edging before the kerb can be dropped at vast expense.  I’ve gone for granite setts.

I’m new to building work, but books, the internet, and people have been very helpful. Here is my first brickwork since a day at a technical college around 25 years ago.  Also my first concrete foundation to the foreground, needed because the ground had recently been dug up in the area.  My first re-pointing is coming up soon on the wall in the background.

new-brickwork

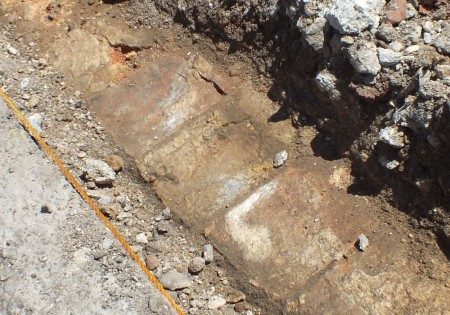
We found the original brick setts about 6 inches below the current ground level.  They look similar to the setts around the concrete patio to the rear of the house, but much less eroded.  The 6 inch slope up to next door runs against the slope of the road and is a constant pain to work with.  The drive will need a bit of trickery to make it work.

original-setts

Most of the granite setts went in today in very hot sun.   The wiggly ones at the far end aren’t finished yet.  The wall needs pointing and the cover for the drain at the side of the house has arrived and needs figuring out.

setts-installed

There is a lorry coming to pick up a skip in a couple of days so a mad panic to put a bit more concrete in to support the setts (as strongly recommended by both the builder next door and the one across the road).   If I were to have planned ahead I would have pressed a bit of gravel into the concrete.   I don’t have the gravel yet.  I can see that being a pain.

concreted

My first lime pointing went OK, though I’ll remember next time not to wet the lime so early as I’ve also lime washed the wall.  The big hole at the bottom will be filled with cement to help direct the gutter into the drain without going via the snug.

I’m getting better at building walls.  The one at the bottom left of the photo isn’t straight but the mortar and pointing went better this time.  I have a book on bricklaying but haven’t read it yet.  Just need to figure out how best to fit the (almost) proper real cast iron grating.

fibregrid

The dropped kerb guy came to do another survey this morning.   The first quote was over £4000 for dropping 5m of kerb, so we’re aiming for closer to 3m now and have set the level of the setts to avoid any work either side.

driveway-marked

That’s all for the next month or so.  Busy!

Turf, Rain and Ducks

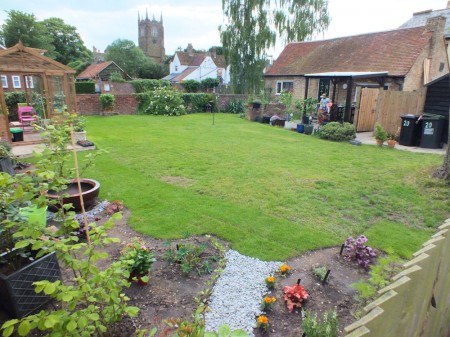
There was a ring around the Cyprus tree where nothing but weeds would grow.   Now that the Cyprus has been replaced by a strawberry plant we’ve removed the pile of needles, added a tonne of top soil, and are going for grass.   There are other huge areas of lawn to patch in at the same time.  The grass to the right is new turf we laid on Friday and it matches well.

turfing

We got only so far on Friday.  The rest of the bank holiday weekend was good weather for ducks.  The turf turned to mud so it’s laid out on the driveway waiting for next weekend.   Oddly we now seem to have some ducks.  They arrived on Friday and are still here on Monday.

ducks

The following weekend the ducks are still here, but only one at a time.   We think they are looking after eggs.

The weather dried up and we finished the turf on Friday.  Kae has added some very creative planting and the garden now looks fabulous.

turf-laid

The planning conditions look like they have all been approved. We’ve got a great planning officer.

Lawn Roller

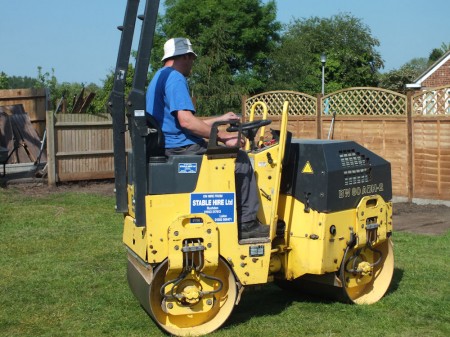
Next door hired a roller for the weekend, but finished their driveway by Saturday morning.   We borrowed it to roll the lawn which had been very tufty underfoot.

It worked – the lawn is now much more level.   Hopefully the grass will survive.

garden-roller-2

Greenhouse

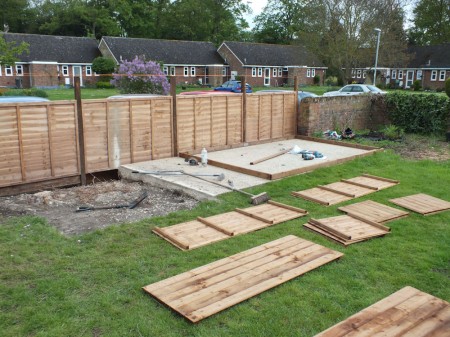
The remainder of the greenhouse arrived this week, but as the weather was not looking good first thing Saturday morning I bought a cheap concrete breaker and dug up the ugly part of the concrete slab.

greenhouse-base

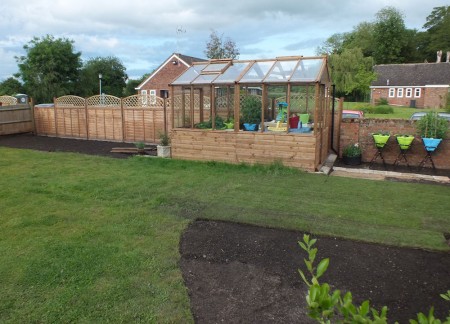
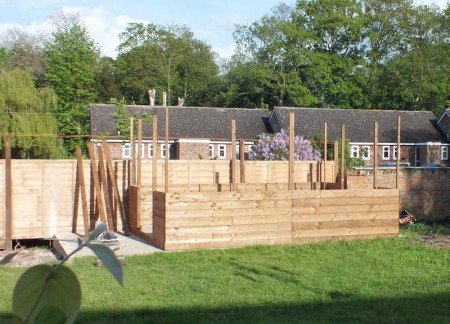
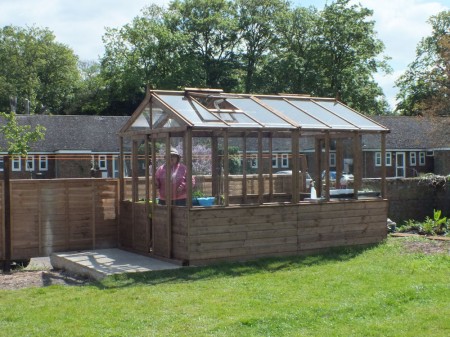
With the skip full and the weather nicer we started assembling the greenhouse on the remaining part of the slab after lunch.  The slab is in a perfect position to have sun all day long.   We gave up at 18:30, both exhausted from moving all that concrete.

greenhouse-walls

The concrete moving caught up with us on Sunday. 🙂  1.5 days in the glass is in the sides and the roof started.   The instructions are terrible so we’re making it up as we go along from here.

roof-started

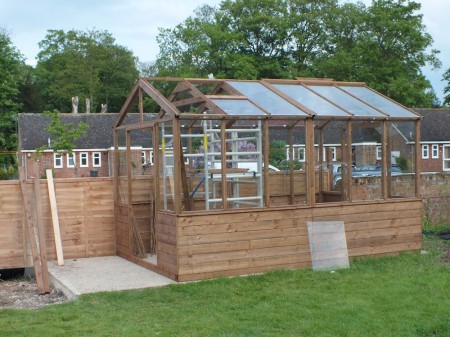
2.5 days in and the roof glass is mostly in.   It takes trained professionals 2.5 days to erect the greenhouse so we’re only a day out.  The scaffold tower base was really handy for installing the roof panels.

greenhouse-roof-glass

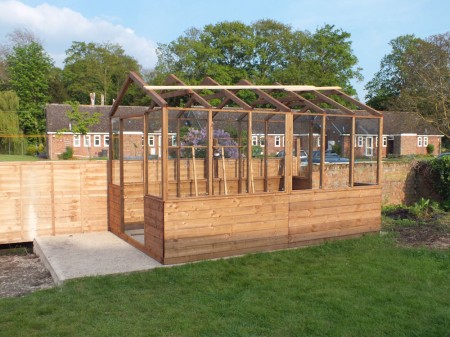
It took another day to finish the greenhouse.   I haven’t seen Kae since – I think she’s moved in there.   I still need to make some staging and fit some guttering to the rear where it drips on the fence.

greenhouse-finished

Next job is to finish the fence.  From there driveway then  finally the kitchen!

Drain Flaunching

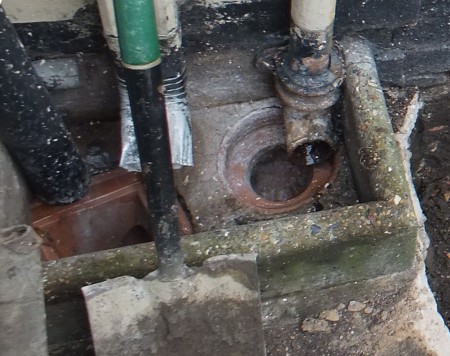
The damp in the kitchen walls is off the scale of the damp meter I am using. One of the many causes was that the flaunching in the drain outside the kitchen had failed due to water falling through misaligned pipes wearing the mortar away.

The sink drains via a tortuous route into the grey outlet at the top left of the photo, then the water falls in the gap (just to the right of the spade) and back through the kitchen wall just underneath the sink.

flaunching-before

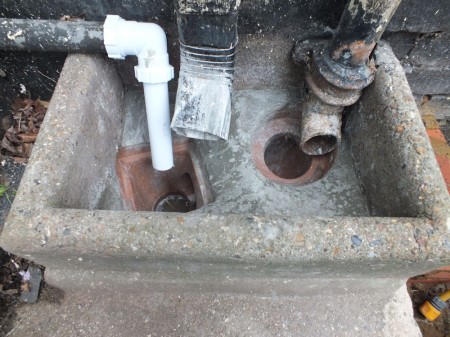
The builder next door suggested a strong mix of 1:1 cement and sharp sand, and tapping the cement to bring the ‘fats’ to the surface to make the cement smoother and stronger.  He gave me half a bag of cement and some sharp sand.   It occurred to me later that flaunching around drain pipes without much access wasn’t necessarily the easiest job for my first time working with cement (I’ve never owned a house before).  But it turned out OK.  It was splashed with water shortly after it was done which is why it is a bit blotchy.

flaunching

I still need to re-align the drain pipes.  The modification to the kitchen sink drain will be temporary.  Kae has decided to move the kitchen into the barn.

Another Unfinished Fence

I submitted a form to discharge the planning conditions last weekend.   It takes ages to decide on which bricks and tiles to use.   In the end I just picked some but have changed my mind already.   We also have general agreement with building regs about what we need to do as part of the change of use.   Things might start happening in a few months!

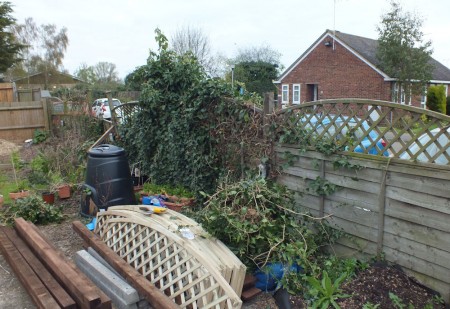
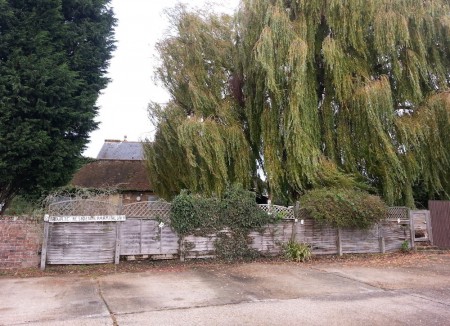
Meanwhile the fence at the back of the garden wasn’t in very good condition.  It turns out 2014 was a very bad year to order a new fence.  Supplies of fencing dried up after the storms in January so the new fence took a while to arrive.

old-fence

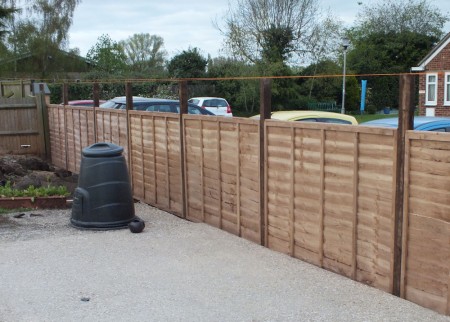
We started putting in the new fence this weekend.  It’s maybe 4 inches higher than the old one which had slipped a bit and was generally falling down.  The increased height is just enough to hide the top of the cars that started parking behind it after the messy willow was trimmed.

new-fence2

Kae did a fabulous job cleaning the concrete slab ready for the greenhouse which was to be a project for Easter bank holiday weekend.  But unfortunately they have so far sent only half a greenhouse.

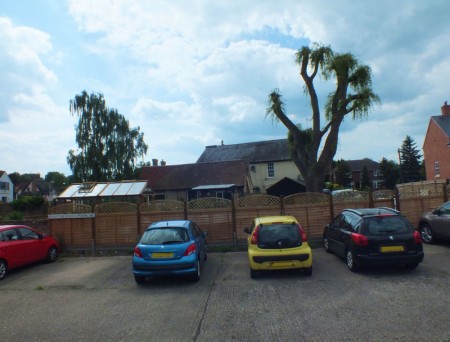
7 weeks later at the start of June the fence was (nearly) finished.   The diminishing roof lines of the house, barn and greenhouse work well from the main road too.

new-fence

Here is a before photo from November 2012.  It’s a parking area for the Wellsfield bungalows but nobody used to park there because of the tree mess.  Neighbours are much happier now.  They have suggested the willow could be cropped a little lower next time – it doesn’t seem to have any trouble growing back.

original-fence

View From Church

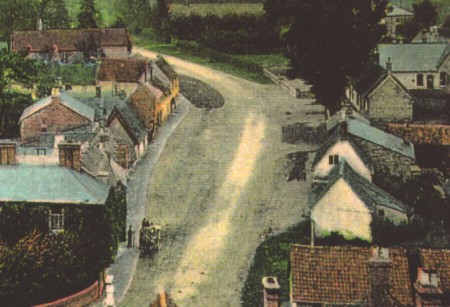
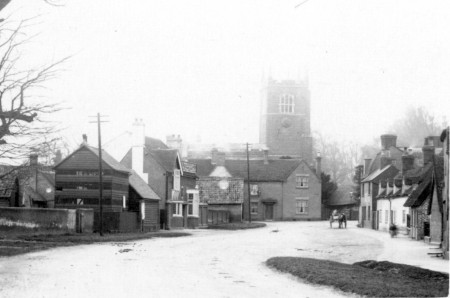
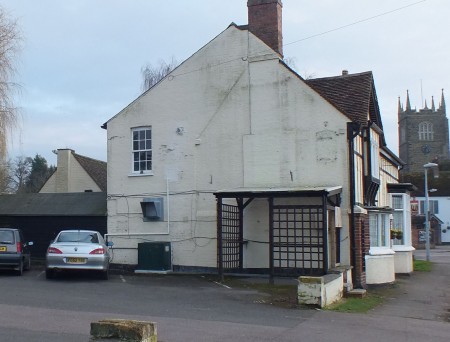
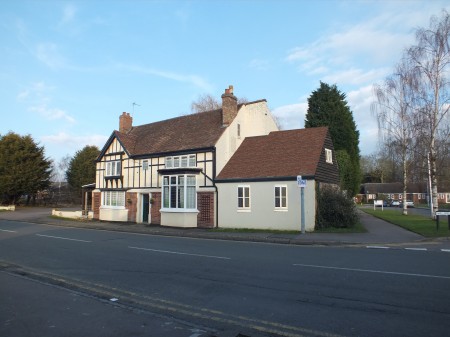
Colin from blunham.com sent photos of the Salutation taken from the church tower.   This time I’ve overlayed the photos and cropped them to the same size.   They show how the house was extended sideways and upwards in around 1910 and a previous pitched roof extension in the foreground removed.  Also they show a flat roof toilet block assumed to date from the 1960s.

The first is a coloured postcard dated circa 1900.church-1900

The second photo was taken by Colin in 1987.
church-1987

The gable was painted (in magnolia!) after 1987.   I had assumed the wall on the flat roof area looked ugly because they used inappropriate materials.  A closer look suggests they made a lot of effort to use hand made bricks and to match the gable.  The wall only looks ugly now because the gable was painted later emphasising the flat roof extension.

The wall in front of the flat roof extension has a bend in it directly below the window.  The bricks to the left are a different colour.   I’ve not figured out yet whether the bricks are part of the extension visible in the first photo, or if they are part of the garden wall that may have replaced it.

Lowering Ground Levels

Just over a year ago I posted about rot in the snug.   I think the problem was due to internal floor levels being up to 300mm lower than external ground levels.  I was thinking about putting a proper French drain in.

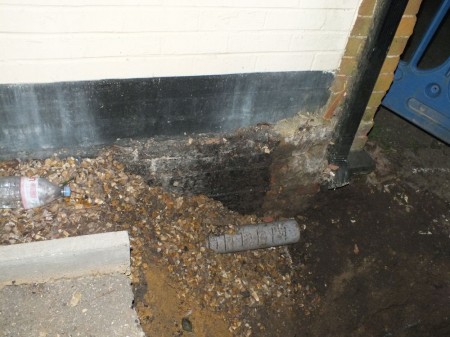
It turns out there was already a proper French drain in place and the plastic pipe dates it to fairly recent, but it was completely clogged up with dirt.  Another solution was needed.

french-drain-pipe

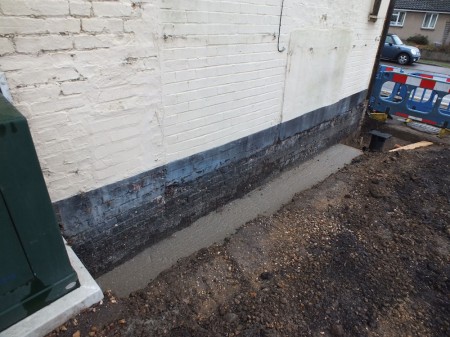
We dug out the gravel from the French drain and a bit more soil, and put a concrete drain in the bottom with a bit of a slope.  The original French drain emptied into a soakaway which was also blocked so we cleaned it out and replaced the pipe.   Water doesn’t puddle in the trench and it’s 150mm to 200mm below internal floor level which should help the snug dry out.

concrete-drain

Next on the job list is to build a short retaining wall to support the car park and fit grating on top to stop willow leaves from falling in.  The trench will be ventilated to keep the walls dry, and should be reasonably easy to clear out when it fills up with muck.

An Edwardian Facade

Colin from blunham.com hosted a photo evening at the village hall a few weeks ago.   He has collected a huge number of old photos of Blunham, some of which you can see on his past and present page.   There were many photos of the Salutation that I hadn’t seen before and Colin has sent them to me.  Many many thanks!

The Salutation is (or mostly was) a very old building.   The first landlord occupied the place in 1646 according to Bill Exley’s research and the local council records. It appears to have started off as a timber framed building with 2 rooms upstairs and 2 rooms downstairs. It was extensively rebuilt, mostly by Victorians and Edwardians between 1850 and 1910, and now the only structure that might be original is in the left side of the house furthest from the church.  Another original beam might have migrated to the later barn – there is a weird 17th or 18th century beam failing to support the 19th century barn roof.

By “circa 1906” the building had already been much modified.  It had been extended backwards and a single story pitched roof extension added to the end closest to the church. The windows are lower closest to the church because the Victorians (presumably) added an attic room in on that side.

1906

Here is a new (to me) photo that was probably taken shortly after 1910.   The building has been extended upwards and towards the church, the previous extension removed, and the “tudor revival” front added outside the original structure.  The Horseshoes pub has the same curtains in both photos, and other buildings haven’t changed much.

1910

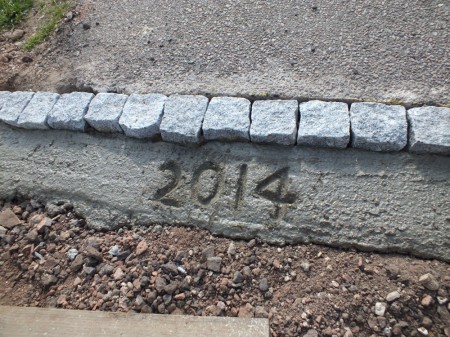
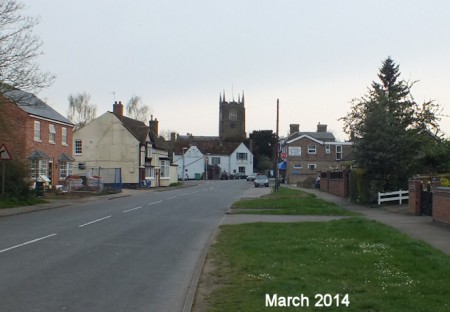
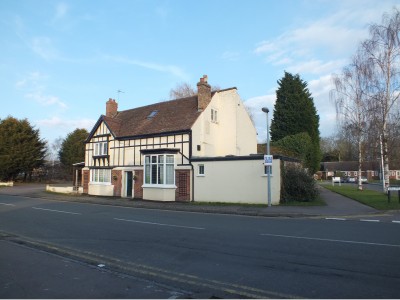
By the ‘1950s’ the shop had been rebuilt and all the houses on the other side of the road demolished.  A flat roof toilet block had been added on the church side of the Salutation.  Here is a similar view in 2014 when a house is being built next door.   I’ve added a date to help future historians.

march-2014

I had assumed the current façade was built in around 1925 as the council note that “In 1927 the place was valued under the 1925 Rating Valuation Act – the valuer noted that it had a low rent because house was rebuilt when Tenant was in”.  Cross referencing with Colin’s page the tenant was “Wm. Thom. Davey” who was there between 1910 and 1933.

My current guess was the previous tenant moved out prior to the rebuilding work, and the new tenant was invited when the work was close to completion.  That would date the current facade to 1909 or 1910.

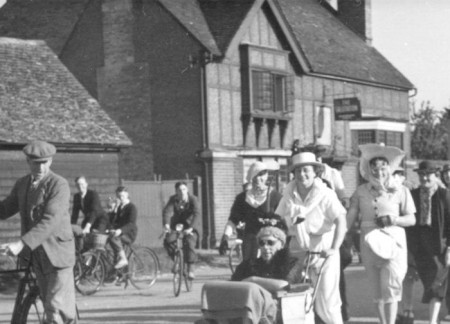
But what did the new front like when it was build?  Another photo from 1951 shows the concrete roughcast render that is in place today, but still unpainted in the photo.  Also there is the cricket club in drag and looking brilliant!

cricket-club

It seems the Edwardians invented the concrete render that has caused damage to so many timber framed buildings.  They had a few problems with damp and cracking, but by the time they splattered the Salutation they seem to have figured it out.

Apart from all the paint the Salutation has a remarkably original Edwardian facade that is well worth preserving.   I quite like it so future generations ought still to benefit from a slightly ugly but almost completely original Edwardian frontage.

Edit from later – the facade was added and a major rebuild happened 1920 to 1921.   They used gypsum plaster on lime which was a post WW1 thing, and the electricity meter had meter reading cards behind it starting in 1921.

Paint Stripping From Brick

Quite a few of the walls have been painted in the past.  There are at least 5 layers of paint, and the top 3 are modern plasticy waterproof paints.

Waterproofing a brick wall is probably a fabulous idea so long as the paint finish is perfectly applied and then never damaged.  In the real world you miss a bit, then want to screw a light on the wall and nail a few wiring clips in.  Also it starts failing after a couple of years with weather and sunshine.  Water gets in and can’t get out so the bricks and mortar are damaged by frost. It isn’t sensible to re-point lime mortar on top of waterproof paint.

Worse, in the modern world people dry line the inside of the wall and fit insulation.  Imperfectly waterproofing both sides of the wall would cause all sorts of trouble, yet that’s exactly what building regs want me to do in order to insulate to the latest regs.  I’m going to be bad and make both sides of the wall breathable.  So I need to remove the waterproof paint.  Here is work in progress:

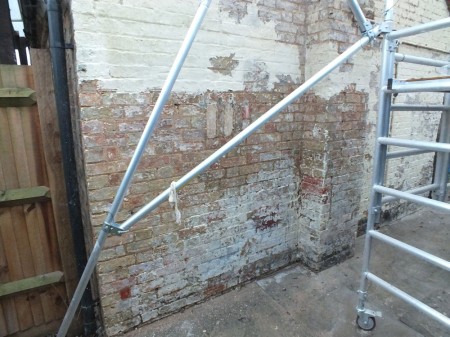
paint-stripping

What a pain!  I did some tests last year and decided on Solvistrip from Stippers of Sudbury.   It works well on my masonry paint but is slow work.  The trick is to trowel it on as thickly as possible with a paint brush, then brush the drips flat after about half an hour,  Never let the outside face of stripper dry out – it always needs visible stripper on the outside else you will be trying to get rid of sticky gum.

After an hour or two gently remove it with a jet washer, taking care not to point the jet washer towards anything you don’t want to be splattered with paint.  Point the pressure washer at a slight angle downwards and work down and the paint is pushed off towards the ground.   I don’t think a hot water pressure washer is necessary, though it would probably be much faster and reduce the number of stripper applications.

It comes off without too much effort (too much effort with a jet washer will take the surface off the bricks), but only removes a few coats at a time. I’m getting better at it and removing it in 2 applications.

I’ve been on the job for 4 days now, but only recently found a way of doing it that works for me.  More stripper on order and another 4 days should see the gable done.  Once that is done I can start rebuilding the chimney which has a triffid growing out of it.

Never again for paint stripping – I got someone in to do the rest of the house.

Road Works

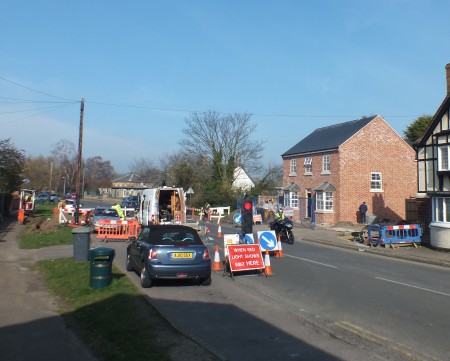
It’s been chaos around here for the last couple of days.   The new build next door has been installing their services all at the same time.  Diggers, cutters and drills all day yesterday.   Electricity had to come from across the road, so there were traffic lights outside the house.   Our driveway was out of action while they installed sewerage.

It would have cost them a fortune to connect to the main sewer so we agreed they could connect to our sewer in exchange for some help with lowering the end of our car park for the new dropped kerb.

road-works

Tonnelle

It turns out that the ugly smoking shelter in the car park was once a fine looking covered area at the rear of the barn.

Here it is in the car park:

smoking-shelter

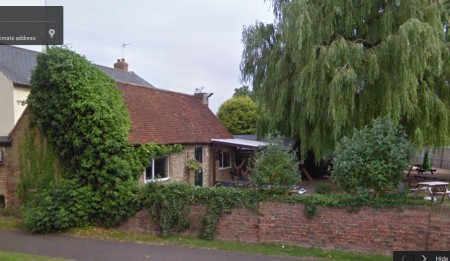
And here is the same shelter behind the barn a couple of years earlier courtesy of Google street view.  The mounting holes for the frame were still there, and the original location explains the non symmetrical shape.

back-garden-google-maps

We had to move the shelter from the car park so that the new build next door could connect with our sewer.  We’ve put it back where it was originally and it works brilliantly.   In France a covered outdoor area would be called a Tonnelle (not a smoking shelter).

Retail Therapy

I went through a bit of a low point recently.

Building regs treat a change of use much the same way as a new build.  I’m looking at over £40k of insulation, secondary glazing and fire doors and that was half my budget for the whole project.

Secondary glazing and nice fire doors cost money, but it’s at more than the same again for knock ons like removal of failed waterproof paint on the outside and lowering ground levels to make insulation feasible that make it expensive.

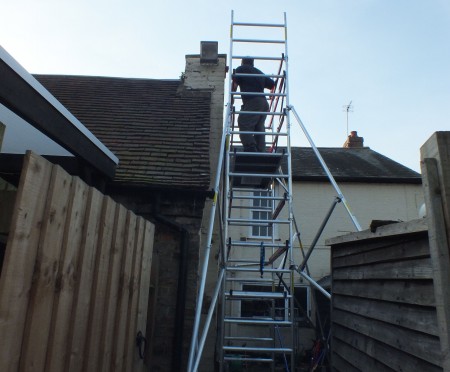
But I’m fine now.   I spent £3500 yesterday on shiny things.  The first arrived this morning.  A 9.4m scaffold tower!

scaffolding

I only have it up to 6m at the moment.  If I get braver with heights I’ll go to 8m to sort the blocked off chimney that is splitting due to damp from not being vented.

Just at the moment I’m removing waterproof paint with a paint stripper to allow the walls to dry out before adding insulation.

The first really low point

Kae is in France again this week.   Normally I would take the opportunity to do some devastation, perhaps knock out the kitchen or something, but nothing has happened.  I’m completely out of energy.  Kae normally does the food, but it’s mental energy I am lacking.  I get too stressed after an hour to work on the organisation side of things any more.

I fully support the planners, conservation officers, archaeological officers, tree officers, building regs inspectors and all the other consultants you need for planning.  I don’t support structural engineers as ours was shit for brains.  It’s just when you try to combine them that things go pear shaped.

You get into some crazy situations with a change of use. Despite the building being 400 years old Building Regs treat it as a new build (they say it is a new house as there wasn’t a house there before, it was a pub).   New build insulation and water usage rules apply.

There are some exceptions – you don’t need to insulate if there is more than 30 years payback for example, but insulated plasterboard dry lining is cheap they think so they require that for all internal walls.  You don’t need to insulate if it will destroy the building, but try proving that one.

I have to insulate my kitchen.  I wanted to insulate my kitchen anyway so that’s no trouble.  Although ground levels outside are nearly half a metre higher than inside and I have damp I’ll need to get rid of first.  I can’t lower ground levels because the tree officer would rightly complain about tree roots.

But that’s still fine.  I can pay a man £1000 to dig a trench around the house to locally lower ground levels.  But the trench needs to drain somewhere.  It needs a soakaway (another £1000).  Which is subject to building regs (only £200) so the council need to know about it.  So I need an archaeologist standing beside the hole if I want to dig a suitable soakaway which looks like another £2000.  Goodness knows what that will turn in to if any archaeology is actually found in the hole.

I have solid brick walls in the kitchen and they are painted with waterproof paint outside.  I can’t dry line inside.  I’ll need to remove the waterproof paint which will cost another £1000.  Then I need an insulation system that will keep the walls dry.  Dry lining is out.  That’s another £2000.

I reckon it will cost over £7,000 to insulate my kitchen. And it’s not just the kitchen that causes trouble like this.  I need to do the same to the rest of the house.  How the heck does anyone get anything done these days without hiding it from the council?

Silly thing is the kitchen isn’t actually heated at the moment so adding insulation in there is unlikely to save the environment.  Even if we did heat the kitchen the payback from savings on heating bills would be around 500 years.  How can that be environmentally friendly when the insulation will likely be replaced in 50 years time?

I’ve got a building regs application in for change of use only. I can bodge and do it their way with insulated plasterboard and tick the boxes.   After the paperwork is completed I hopefully won’t actually HAVE to do anything more.  Of course the building has been neglected for a long time and if I don’t do anything more the place will fall down.  A problem for the next fool?

Update 2 years on:  The builders next door dug our trench and happened to find an existing soakaway which just needed clearing out…  The paint did need to come off the exterior walls, but the walls look much nicer for it.  Insulation is a topic in itself but does need to be breathable and I haven’t done it yet.
WIllow

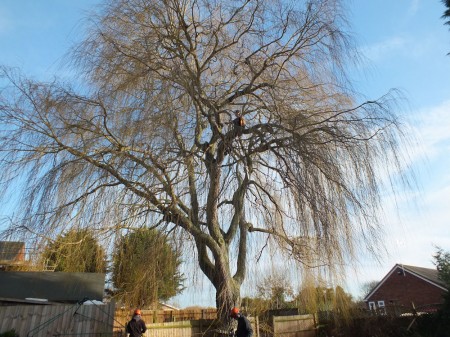
The willow in the back garden is a magnificent tree.  But it is mad to have such a big magnificent tree quite so close to an old house without much in the way of foundations.

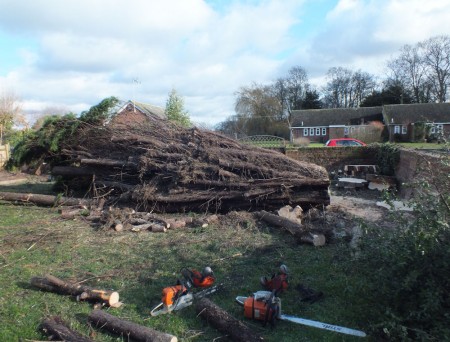
So it is now a much smaller willow.  I don’t mind the settlement on that corner of the building, but I hope the willow will think twice before growing into my drains again.  The Tree People did an excellent job.

It’ll grow back.

willow-before

willow-saw

willow-after

The conifer on the other hand might not grow back.  Removing the conifer was a condition of the planning application because it is pushing over a garden wall that they like.  Fortunately the wall survived and I am hoping to support it with a structural trellis.

conifer

More Artist Impressions

I will need to tell the council what materials I want to use before I can start any work.  I struggle to visualise what things will look like before I see them so I’ve put together some more artists impressions to help me figure everything out.
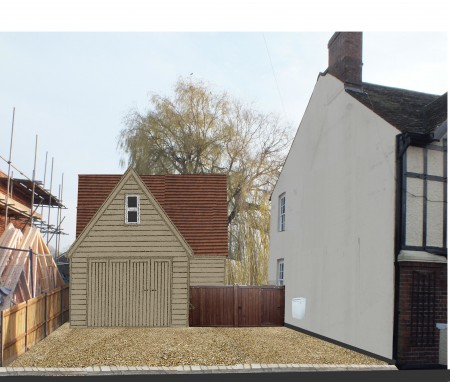
Here is the garage from the road with a shingle driveway and cheaper clay plain tiles. I had a very helpful chat with the Conservation Officer who felt a shingle driveway would soften the approach to the garage.
garage-and-driveway

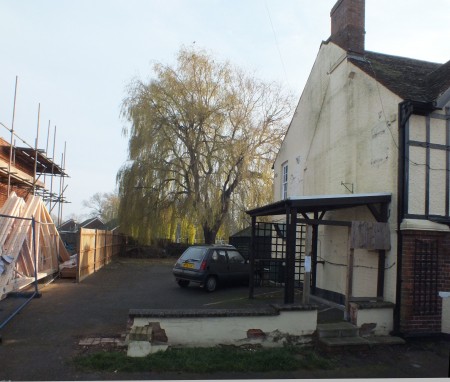
Here is the same view at the moment.  It’s only nicer because you can see the whole willow and a very fine Renault 5.

garage-and-driveway-original2

I’ll go with shingle as I’ve still not figured out any good way to make the exterior ground level lower than the interior floor level and shingles will help a lot with drainage. (I will post more later about the snug with the rot but it turns out the damp proof course that can be seen at exterior ground level is actually built on top of the 12 inch plinth that supports the timber frame).

The garage is well set back from the road.  It was originally going to be black but Kae thinks that will be too dark.  We will propose a natural wood finish and can always add a stain later if it doesn’t fit in.  The picture above is as close as I can get to natural wood on the computer.

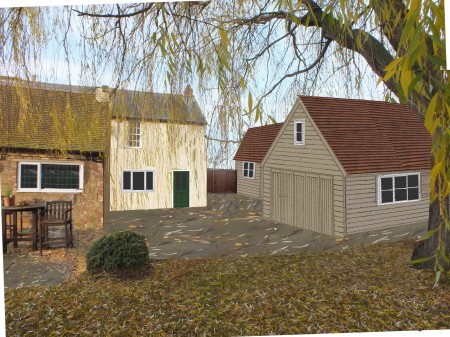
I have a thing about courtyards.  The idea for the garage is to create a courtyard at the rear of the house which frames the willow when you look from the kitchen window.  This is how that might look from the garden:

garage-rear

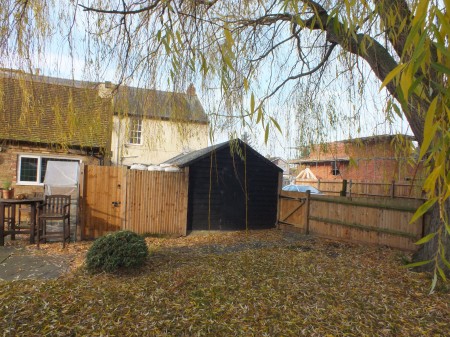
I’m not sure how quickly the garage will be built – costs are looking a lot higher than expected and planning conditions will likely add another 10 grand.  Here is how the same view looks at the moment:  There is a wooden shed and fencing we will need to knock down, and a load of tarmac to scrape off behind the fence to keep the willow happy.

garage-rear-original2

I’ve also updated an earlier artist impression of the front of the house to see how the more expensive hand made clay tiles might look. They will never match as they haven’t had 100 years of dirt and decay, but look reasonable.

I’m still not happy with the windows in the toilet block.  There was a door there in 1900 which would be prettier, if less practical if the toilets are retained.

artist-impresion-new-roof

It’s based on an old photo before the house in the car park next door.  This is how it looked before:

roof-side-choices-1

On reflection 5 years later it might not have been a great idea to apply for the planning so early.  Most of my ideas have changed enough to need another application.  I’ve not got onto the the new bits yet as there was so much to fix in the rest of the house.

Planning Permission Granted

Planning Permission was granted on 14th November 2013 (see the plans).  We also have permission to reduce the willow and remove the conifer.

It’s scary now!  The architect is available for consultation but it’s up to me to progress things from here.  Currently I’m working through the planning conditions that are supposed to be agreed before we start.

I’m putting together a schedule of works, or more a sequence of works at the moment.  Things like remembering when we re-lay a floor downstairs to put drains in for the new bathroom we’ll build later upstairs.  It also currently includes things such as “demolish shed” followed by “don’t demolish shed yet”.

Budget is a bit frightening.   It is very difficult to cost some of the inside work, but it does lend itself to being done bit by bit when we have the money.  On the other hand that approach could ensure nothing is ever finished.

I’ll probably feel more confident when I actually start doing something.

New Build Next Door

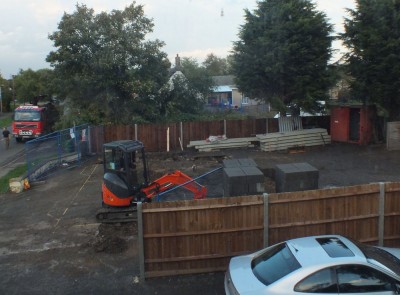
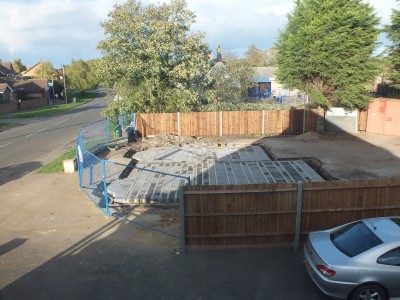
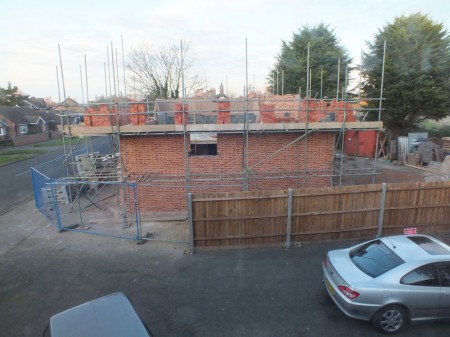
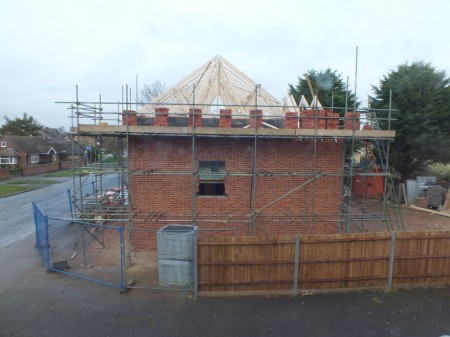
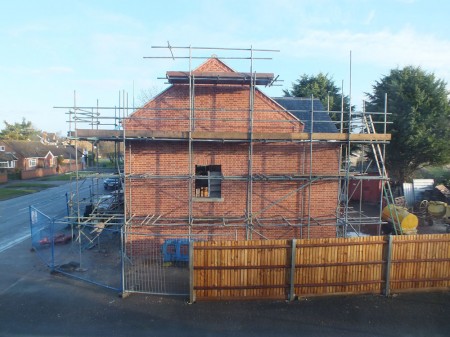
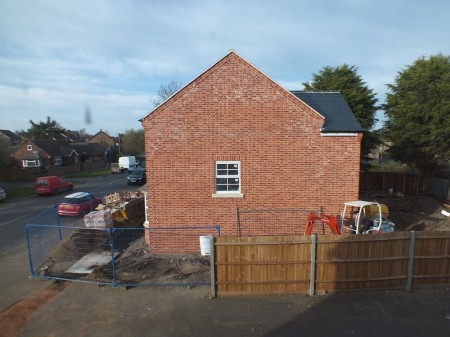
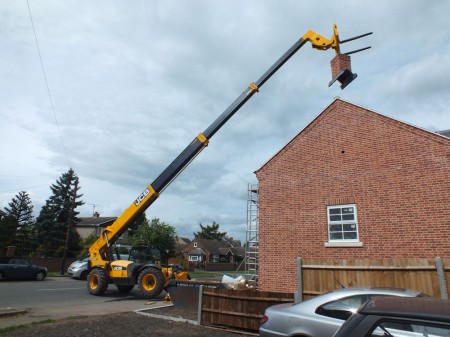
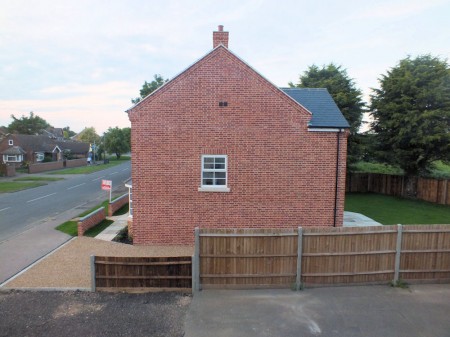
The new build has finally started in the car park.  I gather it was delayed a few months while details were agreed with the council, but it looks like it’s full speed ahead now,  Here is a view of the build from our upstairs window.

October 22nd 2013
new-build-starts

November 3rd 2013
DSCF7585

December 7th 2013
new-build-first-floor

December 15th 2013
new-build-second-floor

February 5th 2014
new-build-roof

March 19th 2014
new-build-tarmac-scraping

26 April 2014 – Some finishing toucheschimney-crane

02 June 2014 – Finished and on the market
14-june-finished

Plans

The planning application was validated at the end of September and we should have a decision by the middle of November.

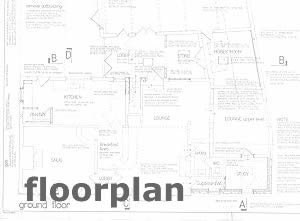
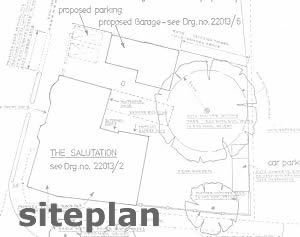
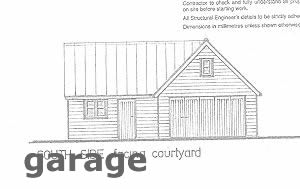
The main changes are adding a garage for my elderly Renaults, putting a pitched roof over the flat roof extension to make it look a bit nicer, and making the void into a bedroom with a new window above the big bay window.

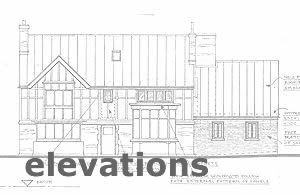
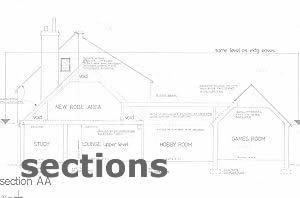
Click on the images below to see the plans.
elevations-smsections-sm floorplan-smsiteplan-sm garage-sm