Author Archives: malcolm

It’s winter now! So, err, progress…..

I’ve ignored the house completely since the last update (apart from a 3 month spring clean).   I have been having lots of fun instead. I’ve also been busy earning money and hopefully have enough to finish the work on the house.

I’m off to Finland for 3 months now, but I’m planning to take the summer off again so I can get the house closer to being finished.   Hold your breath – I’ll post again in April or May with news of progress…..

winter

It’s July now. So, erm, progress….

I’m still alive but not much has happened on the house since the last blog entry.   I’ve been busy – I came back from Sweden at the end of May then went to Finland for a few weeks.

Since the last post I have been on a ‘diet’ and have lost 5kg (the remaining 7kg is sticking out in the photo below).  My cunning plan is to burn off more energy than I eat so I’ve taken up cycling.   40 miles of cycling burns a whole day of calories.

I’ve been working on getting a social life too. Someone allegedly once said “it’s summer – go out and have some fun as you’ll be spending half the winter back in Finland.  And don’t worry about the kitchen or the plastering in the snug – they will probably sort themselves out”.  Wise words….

grafham-water

Kitchen Floor Tiles

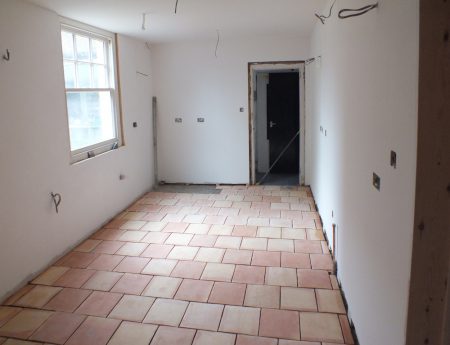
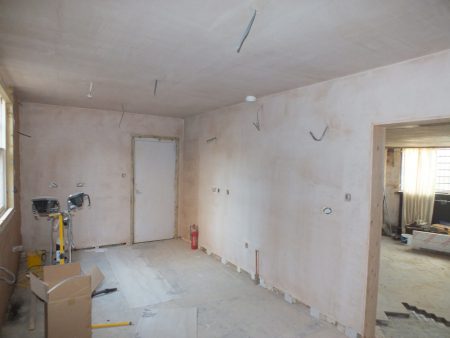
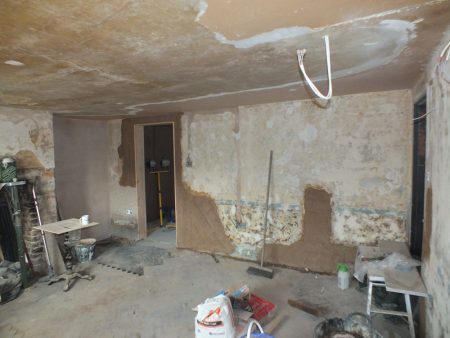
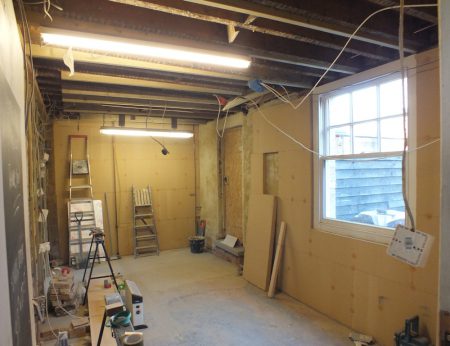
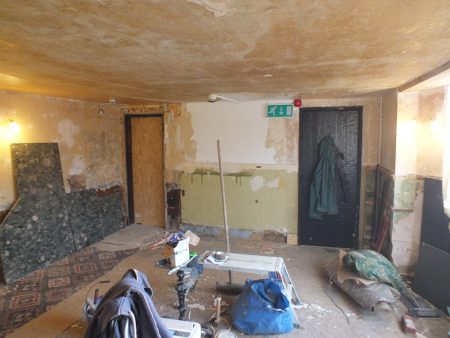
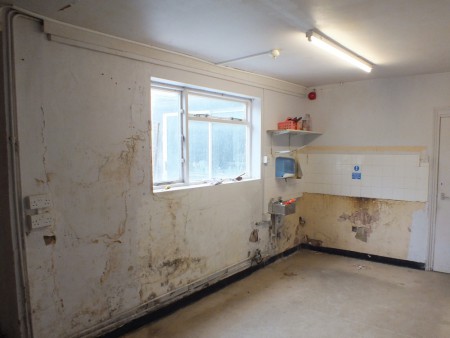
The kitchen has been moving on over the last month.  The plastering has been completed and the walls painted.   There is a ‘before’ photo of the kitchen here.

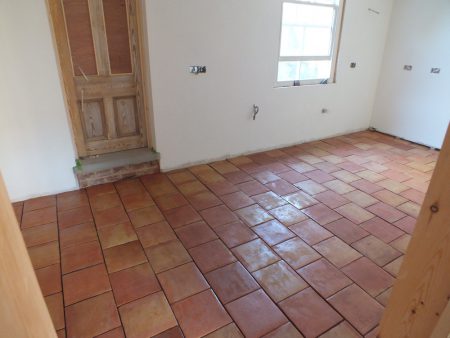
I took a couple of days off to give Rocco a hand laying the floor tiles and am exhausted now.  I’m not used to doing work.   The tiles are Elon Mexican Saltillo Teracotta from Terra Firma tiles and still need to be sealed with many coats of linseed oil and waxed.

kitchen-tiles

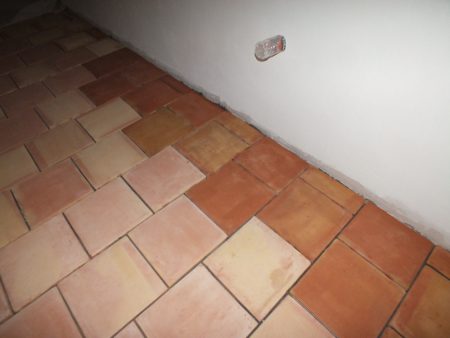
I spent a lot of time going around tile shops but the current styles seemed drab.  It is amazing that these hand made tiles were available for cheaper than the normal offerings. They are uneven under foot being hand made – I think flatter tiles might have been better  The linseed oil makes the tiles darker:

linseed-floor-tiles

Of course Mexican tiles are made from the most absorbent material known to man.   In the photo the 6th coat of linseed oil is soaking in.   The 7th coat is soaking in more slowly so I must be nearly there..

floor-tiles-drying

Kitchen, Snug and Bedroom – Even More Progress

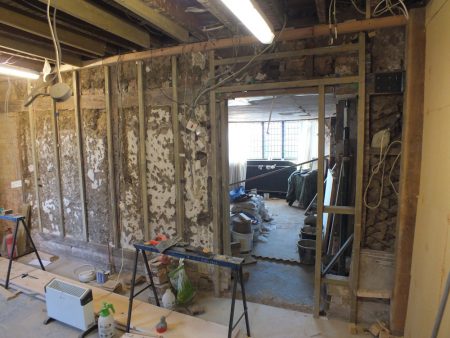
It’s only been a month since the last post and look at the difference!    The side of the house we are working on has first fix electrics, the door frames are in and the internal stud walls have been plastered.  The external walls have a base coat of lime plaster which is taking a very long time to dry in the cold weather, but hopefully will dry more quickly now the dehumidifier and heater are running.

kitchen-plastered

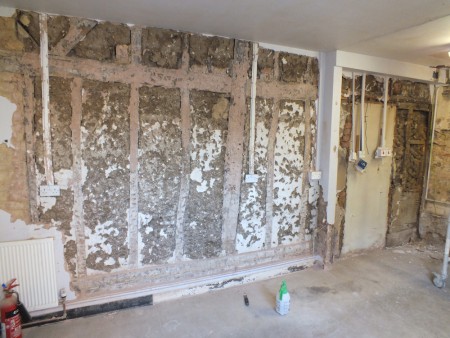
The snug next to the kitchen is a very old room that has survived largely intact with it’s wattle & daub and it’s inch thick straw plaster.   Some damage was exposed when the wood panelling was removed, and some great chunks of cement fell out of the walls.   The base coat of lime is drying and the walls have been prepared for a skim coat in lime.    I want to paper the ceiling and walls with lining paper so they can be rescued again more easily in the future.

snug-prep-for-plaster

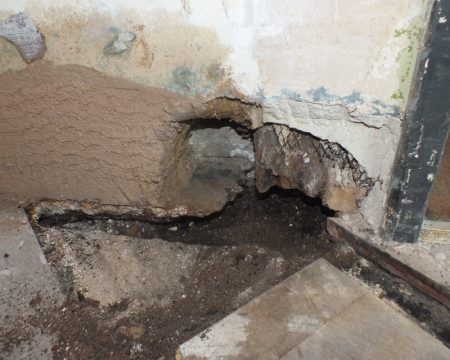
The sole plate in the internal wall of the snug turned out to be underground and therefore rotten.   Normally sole plates are a good 15 inches above ground on brick plinths and therefore dry.  I put this wall down to lazy Jacobean builders!  The wall doesn’t support much any more so we’ll prop the posts up on bricks and remove the sole plate.

buried-sole-plate

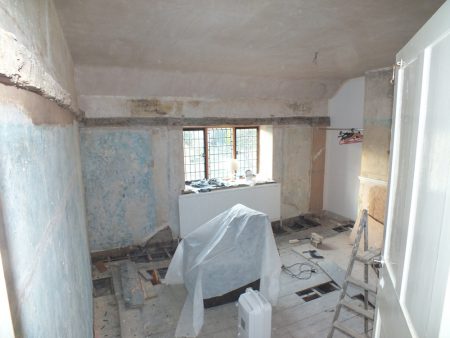
Meanwhile upstairs, the bedroom ceiling has been skimmed which neatly hides the artex, the bit that I put my foot through while insulating the loft, and the rotten bit that Rocco replaced with lath and lime.

The floor boards are up near the window because I wasn’t convinced by the Edwardian approach to joist hanging.  Modern joist hangers make the floor much less springy.   It was also a good opportunity to finish off the plastering around the window – the scratch coat went on 2 years ago.

bedfoom-mess

Kitchen Progress

I’ve not posted for a while as I’ve been very busy with work, but Rocco is working on the kitchen and is doing a fabulous job.   It has moved on a lot since the last kitchen post.

I had thought to expose the 17th century oak frame in the kitchen, but the oven will now sit against that wall so we decided to protect the original timber frame with plasterboard.   Unblocking the bricked up door to the snug has allowed a lot of light into the dark end of the kitchen.

kitchen-timber-frame

The internal wall insulation is almost complete.   I’ve gone for woodfibre board insulation and lime plaster to keep the external walls breathable.   The causes for most of the water ingress should now be fixed, but there is still no damp course so modern materials are out.

The ceiling has been levelled with some new bits of wood sistering the joists, mostly because correcting the slope allows space for the oven extractor duct.  None of the walls are vertical because the house is squint, but we’ve gone for straight walls which will be handy when we install a work surface.

kitchen-insulation

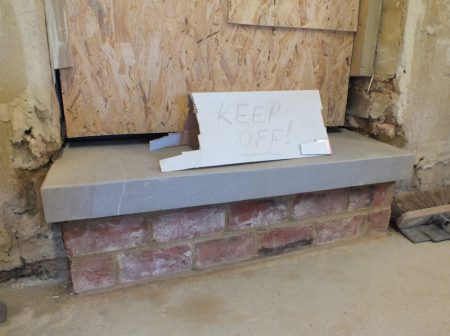
We are getting towards the fun bit where little features start to appear.   A yorkstone step in the door to the utility room went in this morning.   It looks a bit new at the moment but should look suitably old in a couple of hundred years.

kitchen-stepp

We are ready for the first fix electrical work next week (apart from me figuring out all the socket positions).   I’ve managed to organise a trip to Sweden next week, but will have a day with the electrician before I leave.

Kitchen Window

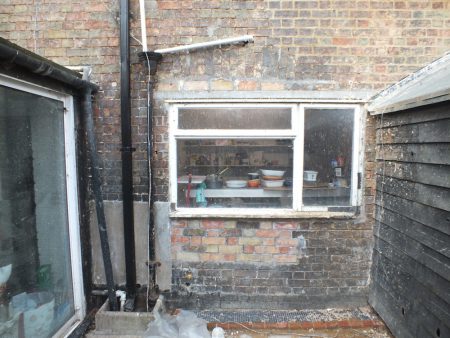
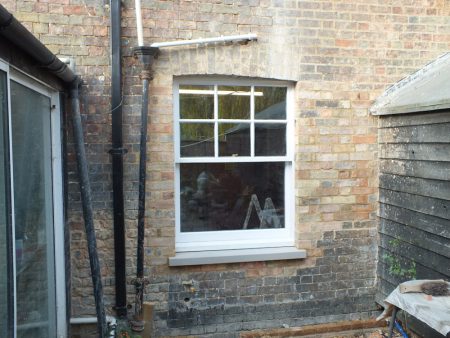
The original sash window in the kitchen had been replaced by a picture window in the 1980s, but the original crooked brick arch remained in place.  We decided a sash window would look nicer.

kitchen-window2

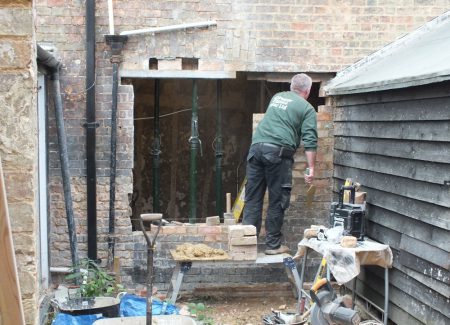
It was quite a job to remove the concrete lintels from above the picture window,   We removed them in two halves so half the opening remained supported while we bricked up the other half.

kitchen-window-brickwork

The new window was made by John to match the original Edwardian windows elsewhere in the house and looks lovely.   He made another 3 windows for upstairs which we will fit next year when the weather warms up a bit.

new-kitchen-window

Update – Kitchen and Snug

The flood put a couple of rooms out of action and has prompted some ‘re-decoration’ over the winter months.    The kitchen was already out of action, and the plan is to connect the kitchen to the snug to form some sort of kitchen diner.

The modern waterproof coatings, the bar and the wood panelling have largely been stripped from the snug putting it back roughly where it might have been around the year 1900.   My nieces will have great fun with the two doors.

snug

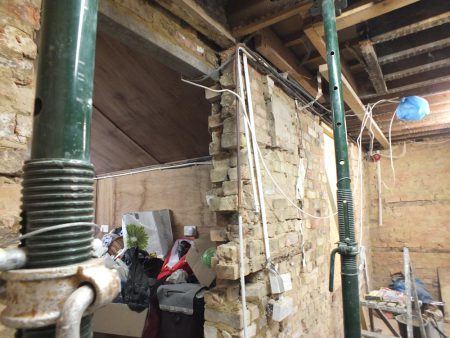
The east wall in the kitchen has been a bother.   Following earlier modifications the east side of the house was supported only by a couple of half bricks sitting at a jaunty angle.   In the photo the door to the utility room is being rebuilt using proper lintels to replace the pretend lintels made of fence post.  Also we’re putting some bricks underneath the lintels this time around.

kitchen-door

Things are moving forward at an exciting speed, but there is so much to do it’ll still take years.  With the high speed of things I should have another more interesting update next week so don’t go away.

The Great Flood of 2016

The muppet who installed the cold water tank in the loft neglected to include a pipe from the overflow to outside.   Unfortunately I was in Sweden when the ball cock failed and had to travel home early.

In the loft I have removed the wet insulation to allow the ceiling to dry.   It was only installed last year.

wet-loft

The water flowed into Kae’s bedroom soaking everything. The carpet and bed have gone to the tip.  I don’t know how the floor stayed so dry – the carpet was soaking.

wet-bedroom

From there it poured into the snug, mostly avoiding the kitchen that was stored there, but soaking most of Kae’s things.    It did a good job of removing the wood chip wallpaper from the ceiling.

wet-snug

Rocco came over to help remove the carpets and clear out water damaged things.

junk

The one good thing is this is an old house and the breathable construction hasn’t suffered much damage and should dry out OK.   Wouldn’t have fancied having a flood like this in a modern house.

I have purchased an overflow pipe for the water tank.   It cost £15 and will take about half an hour to fit.

Bond Timbers

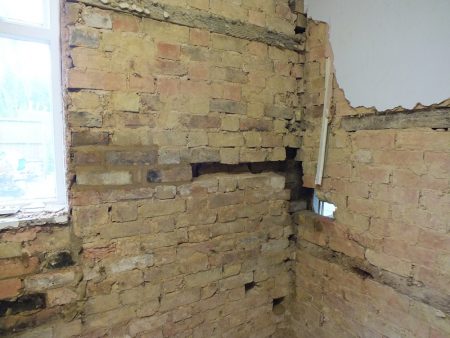
I’ve seen bits of wood embedded in the inside of walls before and assumed they were intended as something to nail things to.   It turns out they are called bond timbers and were commonly embedded in walls up until at least 1850 as a reinforcement that might stabilise the building a bit should you have forgotten to build foundations.  One of my bond timbers had rotten so I’m replacing it with bricks.  The rest aren’t too bad.

bond-timbers

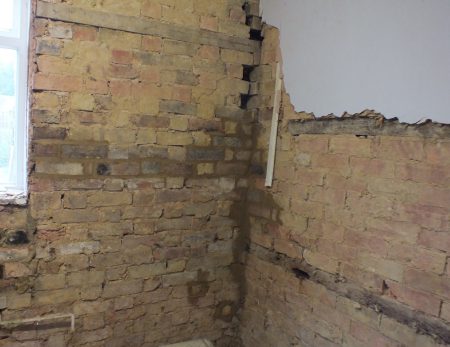
The Edwardians built the half brick internal wall to the right and they also put some bond timbers in, but they missed the point and put them where they wouldn’t tie to the timbers in the external wall.  The external wall doesn’t seem to have moved much recently as there were no cracks in the modern plaster, but it is worth making things a little more sound while the wall is exposed.    I put in a few new bricks in to the corner and re-jointed other bricks to tie the walls together all the way up.

kitchen-corner

I have taken on some more work, partly based abroad, so progress will likely slow even more.

I have ordered some new sash windows for the rear of the house to replace the nasty 1996 efforts, and I have come up with an elegant custom secondary glazing system for the front of the house which will give me something to do in the winter evenings.

Back After a Break

I’ve been a bit quiet recently.   The weather hasn’t been very inspiring so I’ve been busy earning money this year to pay for work on the house instead of actually working on the house.   Also I didn’t have any matching bricks to tidy up some of the holes in the kitchen wall – this hole was from the industrial extractor fan outlet.

extractor-hole

I found bricks at Solopark in Cambridge which I think will match reasonably well.  They are still wet in the photo but should lighten as they dry out and end up quite close.

extractor-hole-bricked

The hole made a lot of difference to light in the kitchen.  I have planning permission for a ground floor window beside the hole but a full height window doesn’t work with the ground levels and a domestic sized oven extractor would become difficult.   I’ll try to borrow light from the snug and shed instead.

I’ll be quiet again for a while – there are a few similar holes to brick up that I won’t bore you with, but check back after that for the the exciting kitchen window.

Gable Unveiled

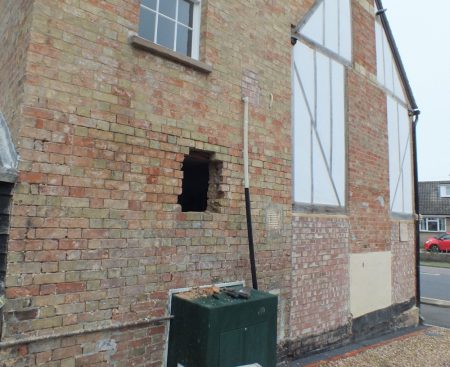
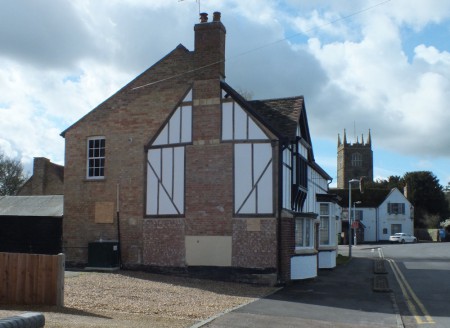
The new lime render on the gable has been protected from frost over the winter with hessian sheeting.  This is the first time I have been able to see it without the scaffolding.

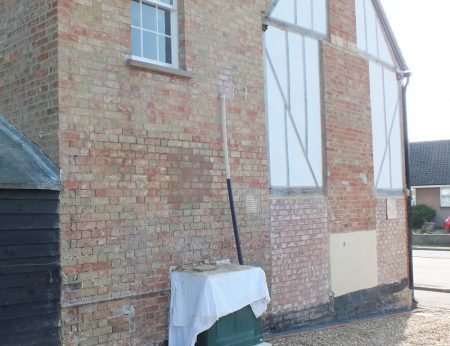
The build phases of the house are clear from the gable.   The timber framed part was built first, then the chimney was added*, then the house was extended backwards in brick by Georgians and upwards by Edwardians, the lower part of the timber frame was replaced by brick in modern times, then finally I replaced the rest of the timber frame.

new-gable

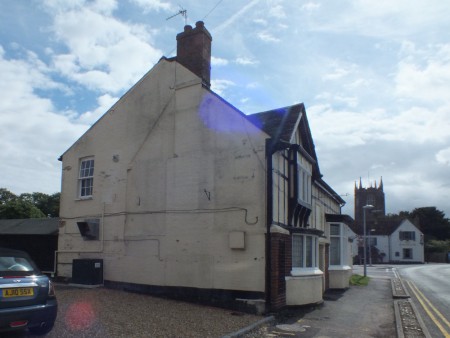
It is quite bright and will take a little getting used to but I think it is an improvement on how it looked before.   It was a very ugly gable.

old-gable

It matches the front reasonably well but it seems a little out of place to have part of a very old building set in to a much more modern building.

front-gable-uncovered

*Positioning of unused mortices in the original gable timber frame indicate the chimney was added after the gable was built.  The chimney is constructed in English bond with a brick size of 225mm * 60mm and about 73mm course height indicating a late 17th century build date, but the building was operating as a pub in the early 17th century..  There is some evidence in floor joists of a wooden chimney (smoke hood) which would not have been common after the 16th century.

I have saved some wood for tree ring dating to hopefully establish a build date, though it is somewhat academic as the brick plinth under the gable is the only original material visible on the exterior of the house.

Drainage

Drains have been a problem since we moved in but I need to fix the damp wall in the kitchen before I go much further with that.  The drains tended to become blocked in much the same place in the yard, but much less often since the willow was trimmed.

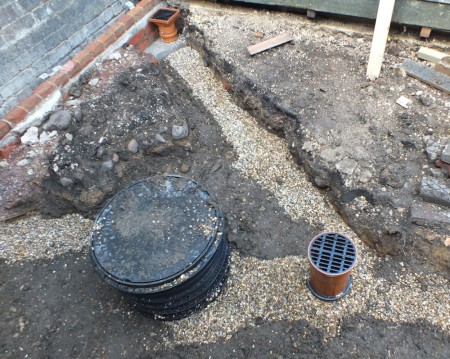
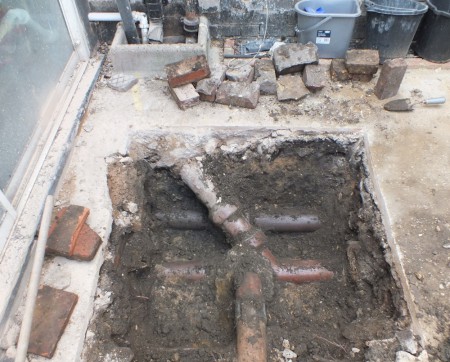
It turns out the kitchen drain had a botched concrete joint and no rodding access.  Later on a land drain was installed by knocking through the pipe and concreting in the new connection. Tree roots had found their way under the concrete and filled the drains with roots.

concrete-drain-connection

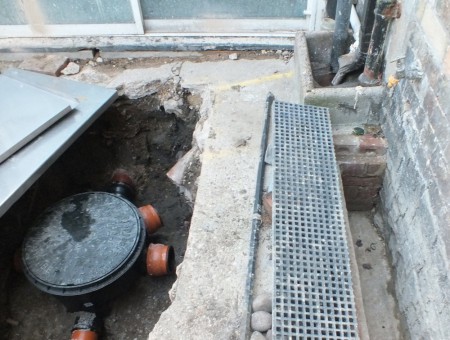
Replacing the defective joints with an inspection chamber was fairly straightforward, but lowering the hopper is taking a lot more thought.  Ideally it would be at the bottom of the trench as that would hide the pipes and keep the kitchen wall dry, but I don’t want any overflow to end up in the trench.

inspection-chamber

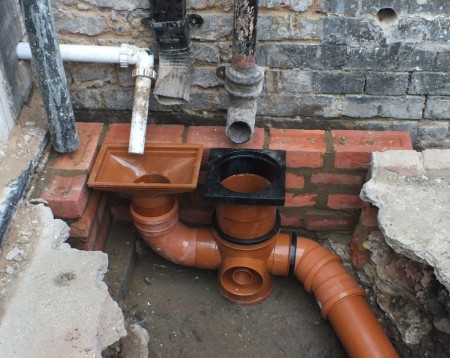
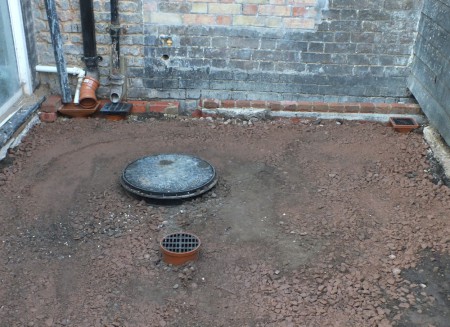
I ended up building a retaining wall with a 2 inch gap to the kitchen wall with the side open to the trench that runs around the house. It is just enough gap to clean out with a stick and I’ll put a cover on top to keep leaves out.  The gully and hopper are set to ground level and will have an edging behind so any overflow will flow into the yard drain and not the trench.  All the drain pipes still need to be realigned.

kitchen-gully

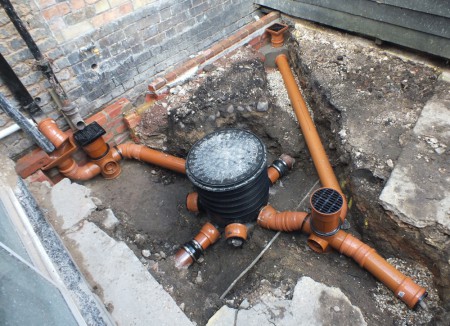
Finally the land drain has been brought closer to the inspection chamber to allow ground levels beyond to be raised a little, and I’ve added a new hopper for a gutter on the shed and a pipe to extend to the barn gutter later on.

drains-completed

The building inspector was happy so I could move tonnes of earth back into the hole.  You can save money on pea shingle by using wooden shuttering close to the pipe and filling the pipe side with pea shingle and the other side with earth.

pea-shingle

I’ve filled to about 3 inches below finished level.  I’m planning to surface using granite setts, but might decide to lay them later on once the outside wall of the kitchen is finished.

filled-in

Sometimes it is difficult to see beyond what was there to start with.   Later I have other ideas for what I might start calling a courtyard, and I’m in the mood to have the finished level a few inches below the original level (which I set out to) so haven’t surfaced.   I think there is room to adjust the height of the drainage.

Stripping the Kitchen

The original kitchen is in a poor state.  The causes of damp included a badly leaking gutter, missing flashing, high external ground levels, a rotten window frame, leaky pipes, trouble with an external drain, and waterproof coatings inside and out.  I’ve fixed some of those things and the rest are on the to do list.

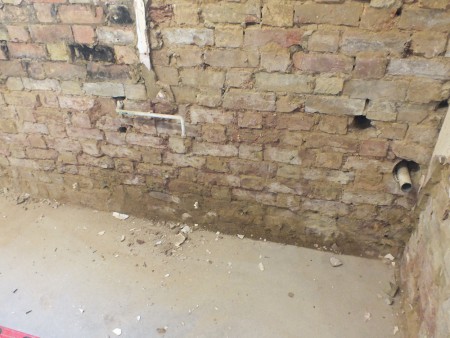
The modern short term thinking way to fix all of this damp is strip the plaster and replace with tanking plaster rather than fix the thing that caused the problem in the first place.  That is what had been done here and it was a pain to remove.

kitchen-plaster

Digging a trench to lower the ground levels outside worked a treat.  Unfortunately I didn’t go all the way to the end of the wall because there was a drain in the way.  I’ll need to lower the drain before doing much with the kitchen as the wall is still wet at the base around there.

damp-brick-wall

Fixing the damp patch won’t be straightforward.   The drains have been botched and will need to be done properly with an inspection chamber.  As usual I’ve started off by digging a hole for myself.

excavation

The internal wall of the kitchen is the external wall of the original building probably dating from the 17th century.  It is still there and remarkably well preserved with the wattle and daub and even a convenient door opening that someone, probably a Georgian judging by the decoration, hacked through.

Temporary Kitchen

I have a deadline at the start of next year to complete the building regs for change of use so had better make a start on them.   Doing the kitchen first will free up the snug for use as a living room later on.

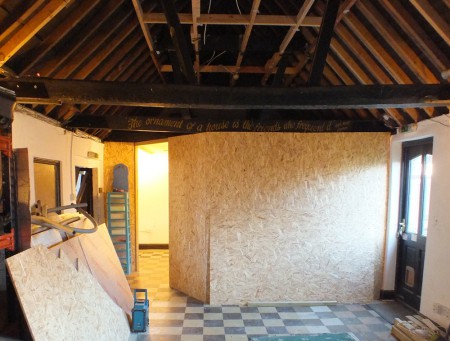
The kitchen and snug will probably take a few months so it made sense to put some time into building a temporary kitchen.  I’ve partitioned off the barn with the iffy roof.

temp-kitchen-barn

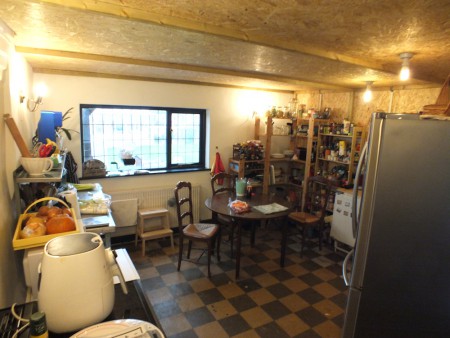
It might be temporary but I think it is an improvement over the current kitchen – it has a radiator, plenty of lights and an extractor fan. The OSB board was surprisingly inexpensive and I might use it to partition other areas of the house as work goes on.  The temporary kitchen might make a good temporary office later on so will probably stay in place until I get around to fixing the barn roof.

temporary-kitchen

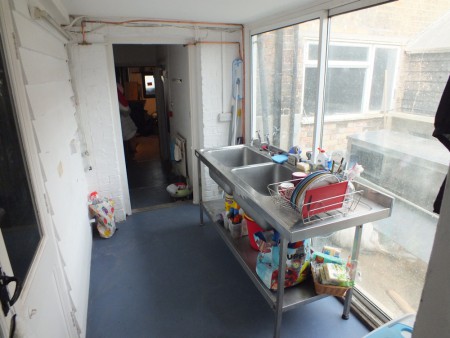
The temporary sink is in a corridor where there is a water supply and drainage.  I used copper pipe because I wanted to learn how to solder, but the pipe will be very temporary as it passes through a door opening where I would like to install a door in the future.

kitchen-sink

Domed Lath Ceiling

I’ve been insulating again, this time in the crawl space in front of the attic.   I haven’t been enjoying it so it has taken a very long time while I have found lots of ways to avoid doing it.

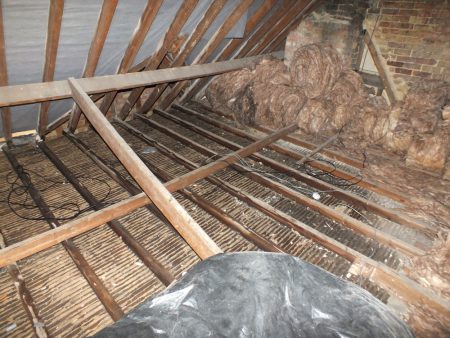
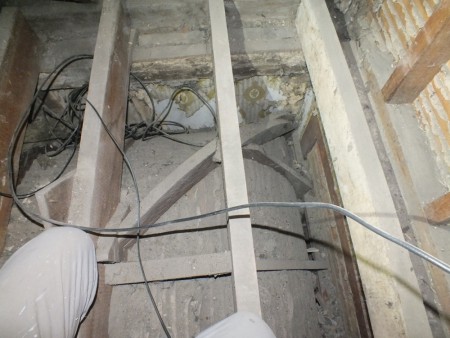
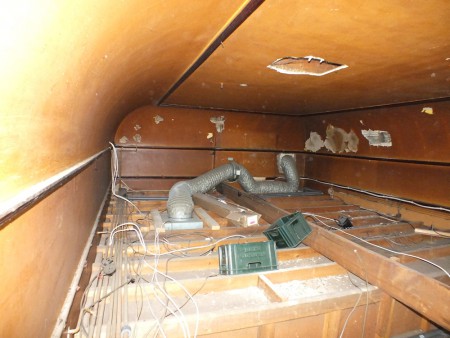
The attic is supported by 8 inch joists below which hangs a domed ceiling with lath nailed on to wooden supports with a curve cut into them. It’s not often you see a domed ceiling from above so here is a photo..

domed-lath-ceiling

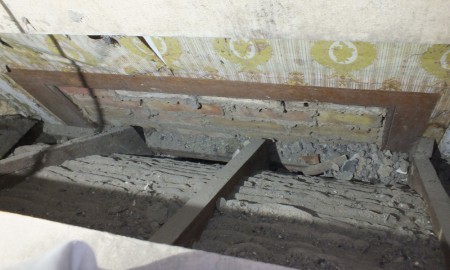
The attic and domed ceiling were constructed in 1910.  The room that was there before is still there in parts with a wide bricked up doorway and Victorian looking wall paper. I’m not sure what the layout was before 1910, but the extent of wallpaper suggests this area might once have been a corridor.

bricked-up-door

The ceiling underneath has been vandalised by plumbers and electricians over the years but is remarkably intact with it’s original wood mouldings.   A false ceiling was added below, probably in the 1950s or early 1960s.

void

I had been wondering why the false ceiling was added.  It would have been a pain to redecorate without a scaffold tower, but it turns out the thermal design was terrible with a huge area of lath and plaster forming the only thermal barrier between inside and outside.  It must have been a bit chilly in there.

I have a scaffold tower and have added insulation up to 1m thick in places which should hopefully sort out the thermal issues.  I think a domed double height ceiling would be nice.

PassivPub

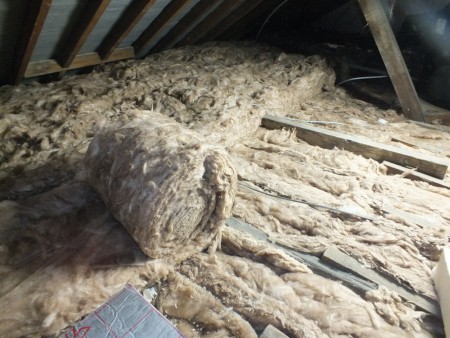
It’s taken a week to insulate the attic and the main loft space (and sort out water tank mountings).  I’ve used 300mm Earthwool which almost meets the 0.1 U-value required for a passive house.   There should be a good payback time insulating to that standard in the loft, and the insulation is unlikely to cause condensation problems as the loft is ventilated.

The first layer was laid at 100mm thickness between the joists and the second 200mm above the joists.

loft-roll

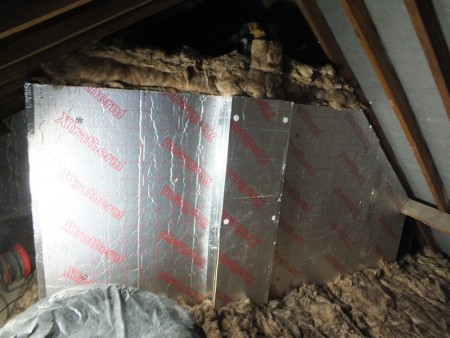
The walls of the attic are only 100mm so not quite to passive house standard.  The crawl space above the attic was horrible to insulate.   Insulation is horrible generally, and even with a good dust mask a lot of it must get into your lungs.   If I had the money I would have used sheeps wool (which is 4 times the price).

attic-wall

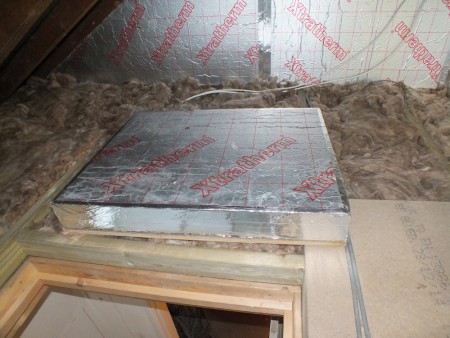
The ceiling beside the loft hatch was built by Georgians from quartered bits of small tree and is not very strong.  I’ve added a new independent structure above the loft hatch and added a section of loft flooring to make it safe to climb into the loft.  The loft hatch only has 100mm of insulation but that makes it heavy enough.

loft-hatch

There is plenty more insulation to do around the house, but just a last section of eaves and the final attic wall remain in the roof space.

A proper passive house should have a heating energy usage of under 15kwh/m2 per year (measured). Before any insulation at all (apart from 100mm in part of the loft) this place was running at 110kwh/m2 (measured) and I should hopefully halve that.

Scaffolding Removed

The scaffolding was removed today.   It’s odd being able to see the whole thing (apart from the new bright white oak frame in the gable which will remain covered for the winter to protect the lime).  The ground floor isn’t finished as the scaffolding was in the way.

scaffolding-removed

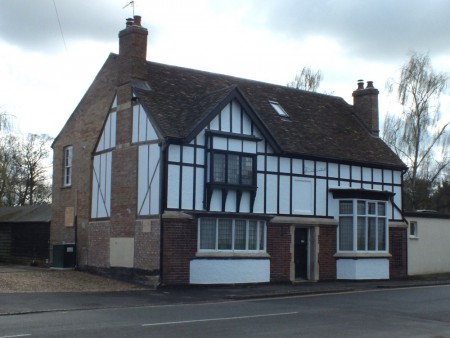
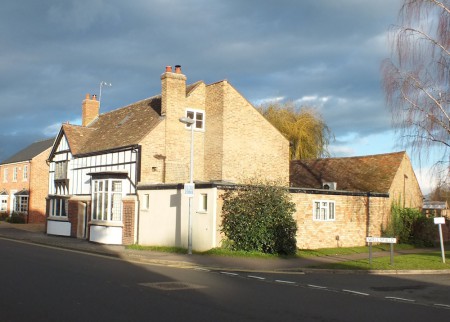
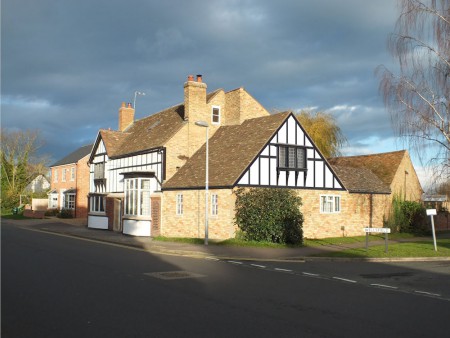
I definitely need to do something about that flat roof extension.  It doesn’t look quite so bad with the magnolia paint removed from the gable.   Maybe I could clobber the render off and pretend it is a garden wall.

east

Though a bit more mock tudor wouldn’t go amiss.  (Photoshoping pictures is much easier than actually doing stuff.)  It would need good overhangs to work, and the gable would need to be angled in the middle as the wall below isn’t straight.

photoshop-flat-roof

The advantage in doing things very slowly is it gives time to think up better ideas.   This doesn’t work – too big and ugly.

Finished! (Almost)

I can only claim to have finished the exterior of the upper storeys of the main house and it only took 4 months longer than planned.  I’ve not really started on the building regs change of use stuff that I’m supposed to be doing.   A final coat of limewash on the north gable and some cleaning up are the only things left to do before the scaffolding comes down next Thursday.

I’m planning to keep the gable covered with hessian over winter to reduce the chance of frost damage to the new render, so this is a sneak preview of how it might look when it is revealed next spring.

limewash

The oak will darken over time and the frame will become black and white.

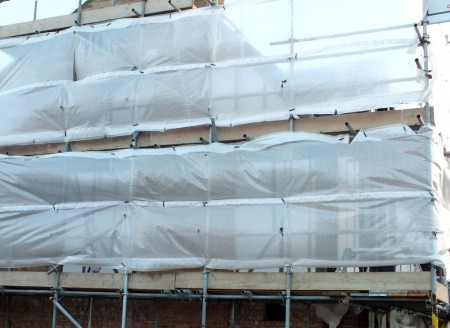
You can’t see a lot through the plastic sheeting, but from the road the timber frame in the gable looks like another part of the half timbering on the facade.  I think it will look interesting when it is finally uncovered.

view-through-sheeting

Snagging

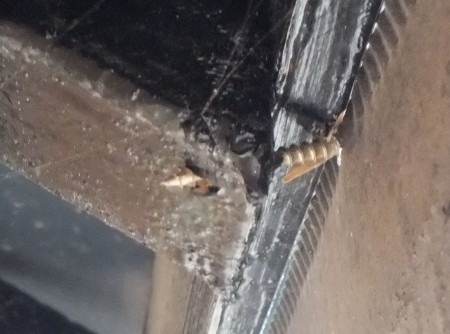
The rear gutter wasn’t mounted well – some screws miss both the gutter brace and the the facia board and just manages to engage in the tip of the rafter. There is a long row of these.  I think I’ll have the gutter and facia board off and do it properly as it’s not a job that can be done later from a scaffold tower.

gutter-screw-rear

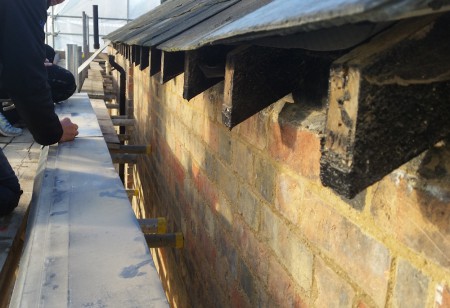
With the ends of the slates supported by the facia board there was a fair risk that we would break some.  We were lucky.  The new facia board is 2 inches taller than the old one.  The plastic eaves protector came out with the old facia board and needed to be nailed to the new one before fitting.

facia-removed

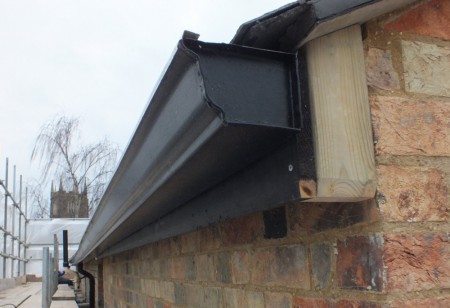
The north corner of the house is slightly lower than the south so there isn’t as much fall as there looks in the photo.   We placed a hosepipe at the end and adjusted the gutter height so there weren’t any puddles.  It was quite a fiddle to set accurately.

gutter-installed

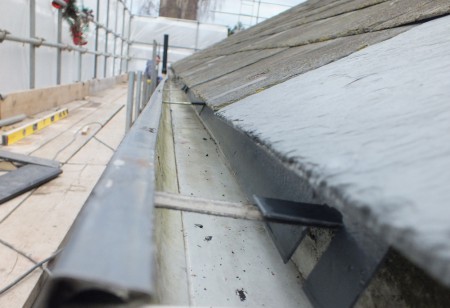
This is probably the first time that water doesn’t puddle in the gutter – it had always followed the line of the roof which isn’t straight. The eaves protector has been trimmed at the gutter mounting points to avoid forcing the gutter down.

no-puddle

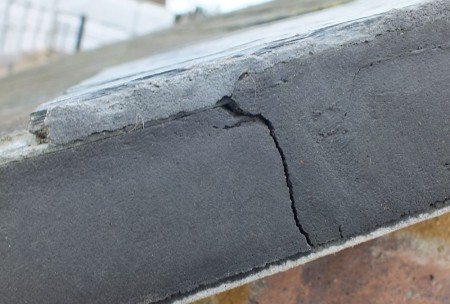
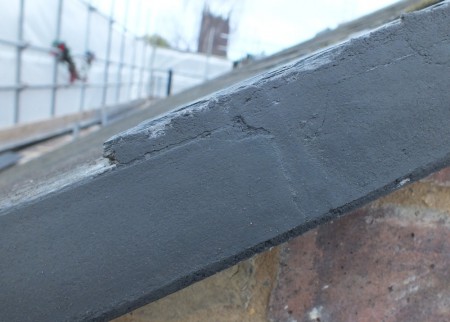
A few cracks had appeared in the verge caused by the cement being pushed past the battens.  Also the undercloak has separated from the cement.  I’m planning to seal the gaps with lime.

verge-cracks

I made up a 1:1 lime to soft sand mix with some black cement colour powder and worked it into the cracks.   Hopefully that will make it fail less quickly in the future.

filled-crack

The rest of the roof is OK – it doesn’t leak any more, there are no condensation problems inside, and nothing has fallen off.

Rendering the New Timber Frame

It is late October and it is madness to be considering lime rendering at this time of year.   Normally you would get your exterior lime work out of the way by the end of September.   The trouble is the lime will take a month to dry in cold weather and will be damaged by any frost before it is dry.  I’m gambling against a frost in November else I might have to do it all again next year.

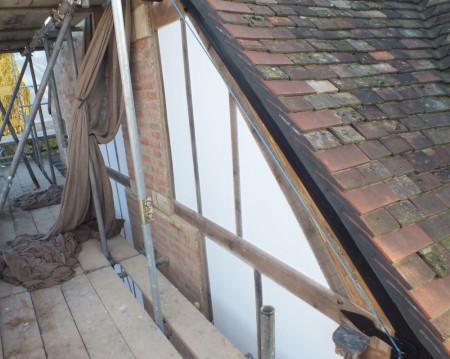
The render will be applied onto woodwool boards which are fixed onto roofing battens screwed to the oak frame.
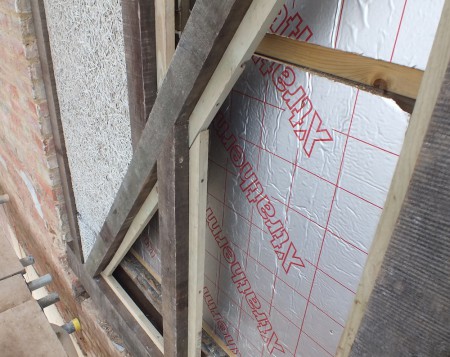
woodwool-frame

Both oak and lime require stainless screws.   The tannins in oak corrode normal screws and electroplating doesn’t like lime.  The holes need to be pre-drilled and a steel screw driven in and then removed to reduce the chance of the stainless screw breaking as it goes in.  There is no chance of removing the stainless screw from oak.

The bricks immediately above the oak frame were not supported and had come loose so needed to be removed and replaced again.   I have fitted a slate undercloak between the bricks and the frame.
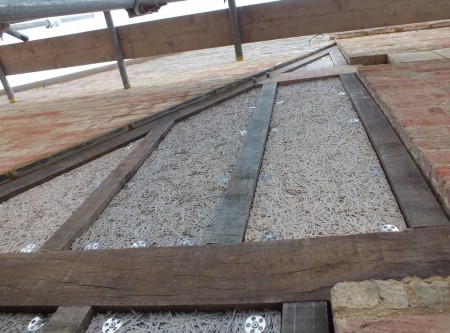
slate-undercloak

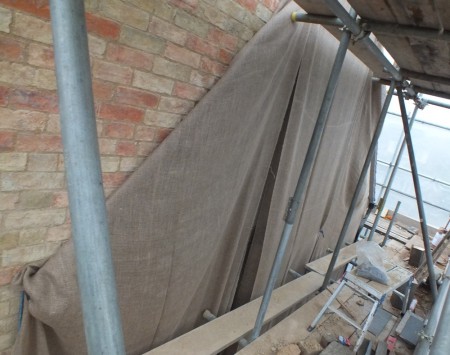
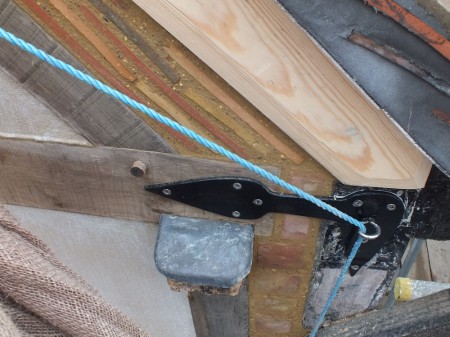
Hessian is my plan to reduce the chance of frost damage.  It should prevent dew forming on the surface of the lime and freezing, and will hopefully insulate a little to retain heat from the wall.  It is supported on eye bolts drilled into the brickwork with a rope threaded through.   I’m hoping to come up with a plan which will allow the rope to be withdrawn from ground level after the scaffolding has come down.
hessian

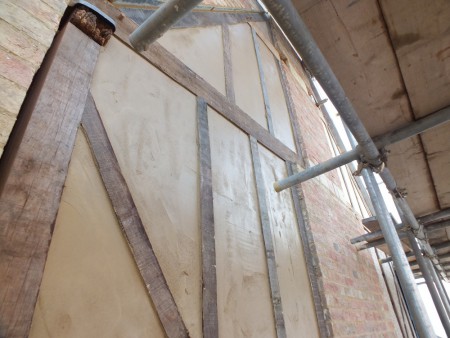
More than half of the first coat went on in a day.  My current recipe for render is a bucket of rendering sharp sand, a bucket of soft sand, and a bucket of lime (NHL 3.5 to help avoid frost damage).  1:2 lime to sand is quite a strong mix, but tests with less lime proved crumbly.  The surface will be roughed and scratched when it becomes firmer tomorrow.   I had planned to whitewash the infill to match the front of the house, but the earthy colour of render looks nice.  I might try adding some pigment to the limewash.
first-coat-render

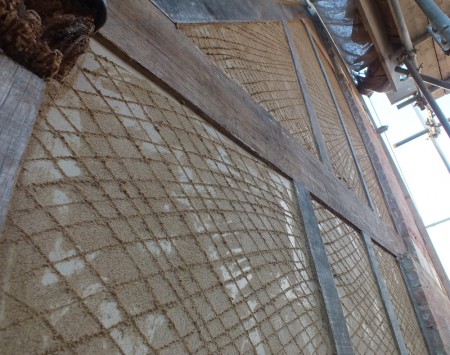
Late October turned out to be warm and the render is drying well.   It is still drying slower than it did in the summer but that is handy as it allows me to use lime late in the afternoon and finish it the next day.  It should be possible to apply the final coat around 5 days after the scratch coat (which has been scratched).   I brushed the remaining smooth bits after the photo to help the next coat stick.
scratched

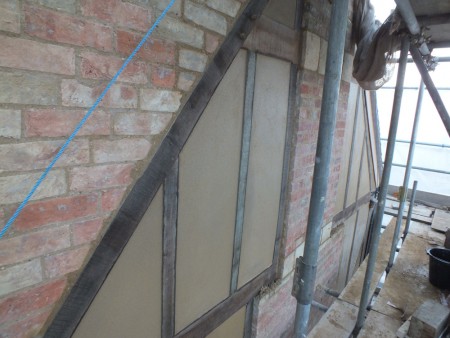
The final coat of render seems to be taking about twice the time of the first coat.   I troweled on the lime trying to make it smooth and level, then after a few hours used a polyurethane float to flatten it, filling in low spots with more lime.   Next day I went over it with the polyurethane float again, then lightly wiped it with a damp sponge to fill in the imperfections.  This left a flat sandy finish which I will claim is traditional.

The finished render is recessed about 5mm behind the frame which will make it easier to lime wash.
final-coat-render

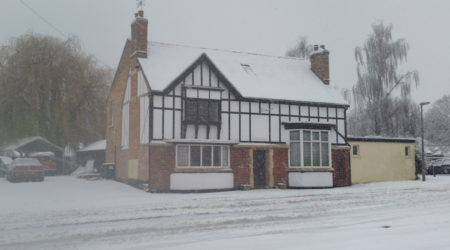
It’s about time the scaffolding came down.  The lime work is finished.  I used a mix of brick and tile to infill between the new and old frames and have fitted some steel to hold them together.
brace-and-infill